Working With Images, OCI Indexes, Tags, and Helm Charts
Needless to say, Docker images are the reason why you actually want to work with Container Registry. This section will describe general features available for managing images and helm charts.
- To learn about working with tags, refer to this section.
- To learn how to push and pull images, refer to this tutorial.
Types of Artifacts
When you open a repository in a project, you will see a list of the available artifacts: items stored in the same repository.
The following types of artifacts are possible:
- Images: items with the Docker whaleship icons;
- Helm charts: items with the “Helm” icon;
- OCI indexes: items with the three-bubbled icon on the left and a folder icon on the right.
What are OCI indexes and why do you need them?
Some images may be gathered in lists using the OCI index.
In general, every Docker image has a manifest: information about its layers, size, digest, as well as for which operating system and type of CPU architecture it was built, etc.
Images are only templates that do not change. The changes are stored in the image layers. In Harbor, you can create manifest lists that are basically lists of the layers of the same image.
Manifest lists appear in Container Registry as artifacts with a folder icon. When you click on the icon, the entire list of the image manifests will be displayed.
Refer to the official Docker documentation to create a manifest list using your command line tool.
SHA256 Hash
The artifacts are named using a SHA256 hash. A hash can be described as a key or a representation of a text message. It is similar to encryption but it can be decrypted into the original message easily.
SHA256 hashes refer to the JSON file that keeps the image manifest and are generated when the image is compressed for being pushed. Since such compression is also a kind of change, a new image layer is created during this preparation for a push. Consequently, this layer needs a new manifest that is pushed to a repository. Further, the manifest is written in a new JSON file. Eventually, this file becomes its own new unique hash.
To display the type of the artifact as well as its complete hash, hover over one of them respectively:
Displaying artifact type:

Displaying artifact hash:
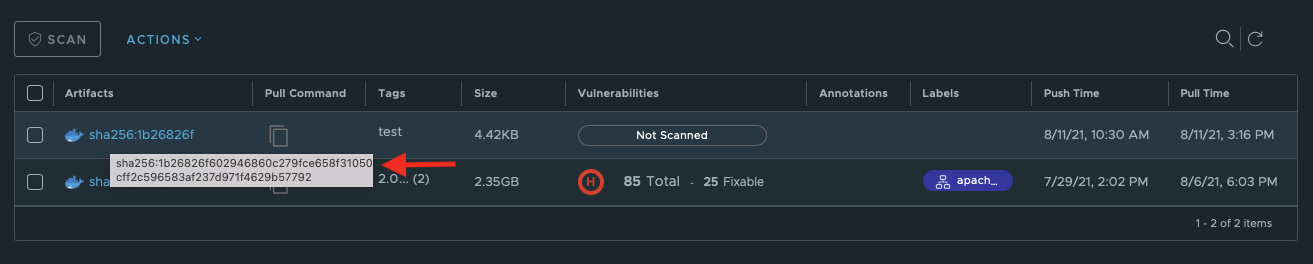
You do not need to memorize the hash, though. It can be copied into clipboard.
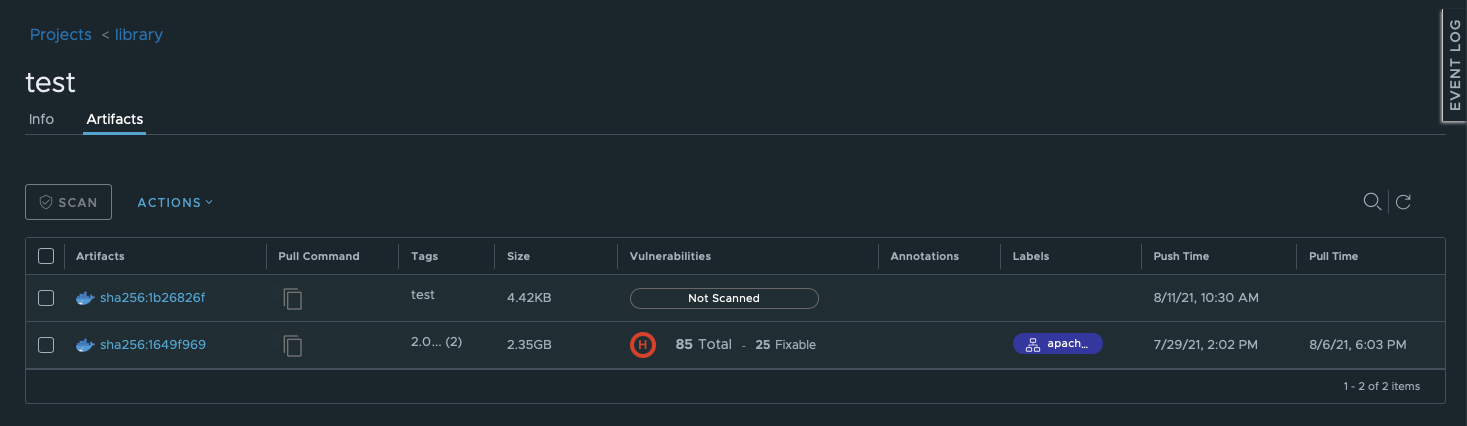
Overview of the Stored Images/Artifacts
The overview table has the following columns:
Artifacts.
Pull Command: when you click on the copy icon next to an artifact, the pull command for this artifact will be copied to clipboard and can be used in your command line tool to pull the artifact. Example of the copied command:
docker pull your-subdomain.container-registry.com/library/test@sha256:1b26826f602946860c279fce658f31050cff2c596583af237d971f4629b57792
Since there are different types of artifacts stored in repositories, they are all referred to using their SHA256 hashes.
- Tags. Read more about Docker image tags here.
Some artifacts can have multiple tags. Hover over the entry to display an overview of all tags or check them in the artifact view.

- Size. This column shows the size of the compressed artifact. When you pull it to your local machine, it will be decompressed to its original size again.
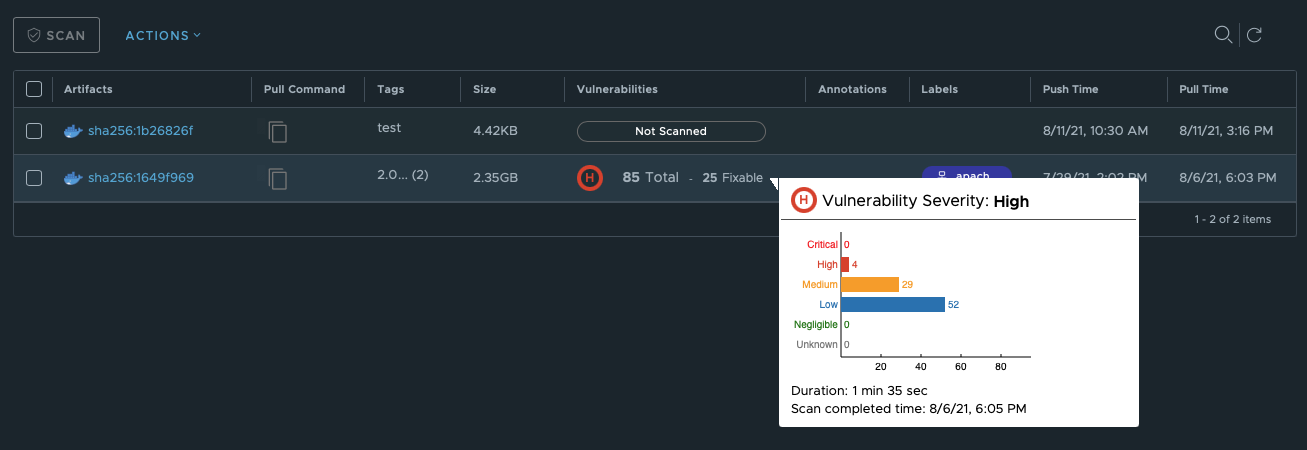
- Vulnerabilities. This column shows the results of the image scan if any scan has been run upon it. Hover over the entry to display all vulnerabilities or check them in the artifact view.
Annotation. This column displays additional information that was added to the image manifest. It can include:
- type of CPU architecture;
- architecture variant;
- operating system and, optionally, its versions and features.
Read more about setting images annotations here.
Labels shows labels that you or your project collaborators assigned to the artifact.
Push Time shows when the artifact was pushed for the last time.
Pull Time shows when the artifact was pulled for the last time.
Repository-Level Pull Command
In addition to the per-artifact pull commands in the table, a pull command for the entire repository appears on the top right of the Artifact List tab. This repository-level pull command lets you pull the repository without first selecting a specific artifact, which is useful when you want to pull the latest image or when you are sharing the pull command with others.
The command uses the following format:
<client> pull <registry>/<project>/<repository>
You can select your container runtime from a dropdown next to the pull command. The command updates automatically to match your selection. Click the copy icon to copy the command to clipboard.
When the repository-level pull command is visible, the per-artifact pull command dropdowns in the table are hidden to avoid duplication.
Filtering Artifacts
You can filter artifacts in the repository using the magnifier in the top right corner of the table.
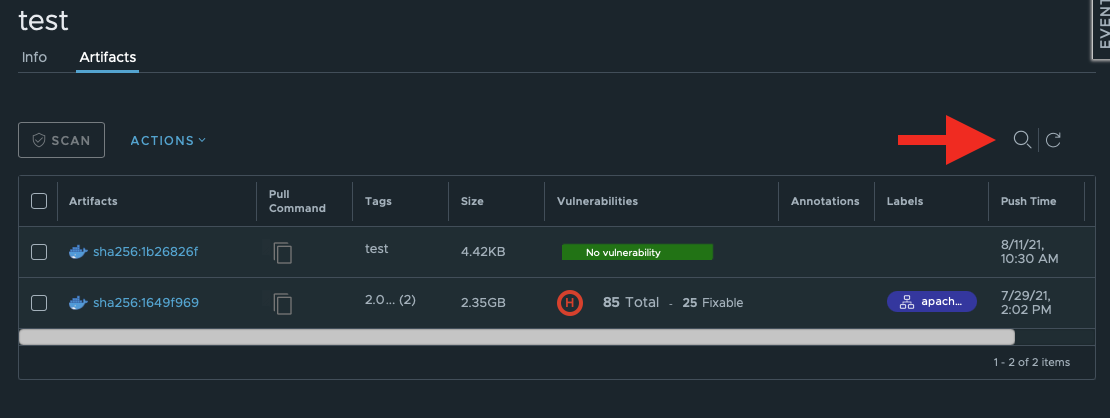
Click on it to access different filtering options.
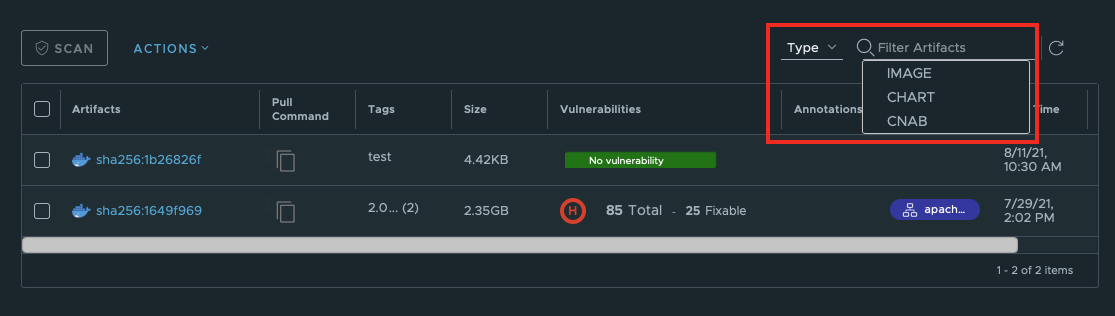
Filter Artifacts by Type
You can restrict the artifacts overview to a specific type by selecting one of the types in the dropdown:
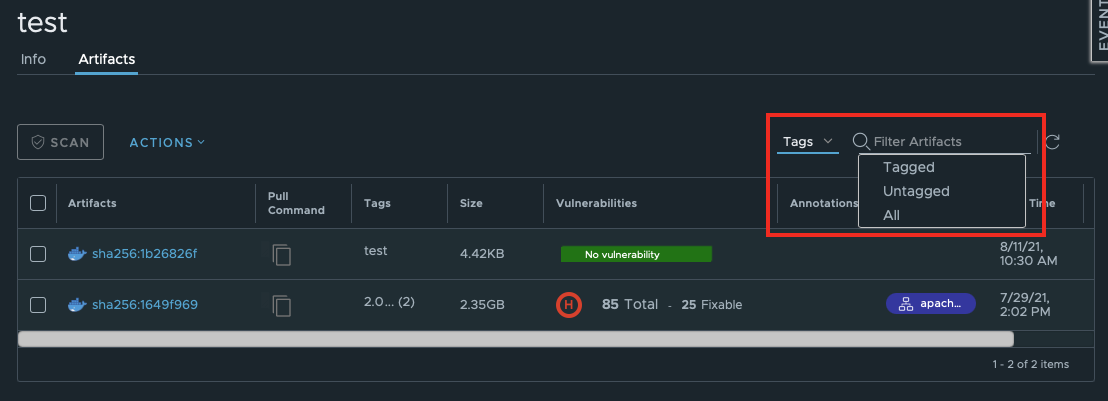
Filter Artifacts by Tags
You can display only tagged or untagged images.
Filter Artifacts by Label
You can display only artifacts that have the same label.
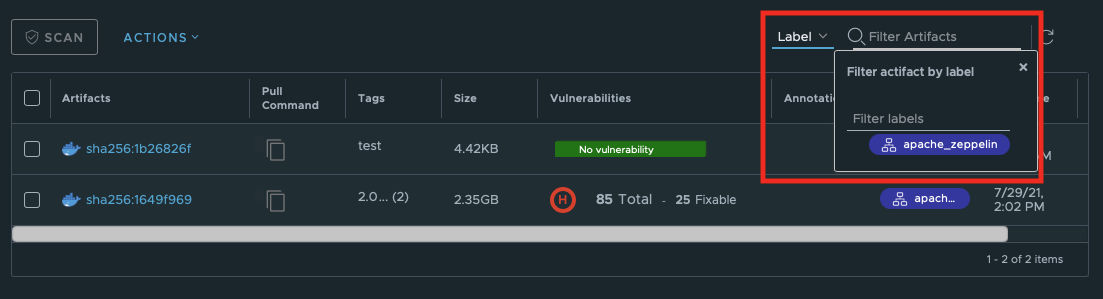
You can select more than one label in this operation.
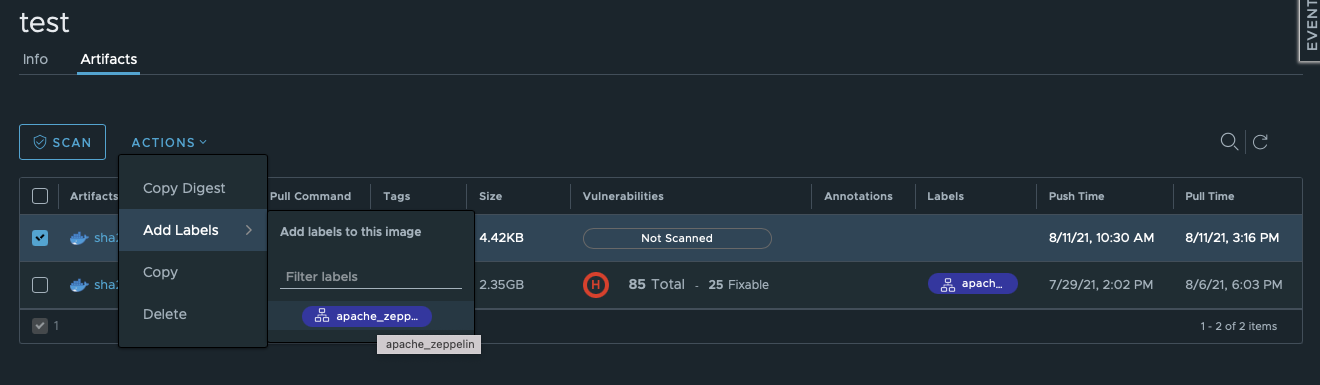
Managing Artifacts
In the artifacts overview, a few basic operations with artifacts are available.
Every time you need to perform one of them:
- Tick the checkbox next to the artifact;
- Click Actions:
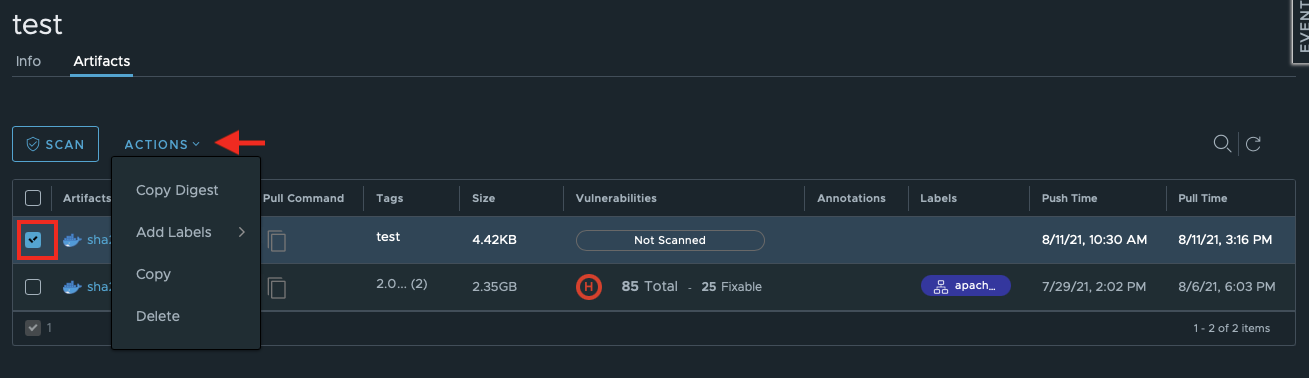
Per-Item Actions
These kinds of actions can only be applied to one artifact at a time.
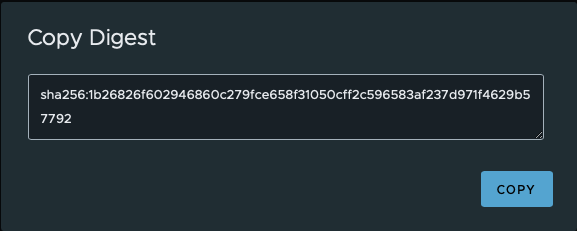
Copy Digest
This button will open another dialogue window where you can copy the digest to clipboard.
Add Labels
Labels are another way to add some short information to your artifacts to sort them later or to make them more eye-catching in the overview.
Labels must be added to the project by the project administrator as described here.
Bulk Actions: Delete or Scan Artifacts
These actions can be applied to more than one artifact at a time.
To scan images, you need at least the project administrator privileges.