Robot Accounts
Robot accounts are used to access your project through an API. They perform a limited range of actions that you can specify per account and are generally used for workflow, deployment, and testing automation. Robot accounts created on the project level can access only one project. They cannot be transferred to other projects.
To create robots that have access to multiple projects, create system robot accounts as explained here.
Overview of Existing Robot Accounts
Inside a project, under the Robot Accounts tab, you will find a list of the robot accounts associated with the project. For each robot account, you can see its:
- name;
- enabled state;
- permissions;
- created time;
- expiration date if any;
- description.

Robot Account Name
The robot account name is used to log in to an external client as a user name.
It’s built following this naming convention:
robot_: permanent part for all robot accounts;- project name;
- the + sign;
- the variable name that you can specify for this particular robot.
Robot Account Secret
Robot accounts use a CLI secret to log in to external clients. This secret is generated and displayed once on creation of the account but is not stored anywhere in the project or instance. However, it can be resetted later to generate a new secret.
Docker Login With Robot Account
Below is an example of how to log in with a robot account in Docker:
docker login your-subdomain.container-registry.com -u robot_project_name+robot_variable_name -p 3xiYiY9eaenXDhZHj8k7WGcF5IfSSGVk
Robot Account Permissions
Upon creation, you can grant the new account all or a few selected permissions:
- Push artifacts
- Pull artifacts
- Delete artifacts
- Read Helm charts
- Create a Helm chart version
- Delete a Helm chart version
- Create a tag
- Delete a tag
- Create artifact labels
- Create a scan
Create a Robot Account
Use + NEW ROBOT ACCOUNT to add a new one:
- Specify its variable name;
- Set when it should expire:
- after how many days;
- or never;
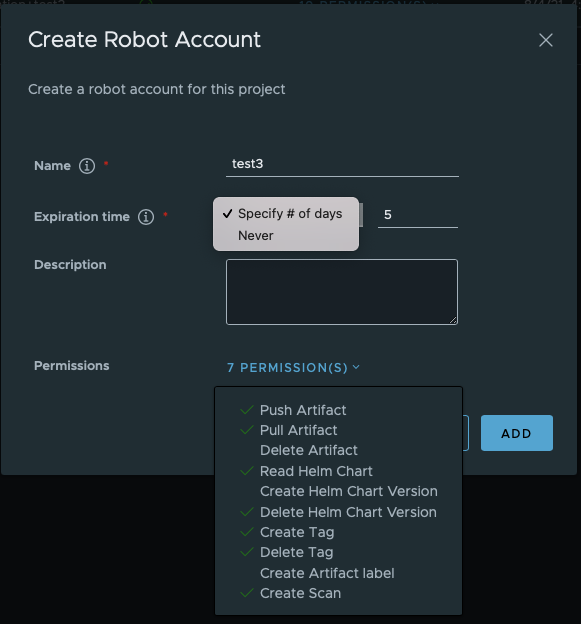
- Check the permissions you need (by default, all of them are selected);
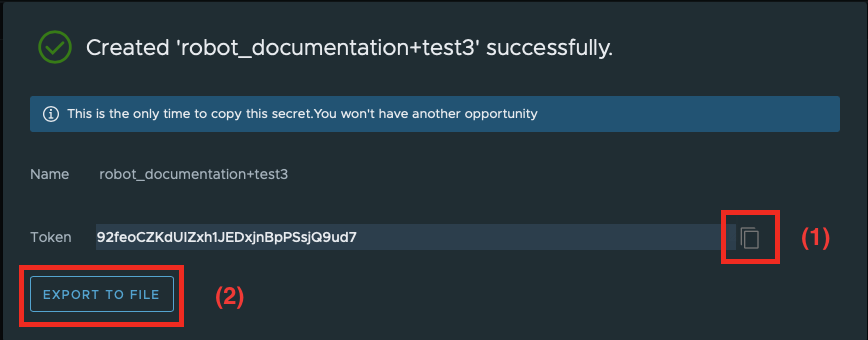
- Save it and then make sure that you save the token/CLI secret using one of the methods:
- copy the token into clipboard with the copy icon and paste it into some text editor (1);
- EXPORT TO FILE to export it as a JSON file(2).
The JSON file looks like the following:
{
    "creation_time":"2021-08-04T13:58:45.934Z",
    "expires_at":1628949525,
    "id":1,
    "name":"robot_documentation+test",
    "secret":"D4pGyGP3eFaW8Ako4249kSNCtZ0McxgV"
    }
exprires_at is shown as Unix Epoch. When it is set to never, it shows -1:
{
    "creation_time":"2021-08-04T14:17:44.764Z",
    "expires_at":-1,
    "id":2,
    "name":"robot_documentation+test2",
    "secret":"3xiYiY9eaenXDhZHj8k7WGcF5IfSSGVk"
}
The id in the JSON file reflects a simple sequential numbering of all robot accounts that have ever been created in the instance.
Refresh Or Specify Own Secret
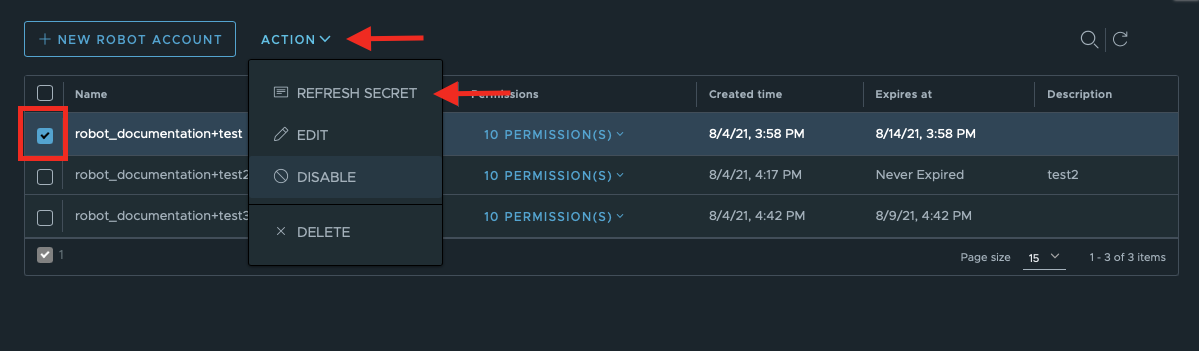
If you lost the CLI secret (token) for a robot account or you want to specify it by yourself, you can do the following:
- Select the robot with a checkbox;
- Go to Actions;
- Select Refresh robot secret.
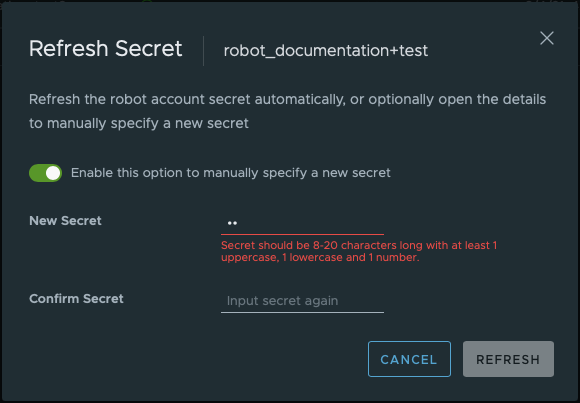
This will open the following dialogue window. By default, without enabling a manual secret, you can generate a new one by clicking on Refresh:
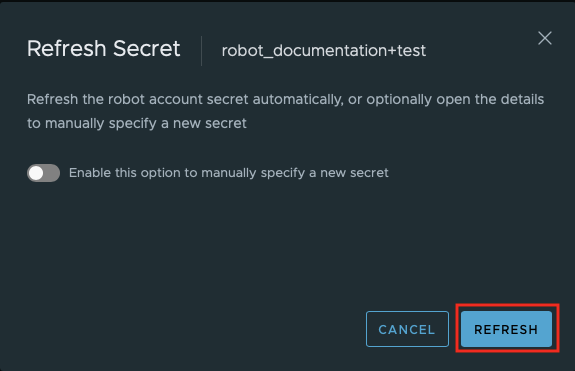
You will see the same dialogue window that was displayed upon creation of the robot account, with the copy to clipboard and export to file options for saving the new token. It won’t be possible to retrieve the new secret later.
Specify the New Secret Manually
If you enable this feature, you can enter your own secret. It should be:
- between 8 and 20 characters long;
- the combination of:
- at least 1 uppercase,
- at least 1 lowercase;
- at least 1 number
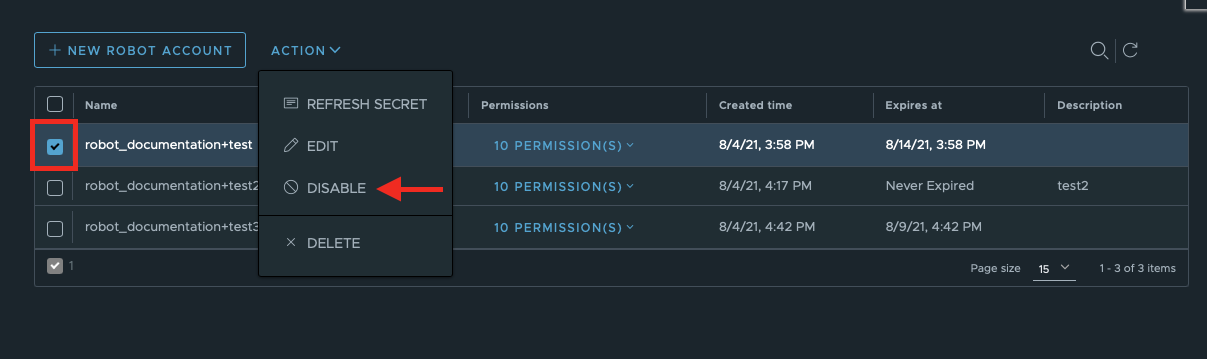
Enable and Disable Robot Accounts
Every newly created robot account is enabled by default. You can disable robot accounts. They will stay in the project and can be re-enabled again at any time. It is not possible to change enable status for more than one robot at once; you have to repeat the procedure for every account.
- Select the robot with a checkbox;
- Go to Actions;
- Click Disable/Enable.
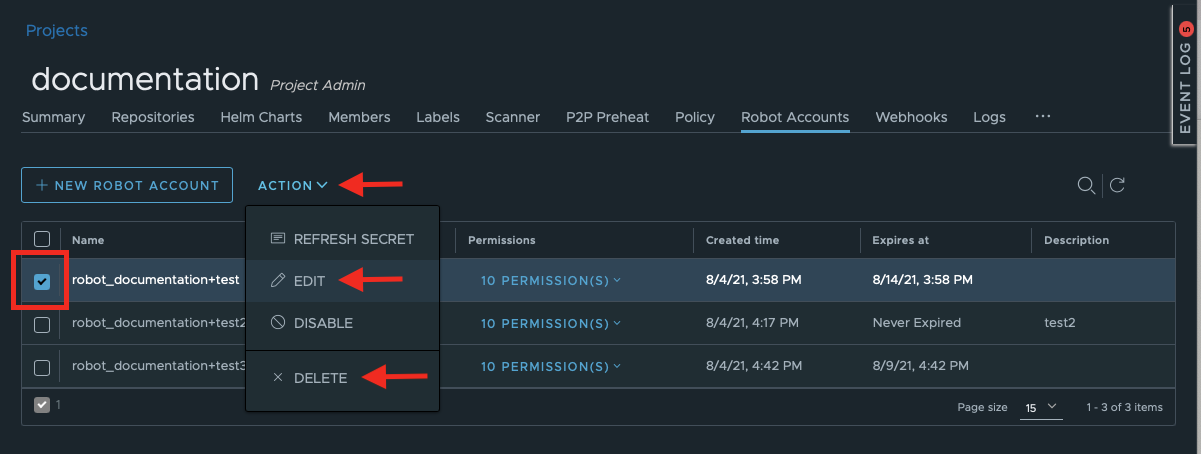
Edit or Delete Robot Accounts
To edit the data that you entered during account creation or to delete one or a few robots:
- Select the robot with a checkbox (it is not possible to edit them in bulks);
- Go to Actions;
- Click Edit or Delete.
Change Robot Account Permissions
The Edit will open the dialogue window where you can also change permissions.