Project Configuration
For each project, you can configure a wide range of properties and features. We already touched on some of them in the general description, repositories section, and the section about project members.
In addition to that, for each project, you can manage the following:
- helm charts;
- labels;
- scanners;
- tag policies;
- robot accounts;
- webhooks;
- project type;
- deployment security;
- CVE allowlists.
Labels and tags are explained in a separate chapter that deals with images in general. In this chapter, we will go through the rest.
Prerequisites
To change any of the project configurations, you need to have one of the roles:
- System administrator;
- Project administrator.
Labels tab
In addition to tags, you can create labels for images. Labels will only be visible for the users that can log in to the Container Registry GUI.
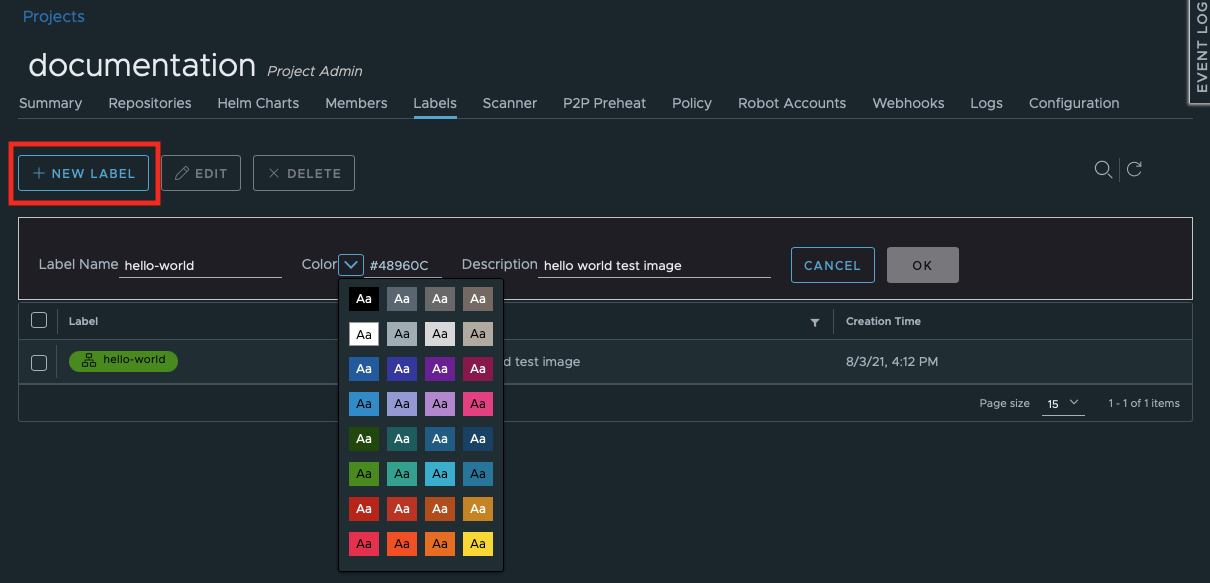
Create a Label
- Inside a project, go to the Labels tab;
- Click +NEW LABEL;
- Enter the label name;
- Select a color or enter a color hash;
- Enter a description.
Edit or Delete Labels
To edit or delete a label:
- Tick the checkbox next to it;
- Click on either Edit or Delete.
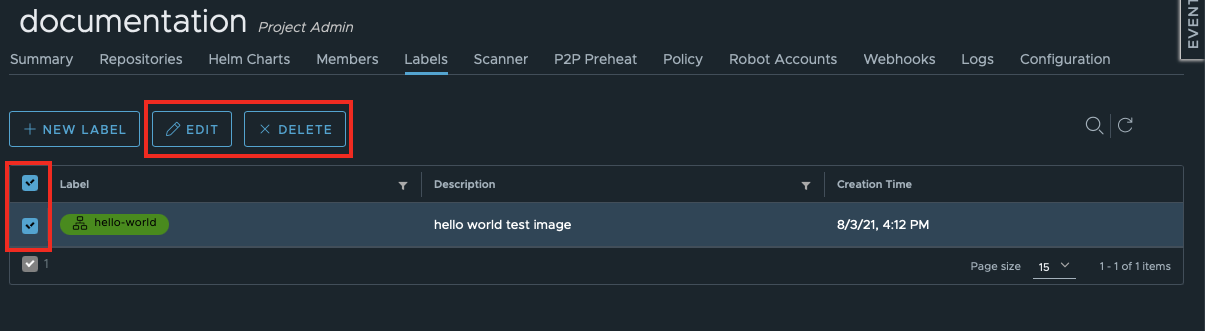
You can delete more than label at once if you select a few of them.
Scanner Tab
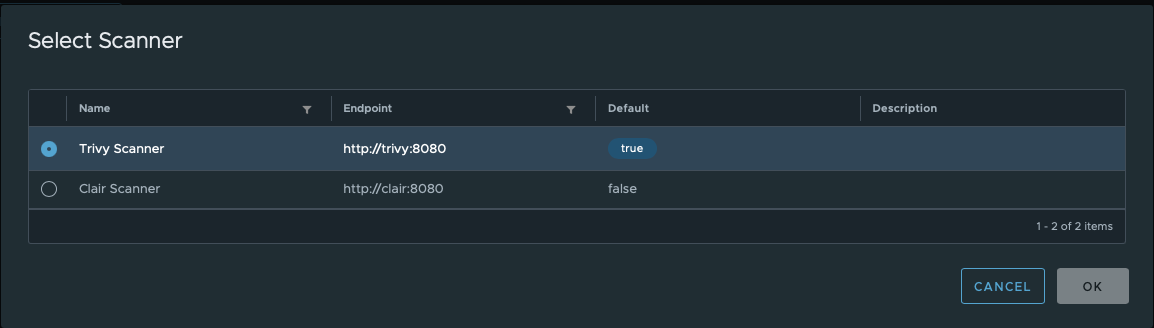
In this tab, you can select the vulnerability scanner you want to use for the images in the project. Only one scanner can activate at the same time for a certain project. At the instance level, only superadmins can add scanners, enable them, and set default scanners.
When a project is created, it inherits the instance’s default vulnerability scanner. To select another one, use Select Scanner button under the Scanner tab. This will open the list of enabled scanners where you can pick up the one you need for your project:
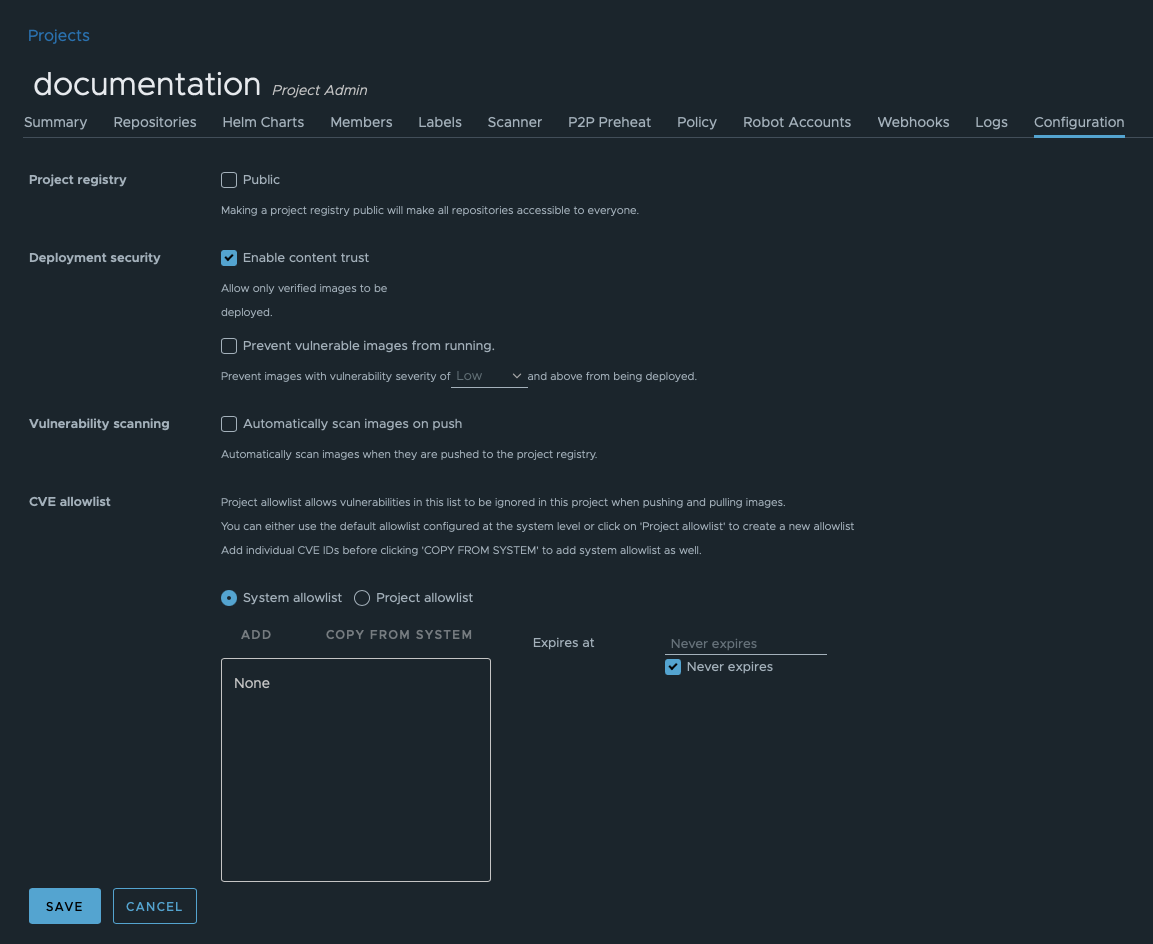
Configuration Tab
Some of the important properties and features can be found in the Configuration tab.
Type of Project
You can change the type of project after it has been created from private to public or the other way around.
Deployment Security
This configuration allows you to make your deployments more secure by limiting which images can be deployed. This can be done using two features.
Content Trust
When this feature is enabled, you can only deploy (pull) images that were signed.
After enabling this feature in the Container Registry GUI, you can still push unsigned images into your project. But since none can pull them, it makes sense to start pushing only signed images.
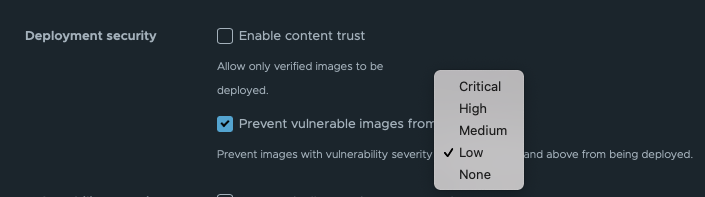
Prevent Vulnerable Images From Running
When you have active vulnerability scanners in your project, they will calculate a vulnerability score following the methodology created by the National Institute of Standards and Technology of the US Department of Commerce. Its common Common Vulnerability Scoring System Calculator (CVSS Version 3.1) and the list of the involved metrics can be accessed here. The specification document can be viewed here.
Accordingly, your project scanner will mark certain images as having one of the vulnerability severity levels:
- None;
- Low;
- Medium;
- High;
- Critical.
Both Trivy and Clair, default Container Registry scanners, use this scale.
In the current setting, you can specify which of the levels is not acceptable. The images marked with this level and all severity levels that are higher, will be suppressed from deployment.
Vulnerability Scanners
Scanners can be added to the instance and its projects only by superadmins but project admins can specify if images should be automatically scanned on push.
If this feature is not enabled but you have scanners in your project, you still can scan images manually.
CVE Allowlists
This is another setting that is applied to vulnerability scanners.
Common Vulnerabilities and Exposures List is a project by the US Department of Homeland Security and Cybersecurity and Infrastructure Security Agency. The aim of it is to “to identify, define, and catalog publicly disclosed cybersecurity vulnerabilities.”
Each vulnerability is associated with a string type record in the CVE database. These records have IDs.
With our CVE allowlist feature, you can use these CVE IDs to make the scanner ignore certain vulnerabilities. There are multiple ways to add CVE IDs to your project.
System Allowlist
When you select this option, all CVE IDs that were configured on the instance level by your superadmin (as described here) will be inherited by the project.
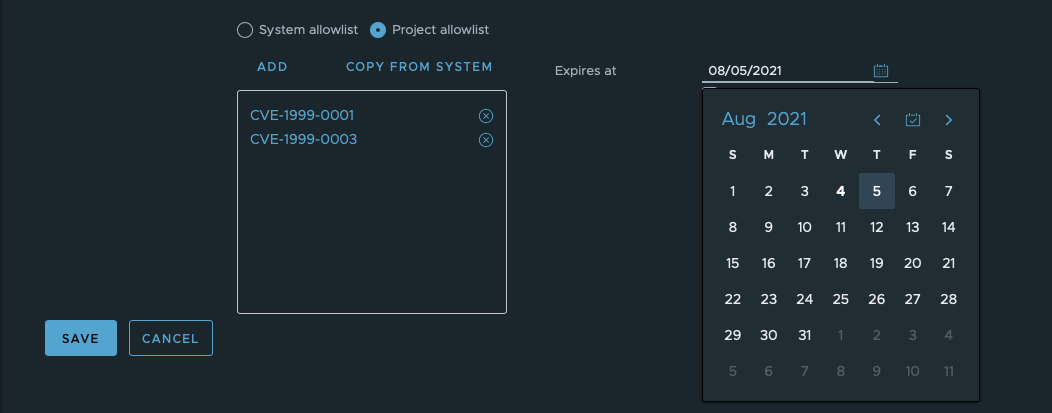
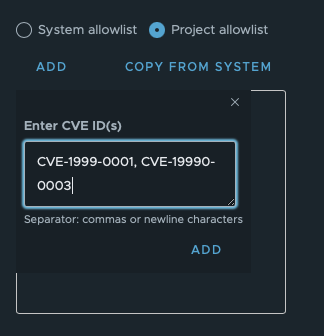
Project Allowlist
Alternatively, you can create your own lists manually or adjust the system-level allowlist.
Use ADD to add the IDs manually using commas or putting each ID on a new line. You can search for CVE IDs in this database.
Adding using commas:
Adding using line breaks:

Result for both:
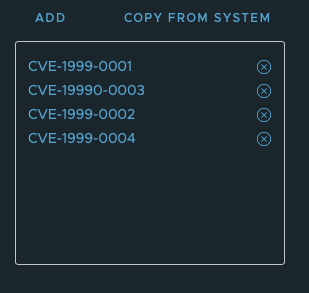
Use COPY FROM SYSTEM to copy the instance-level CVE IDs and then use X to delete any of them. You can also add new ones using ADD as in the previous case to expand the copied allowlist.
System vs Project Allowlist: Which Overrides Which?
When you never created any project-wide lists, then the system-wide (instance-wide) allowlist will be applied to all of your projects, as well as to all other projects in the instance. You do not need to select the System allowlist option pro-actively, it is set by default upon creation of the project.
Once you create any project-wide allowlists, the project-wide lists will override the system-wide ones. It means that if you copy any allowlists from system but then modify them, the new custom allowlist will be applied to this specific project.
Thus, be careful with deleting items from the system-wide allowlists when re-using them as project-wide allowlists to avoid any security issues in your images. Also note, that removing CVE IDs from the system won’t automatically remove them from the project if you re-used these IDs in a per-project allowlist.
Set Expiration Date
By default, no expiration date will be set for your CVE allowlist. They will remain active forever.
To set a particular expiration date for either system-wide or project-wide lists, use the calendar to select a date. Once the date is set, the Never expires checkbox will be unticked automatically.