System Robot Accounts
Robot accounts are used to let another application log in to Container Registry automatically.
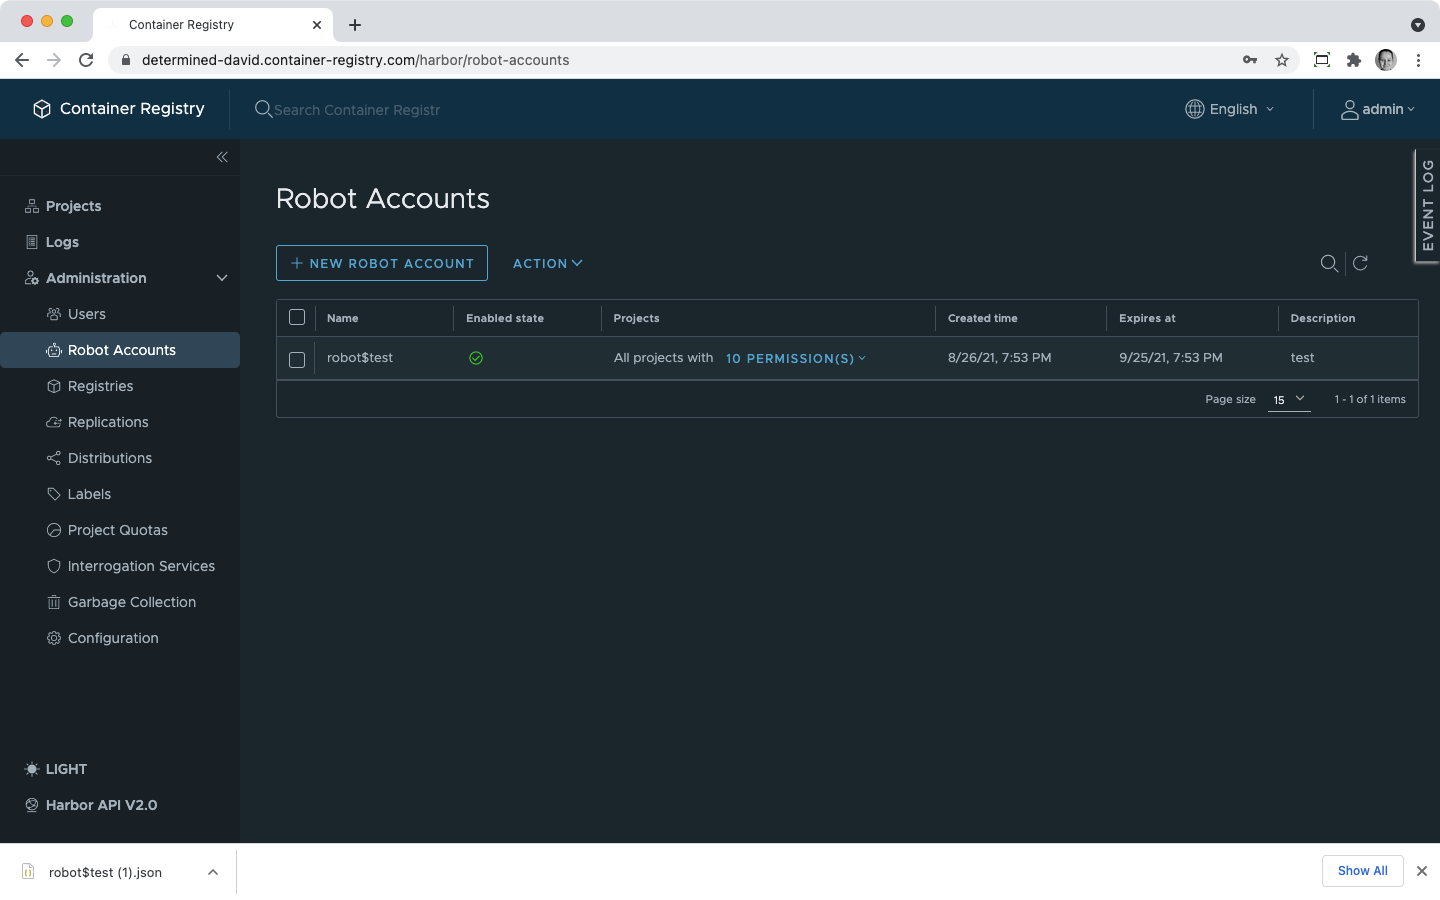
The overview of all robot accounts in your instance is available from Navigation -> Robot Accounts.
Please note that all robot accounts get a prefix to their names when they are created. By default, the prefix is robot$. It is possible to configure another prefix as described here.
Available Robot Account Permissions
Robot accounts can access Container Registry through API or a command line tool but never the GUI. They can perform one or more of the following actions based on the permissions you granted them:
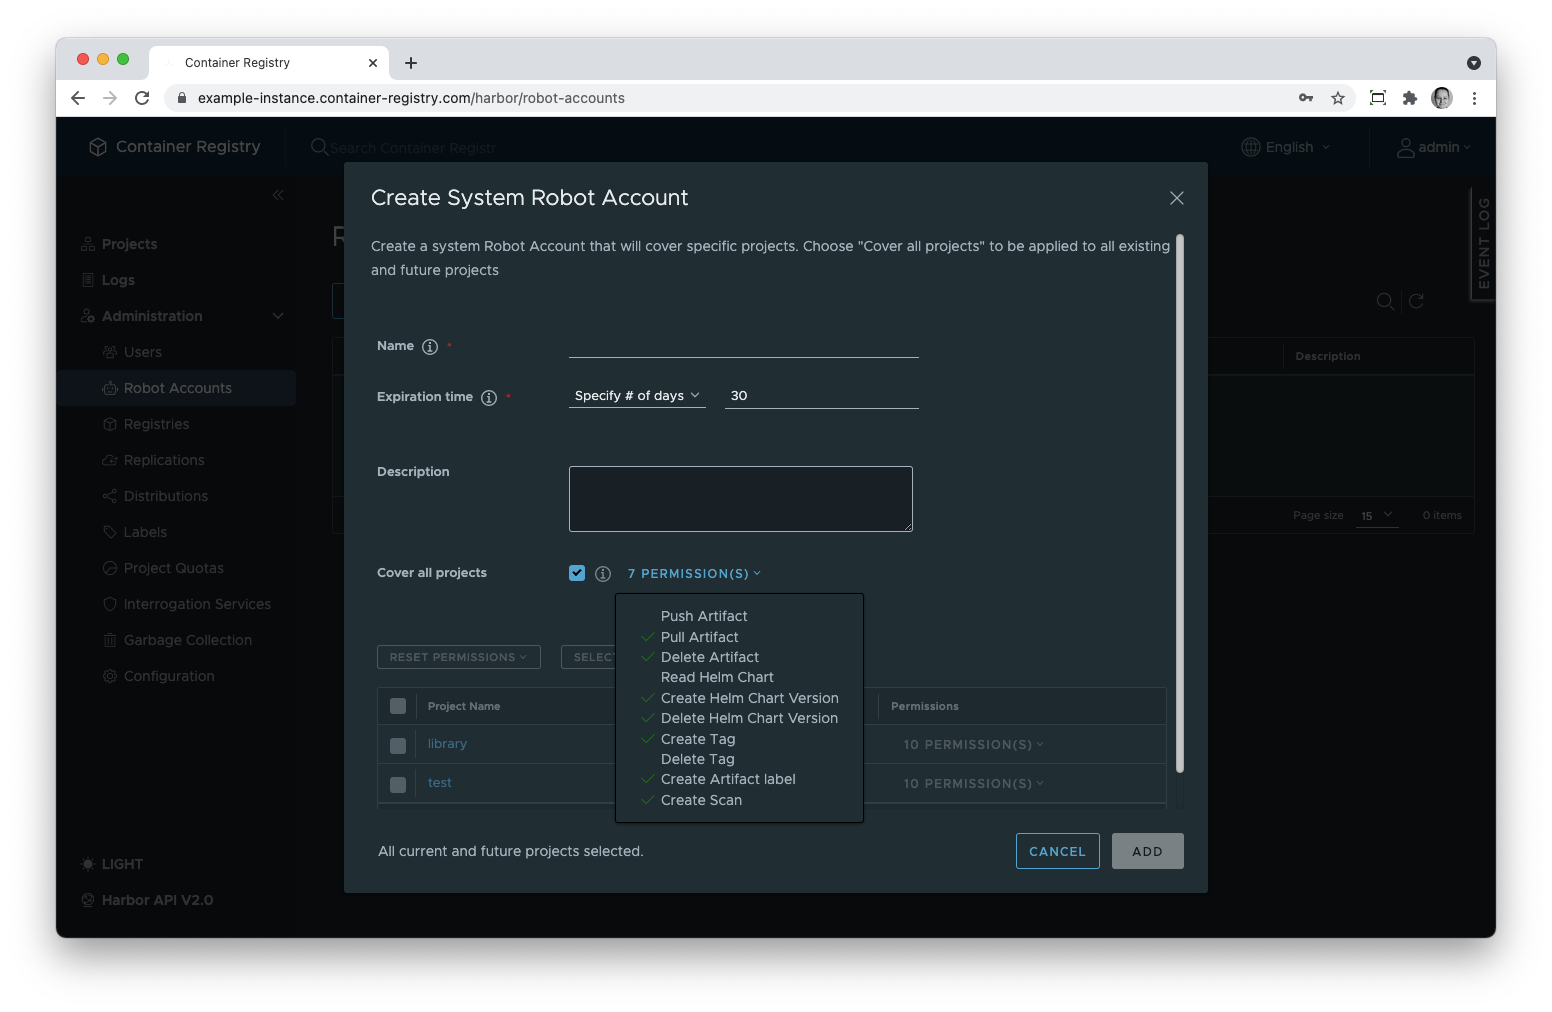
- Push artifacts
- Pull artifacts
- Delete artifacts
- Read Helm charts
- Create a Helm chart version
- Delete a Helm chart version
- Create a tag
- Delete a tag
- Create artifact labels
- Create a scan
System robot accounts may be granted such permissions for more than one project or even for the entire system.
Create a System Robot Account
The procedure is similar to creating robot accounts on the project level as described here with the difference that, as a system admin, you can create robots that have access to multiple projects. To create a system robot account:
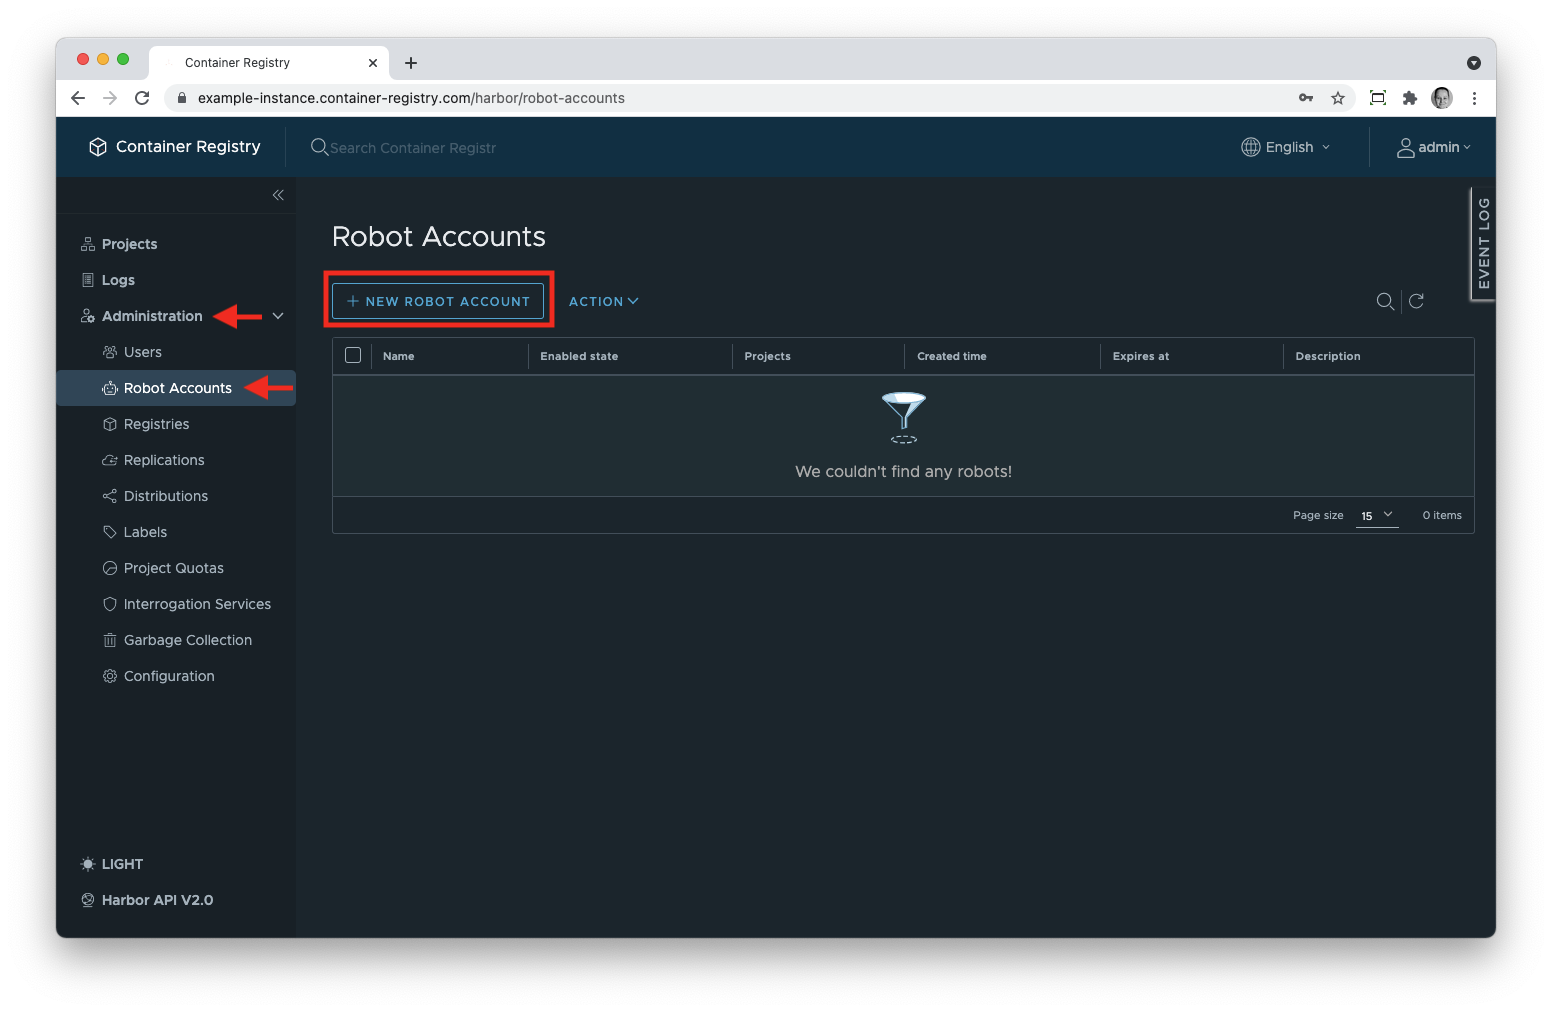
- Go to the Administration tab;
- Select Robot Accounts;
- Click New Robot Account;
- Fill in the form:
- Give your robot a catchy name;
- Select from the dropdown if its token should expire and how soon;
The tokens can be refreshed upon expiration or at any other time as described here.
- Optionally, add a description:
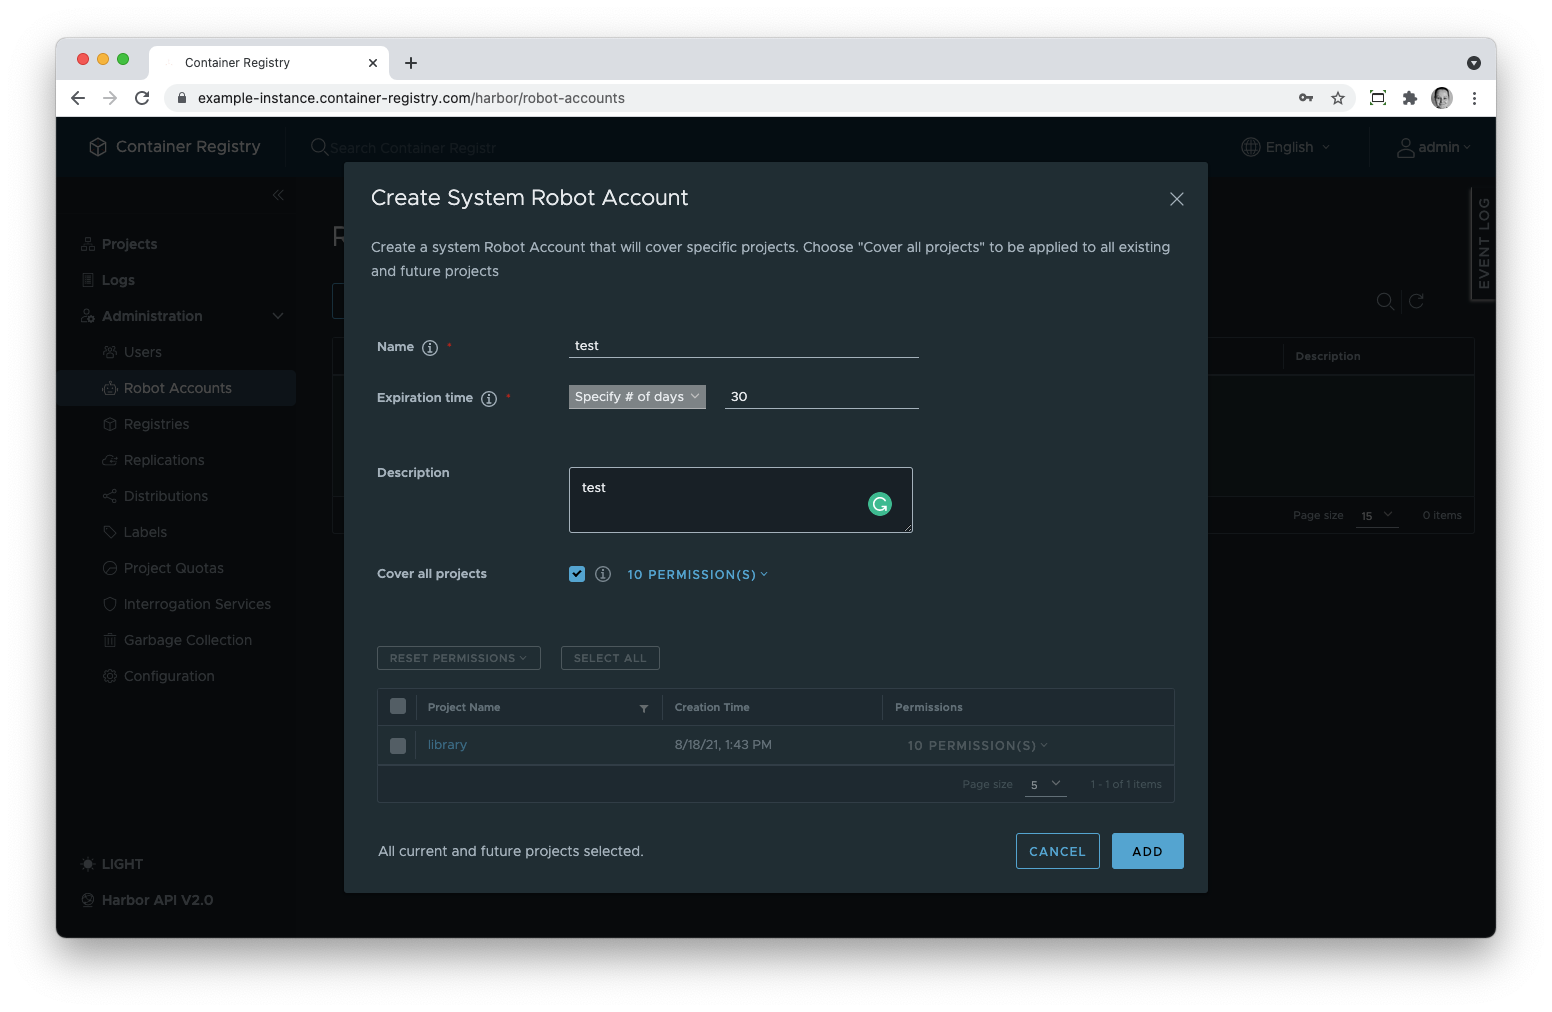
If applicable, select a federated identity provider; such provider should already exist, to add one, follow instructions from this article:
Set which projects it should have access to:
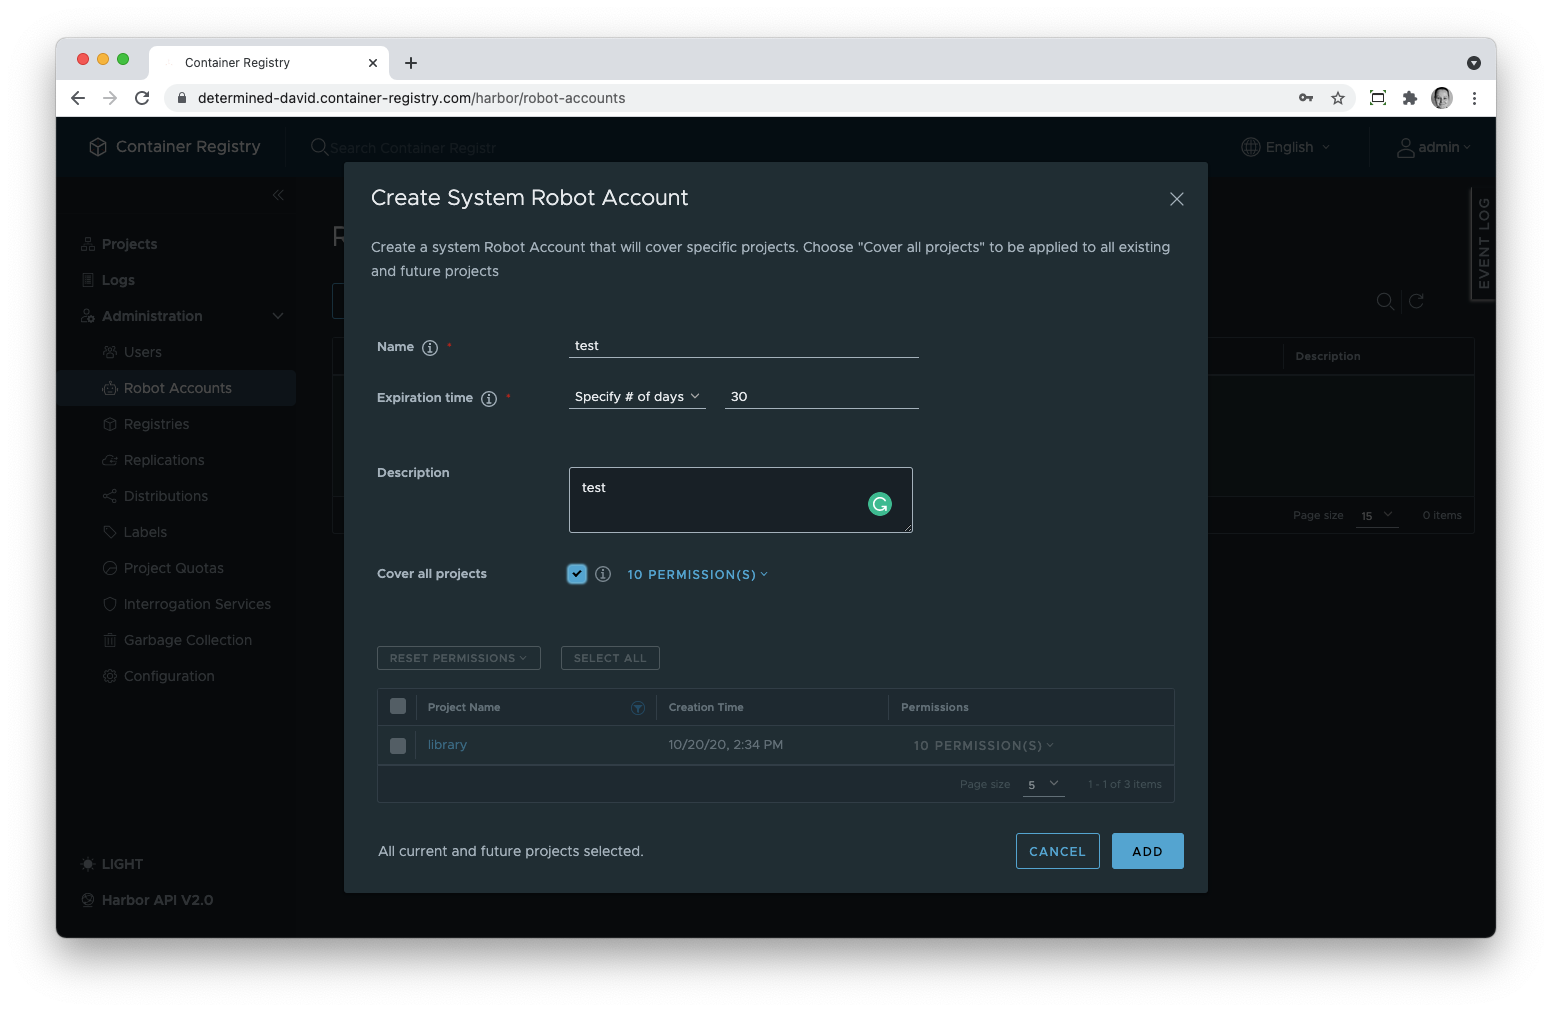
A) Select Cover all projects and set permissions that apply to all projects. Select or de-select them from the dropdown.
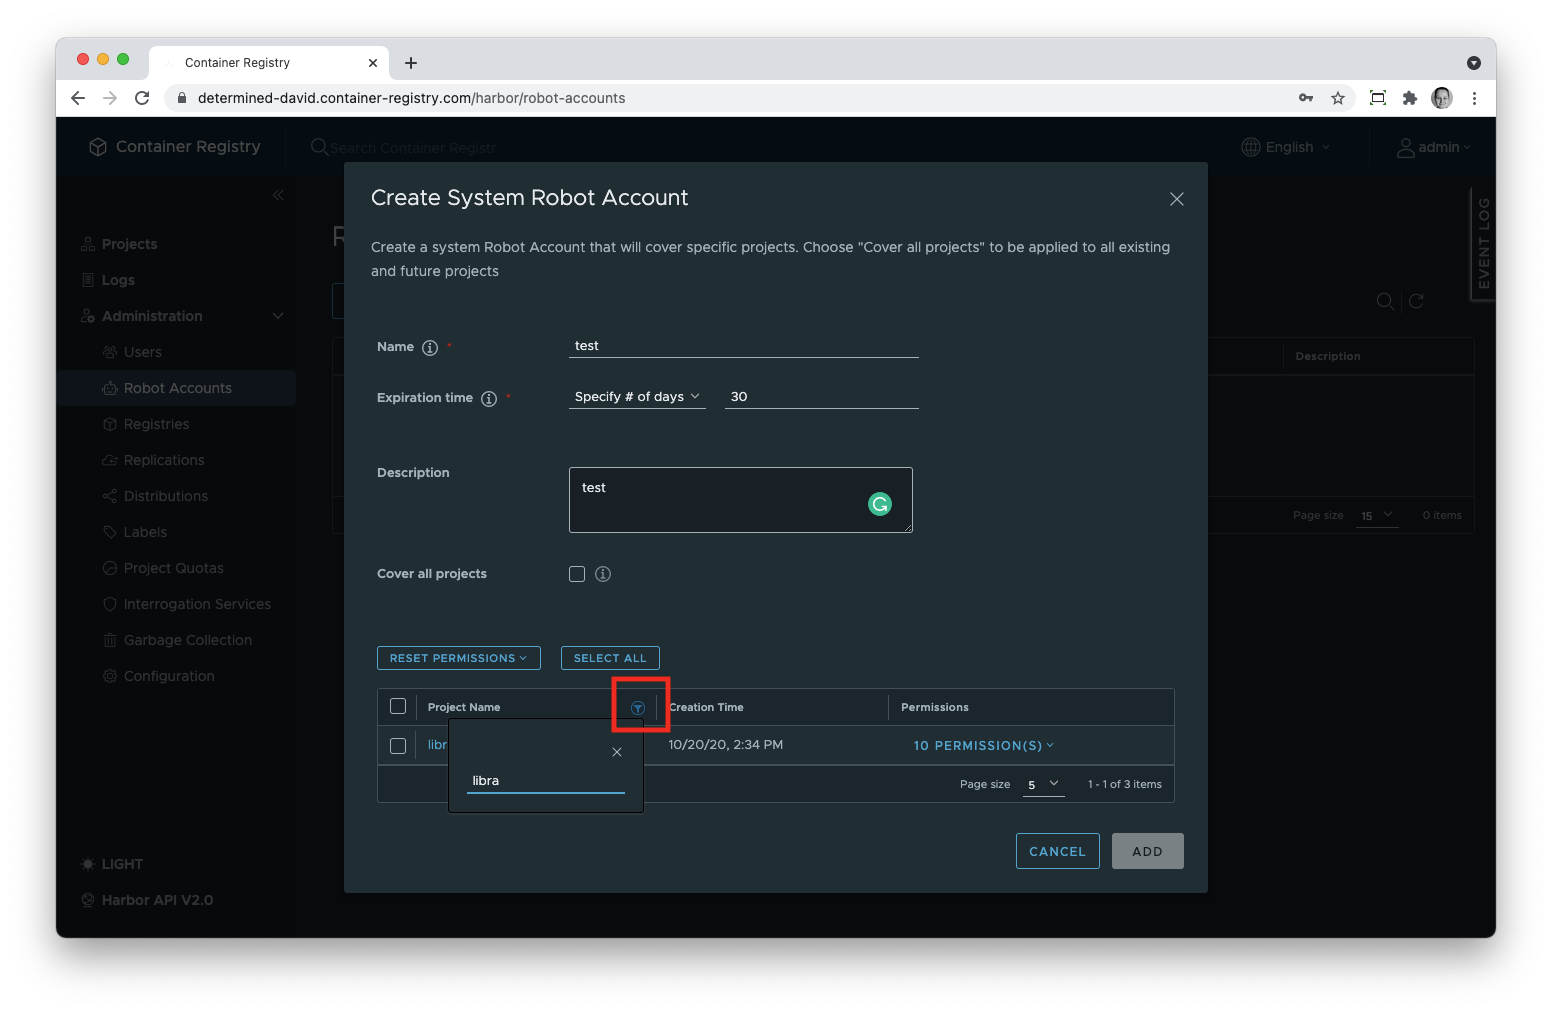
B) If you have a lot of projects, filter them by name and then click Cover all Projects to include the selected results.
The filter that you created in this step will be saved in the robot account configuration. It means that if you later create a project with the name matching the same pattern, the existing robot account will be automatically granted access rights to this project.
C) Or check the tickboxes next to specific projects. In this case, you will need to set permissions for each project individually.
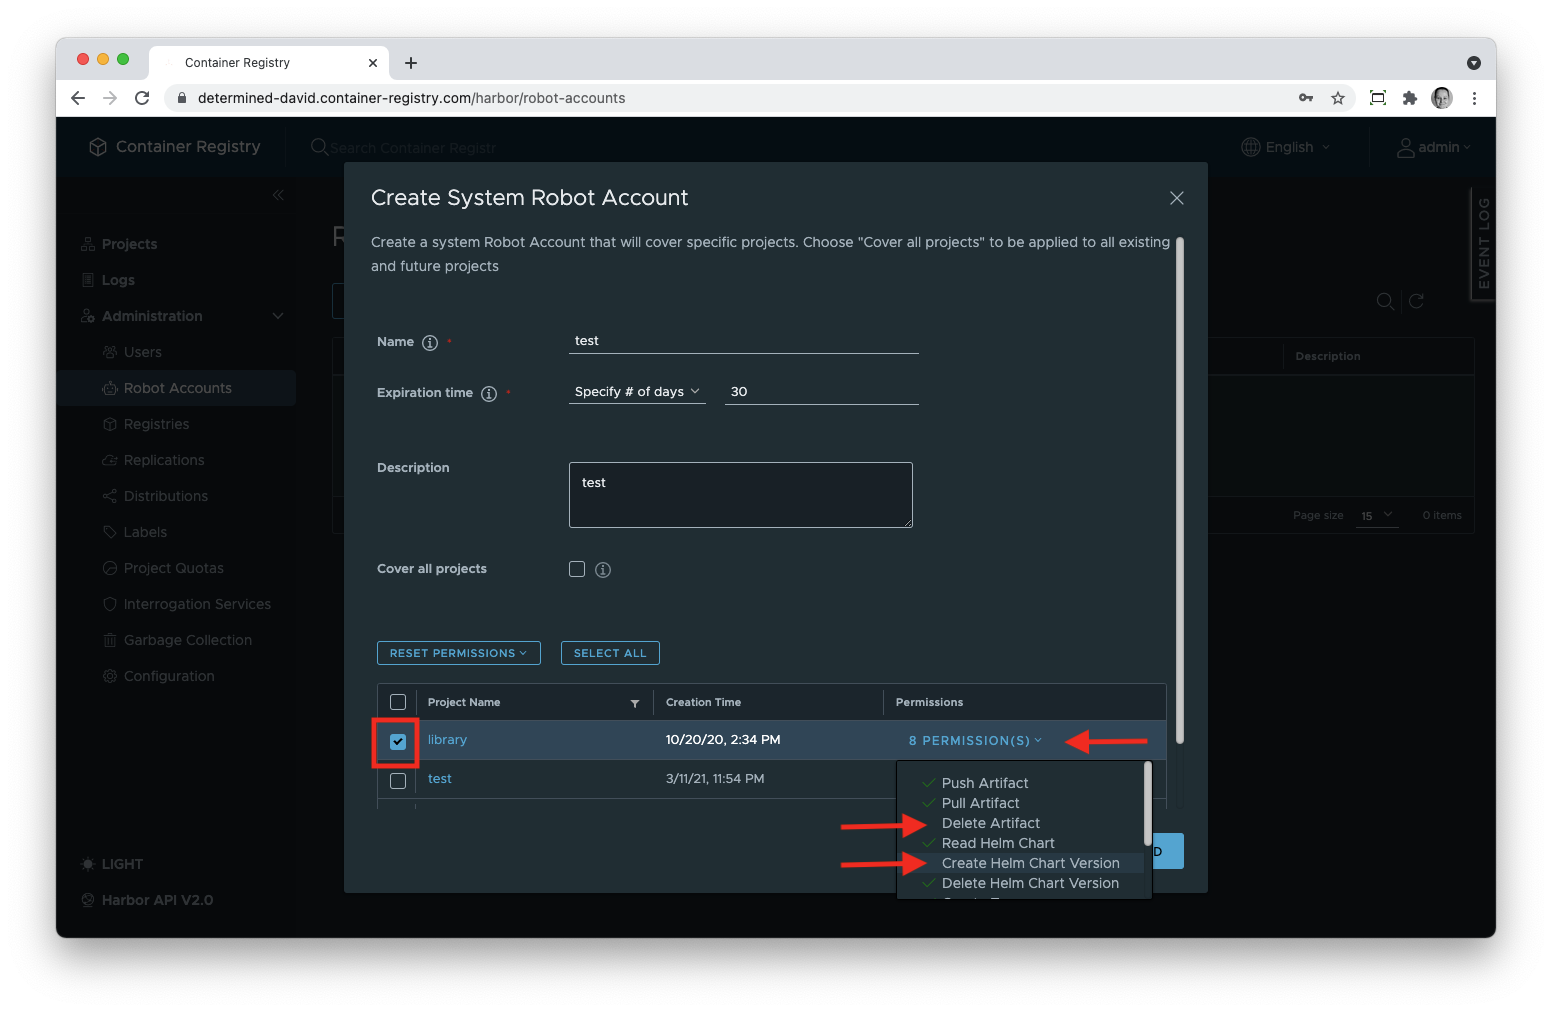
As a shortcut, you can use the Reset Permissions button to revoke certain permissions from all projects in the list.
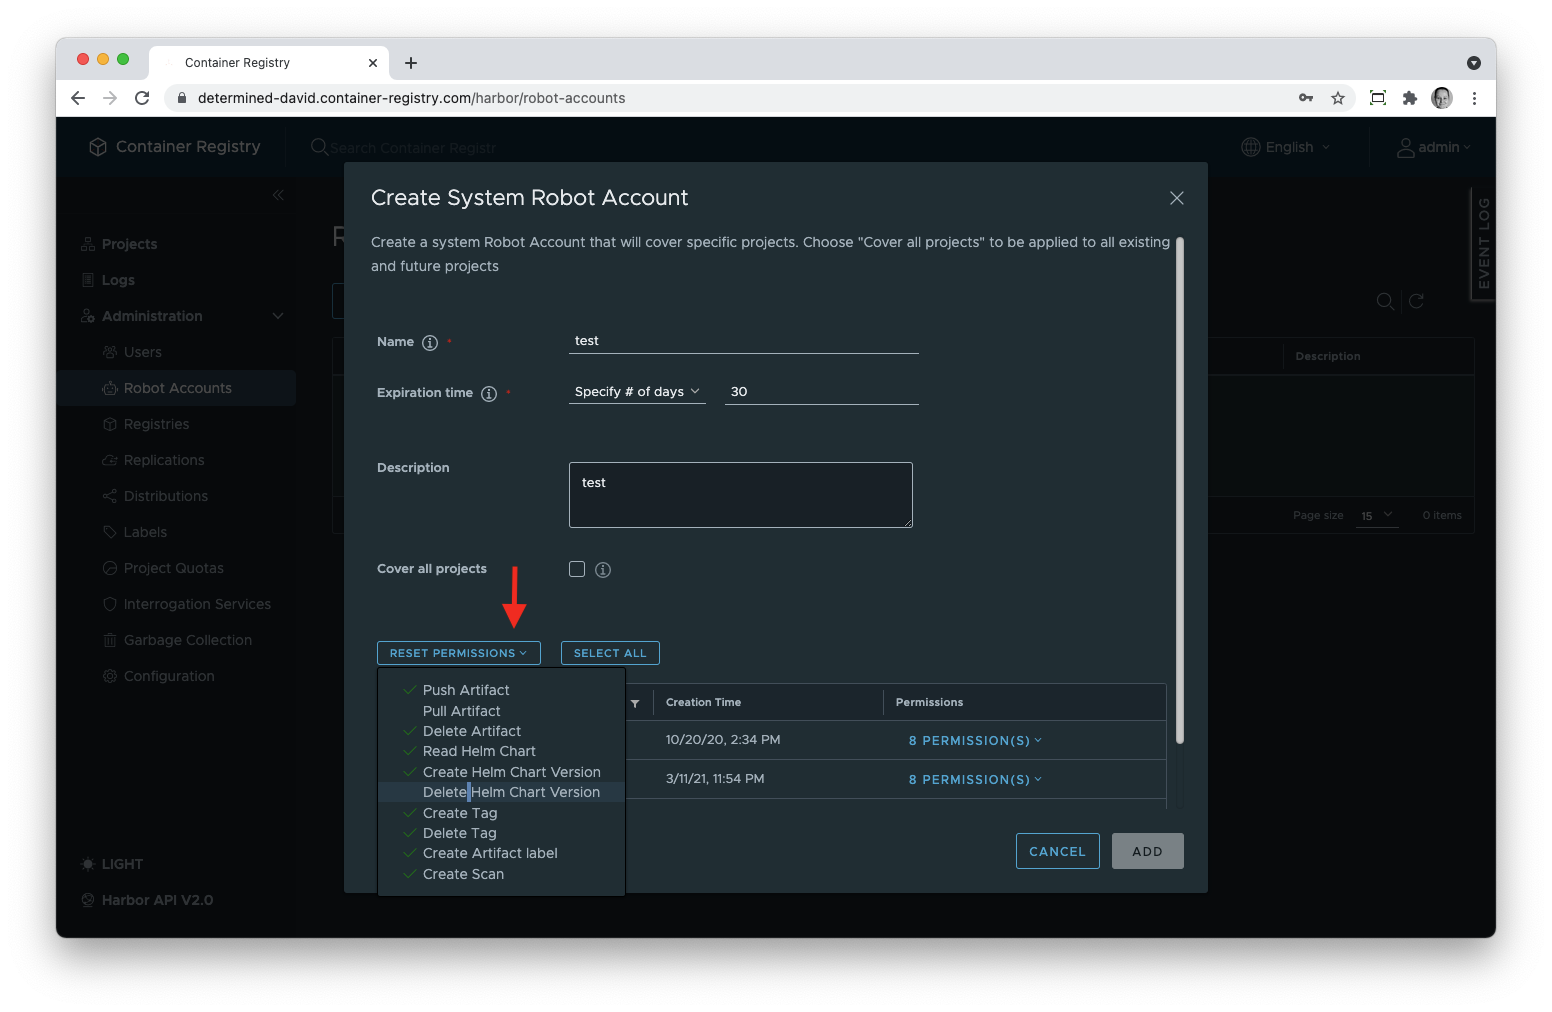
Hit ADD to add the new system robot account.
Upon creation of the new robot account, the secret token for this account will be displayed once. You can also save it as a JSON file if you use the Export to file button.
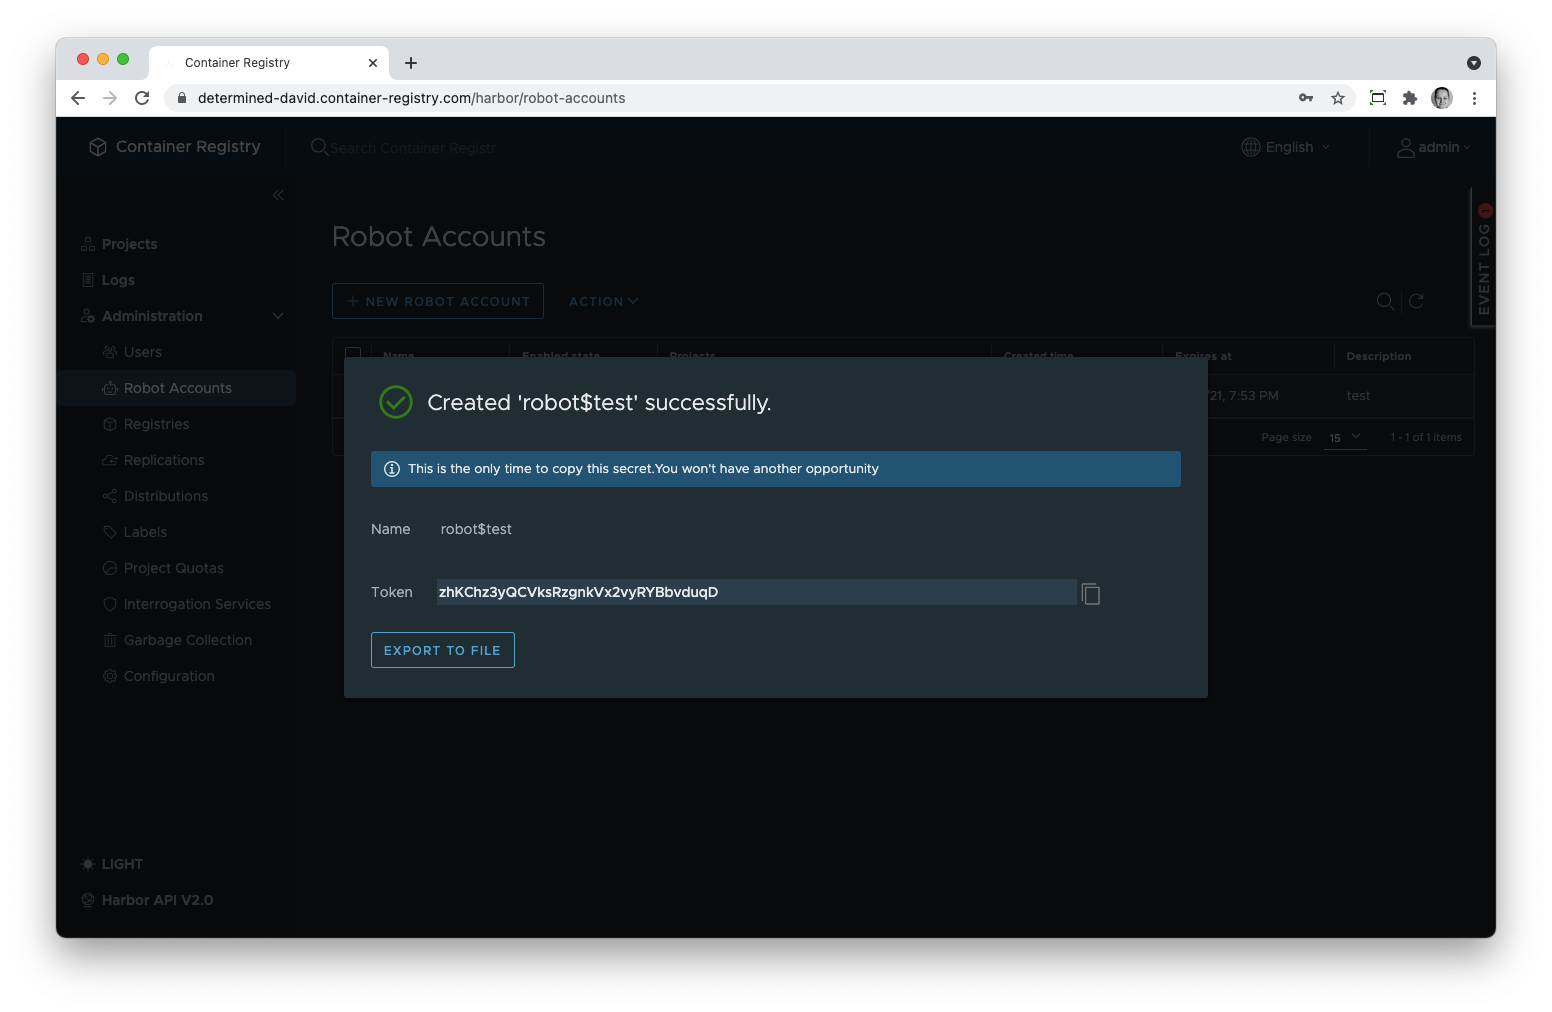 If you do not copy or export the token immediately, you will need to reset it later since the original one won’t be accessible any longer due to the restrictions of the underlying Harbor technology.
Managing System Robot Accounts
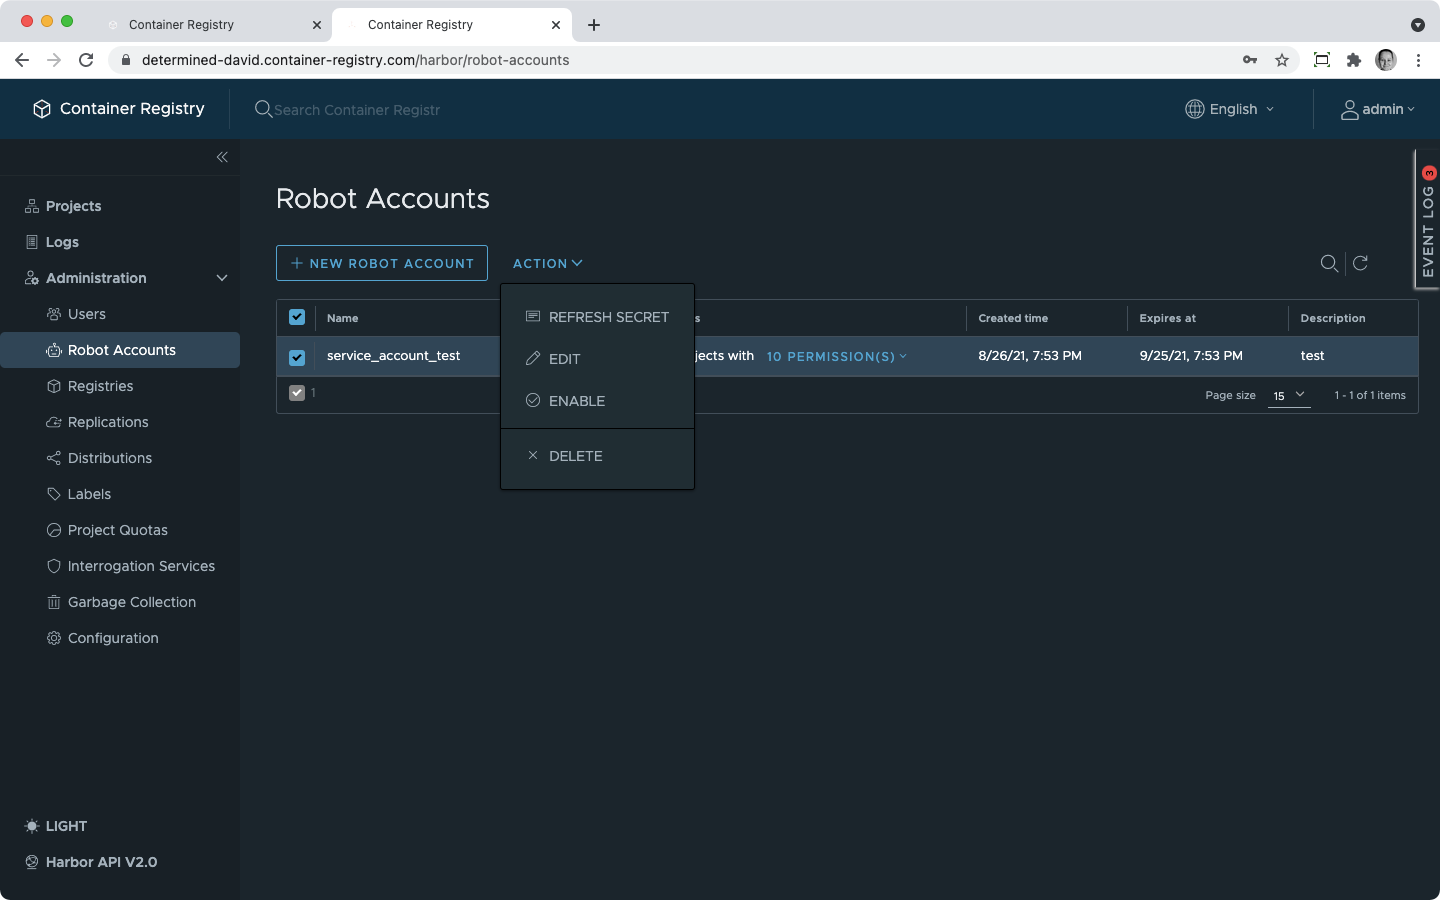
From the system robot accounts overview, under Administration -> Robot Accounts, you can manage your robots.
To do this, tick the checkbox next to an account and click on Action button. You cannot manage items in bulk.
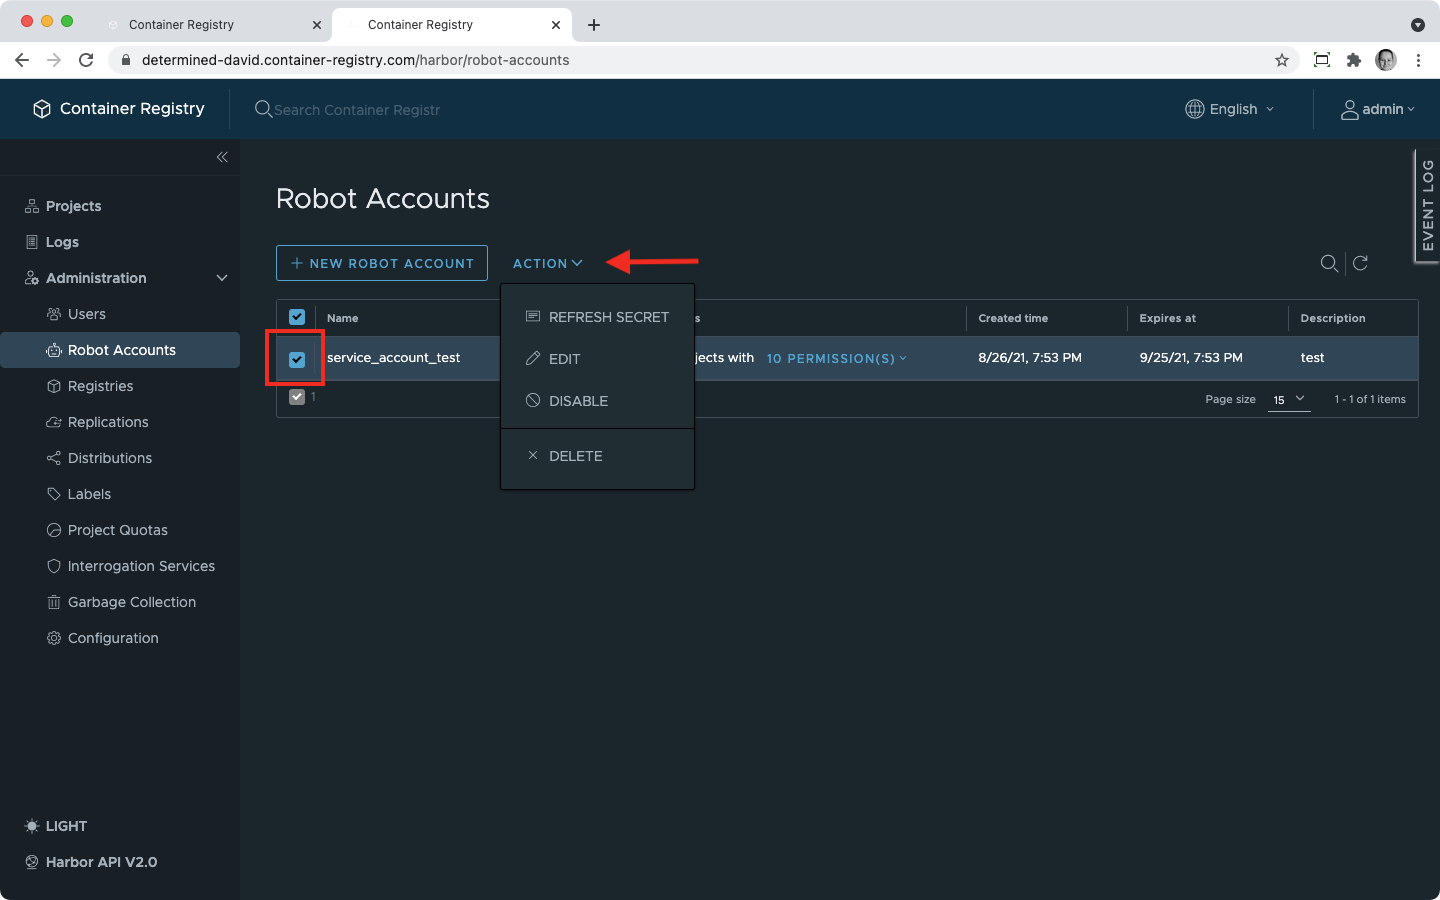
Refresh System Robot Account Token
Robot account secret tokens must be refreshed when they expired or can be refreshed when you have not saved the original ones or want to refresh them for security reasons.
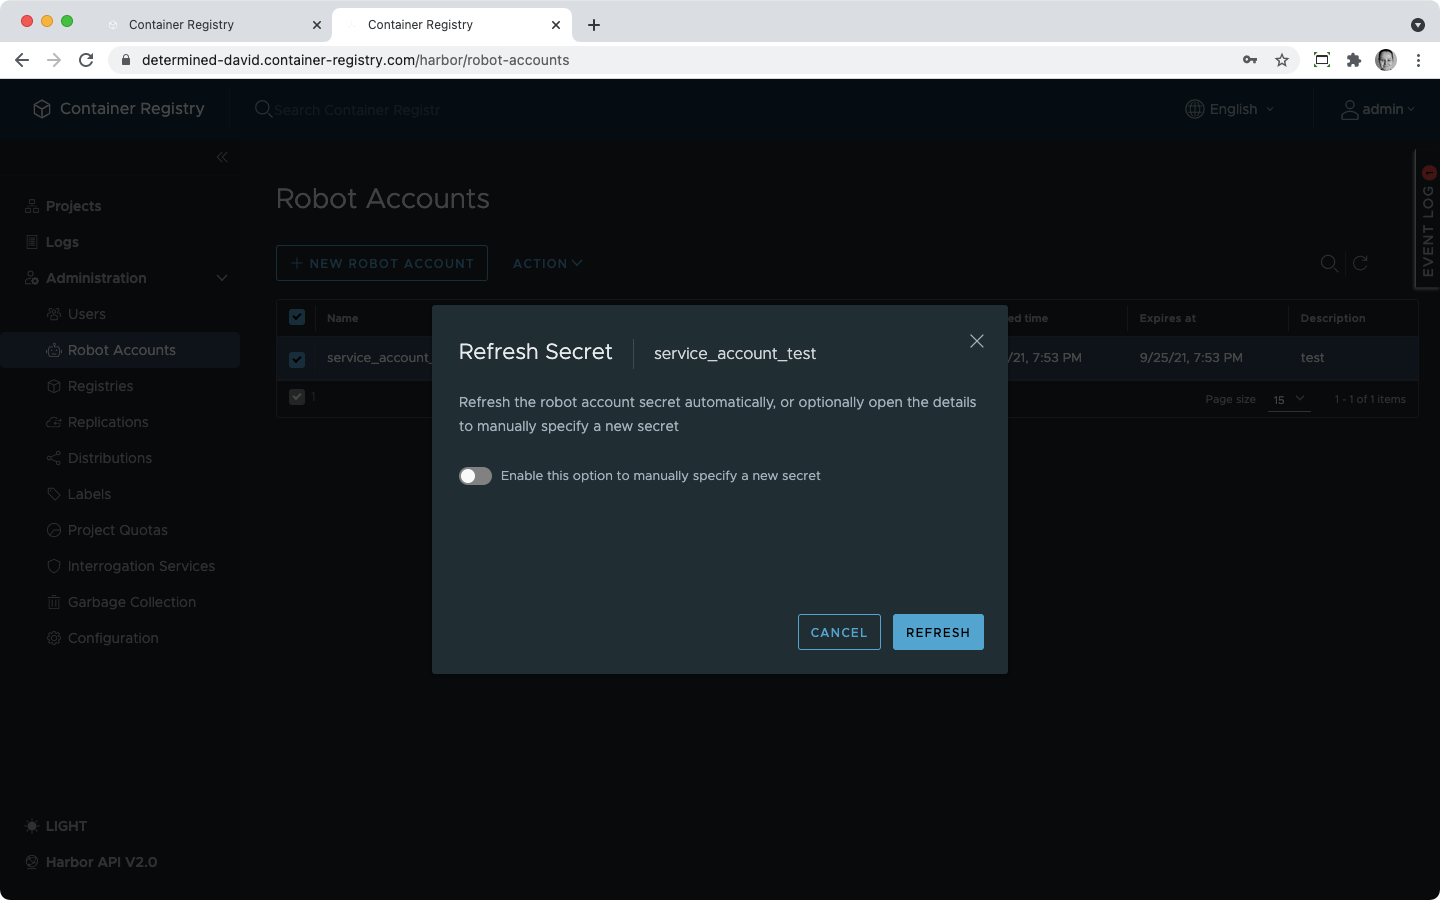
To do this, use the Refresh Secret button and then Refresh in the opened dialogue window. The new secret will be generated automatically.
After you hit Refresh, you will see the dialogue window that allows you either to copy your secret or download it as a JSON file. Remember, that, like in the case of new account creation, this secret token won’t be saved anywhere in the system, so make sure you save it immediately.
Optionally, you can type in your own secret if you enable this option using the slider.
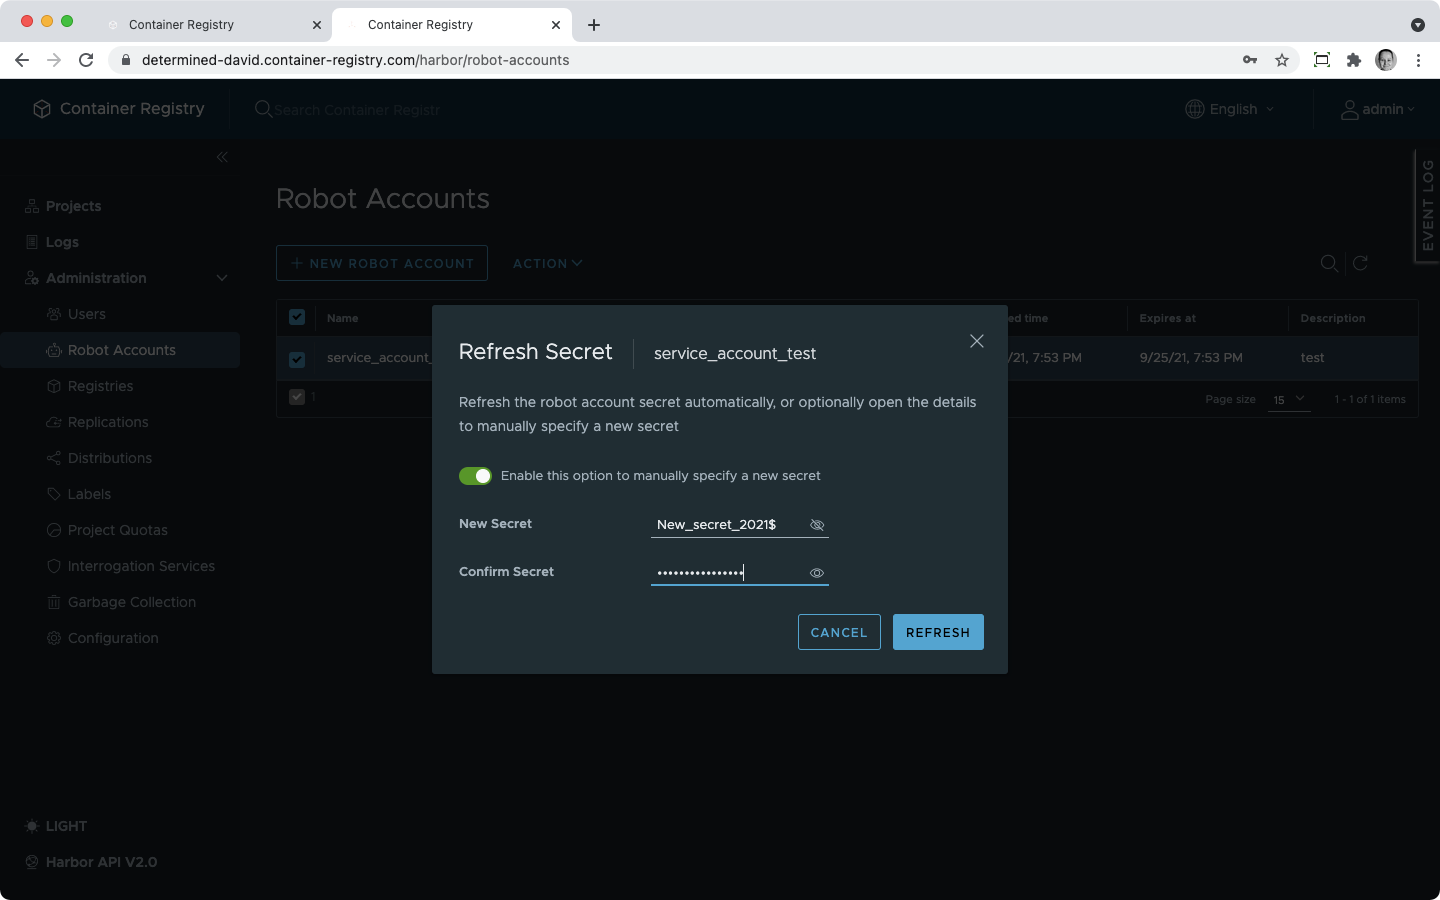
Requirements for the Manual Secret
- 8-20 characters including:
- at least 1 uppercase;
- at least 1 lowercase;
- at least one number.
Edit System Robot Account
Still in the Robot Accounts overview, use Action button and then Edit to edit general attributes of the robot account, such as expiration period, description, and permissions. You cannot rename existing robot accounts.
Delete System Robot Accounts
In the same Robot Accounts overview, use Action button and then Delete to remove any system robot accounts completely.
Disable and Enable System Robot Accounts
Instead of deleting system robot accounts, you can disable them using Action - > Disable in the Robot Accounts overview. The accounts will be kept in the system and can be enabled using the same Action button.
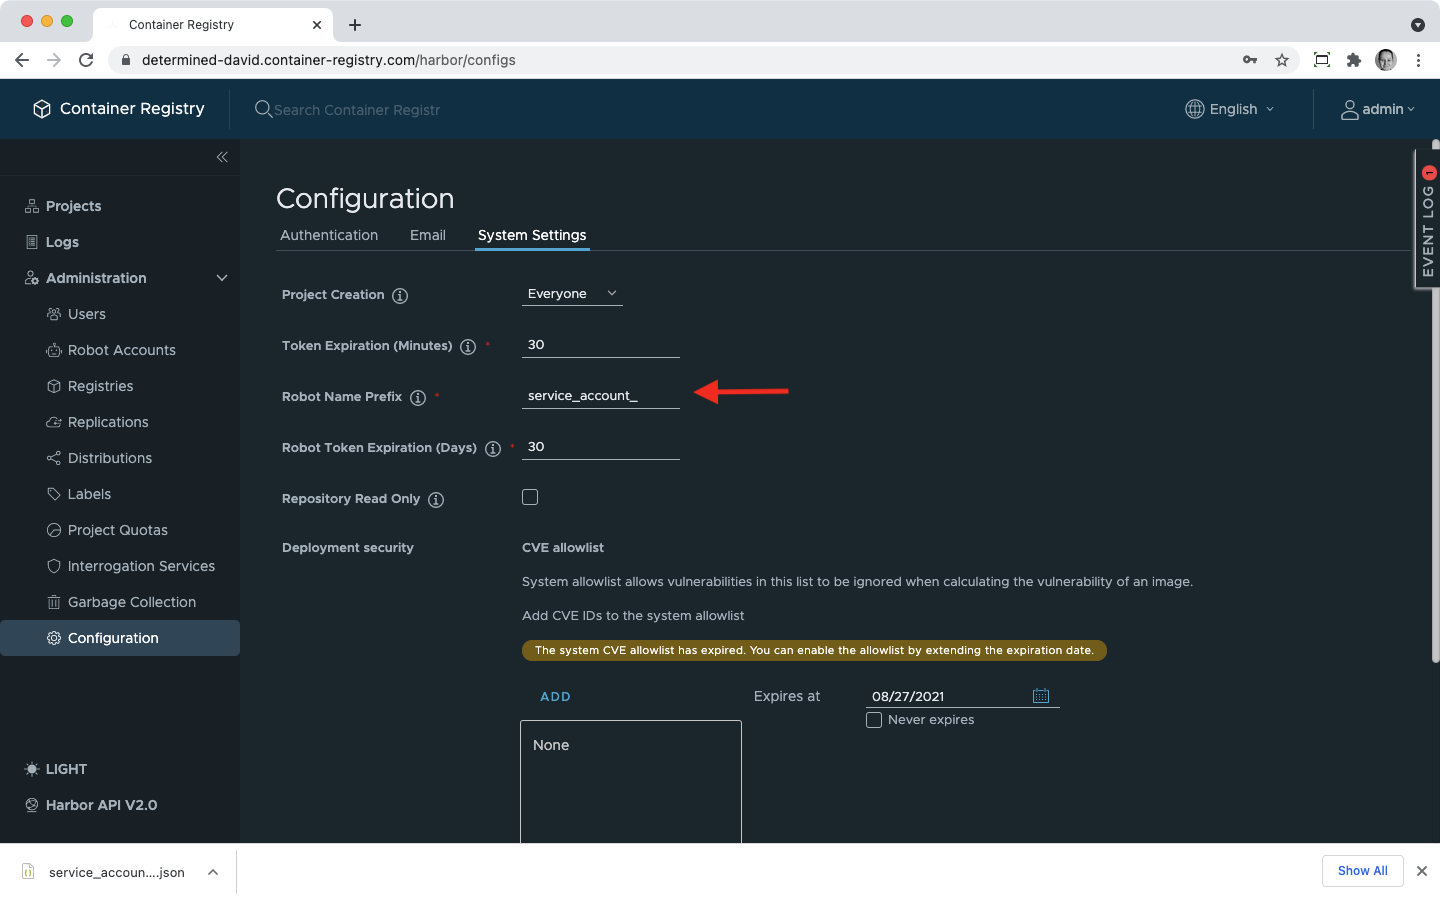
Additional Configuration
You can configure a few features that apply to the creation of new system robot accounts. This needs to be done from a different section in the navigation.
- Go to Administration;
- Click on Configuration;
- Then open the System Settings tab.
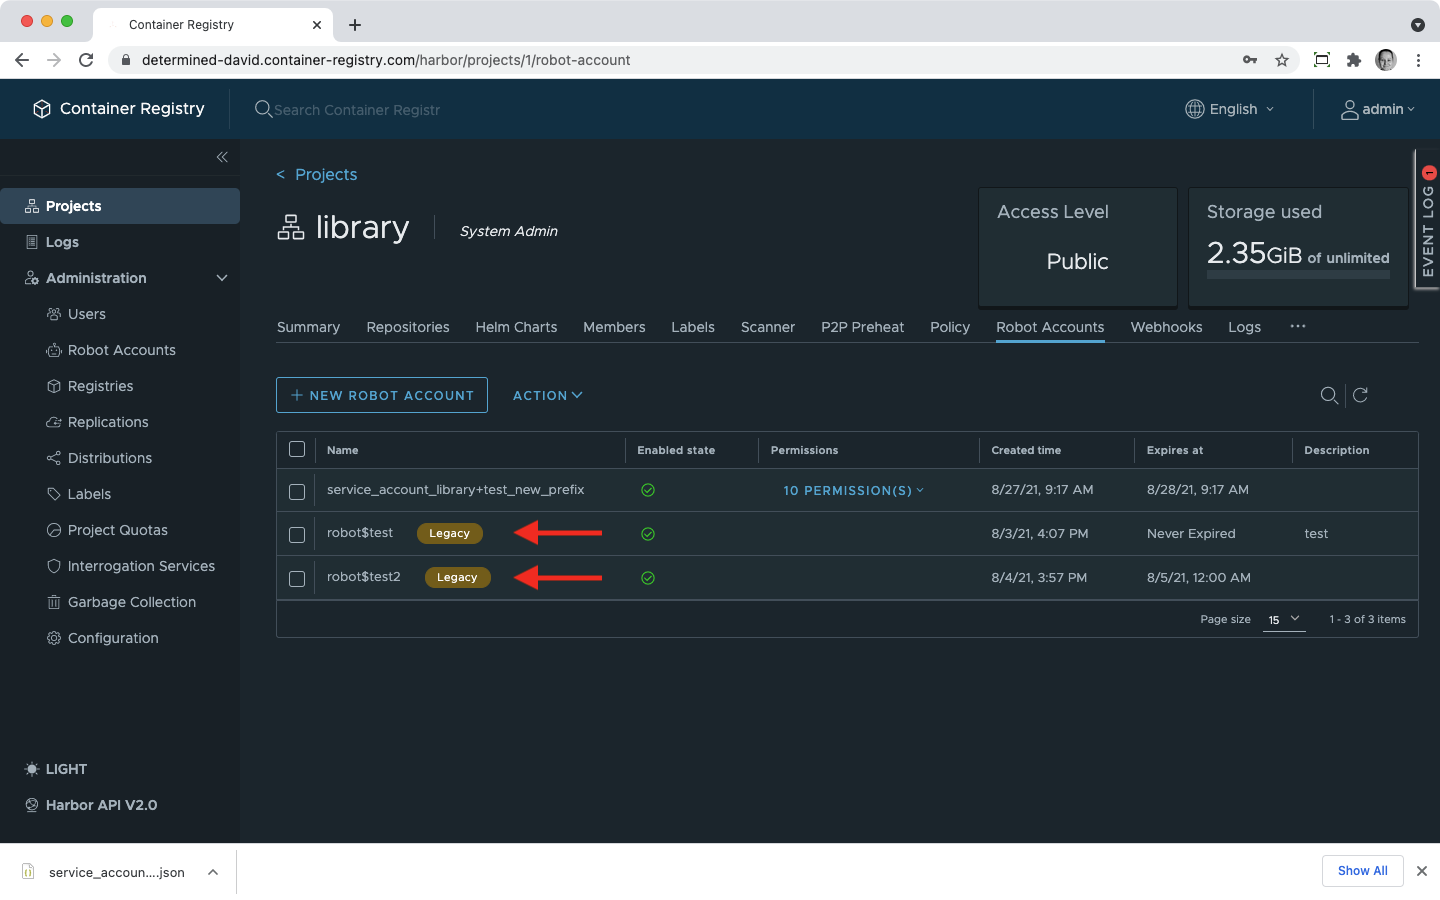
Changing Default Robot Accounts Prefix
By default, all new accounts are created with a robot$ prefix that is attached to the name that you provide manually. You can set a different default prefix in the System Settings.
In the Robot Name Prefix, type in the new prefix string. The prefix will be applied to all new system and project robot accounts.
The robot accounts with the old prefix will be marked as legacy.
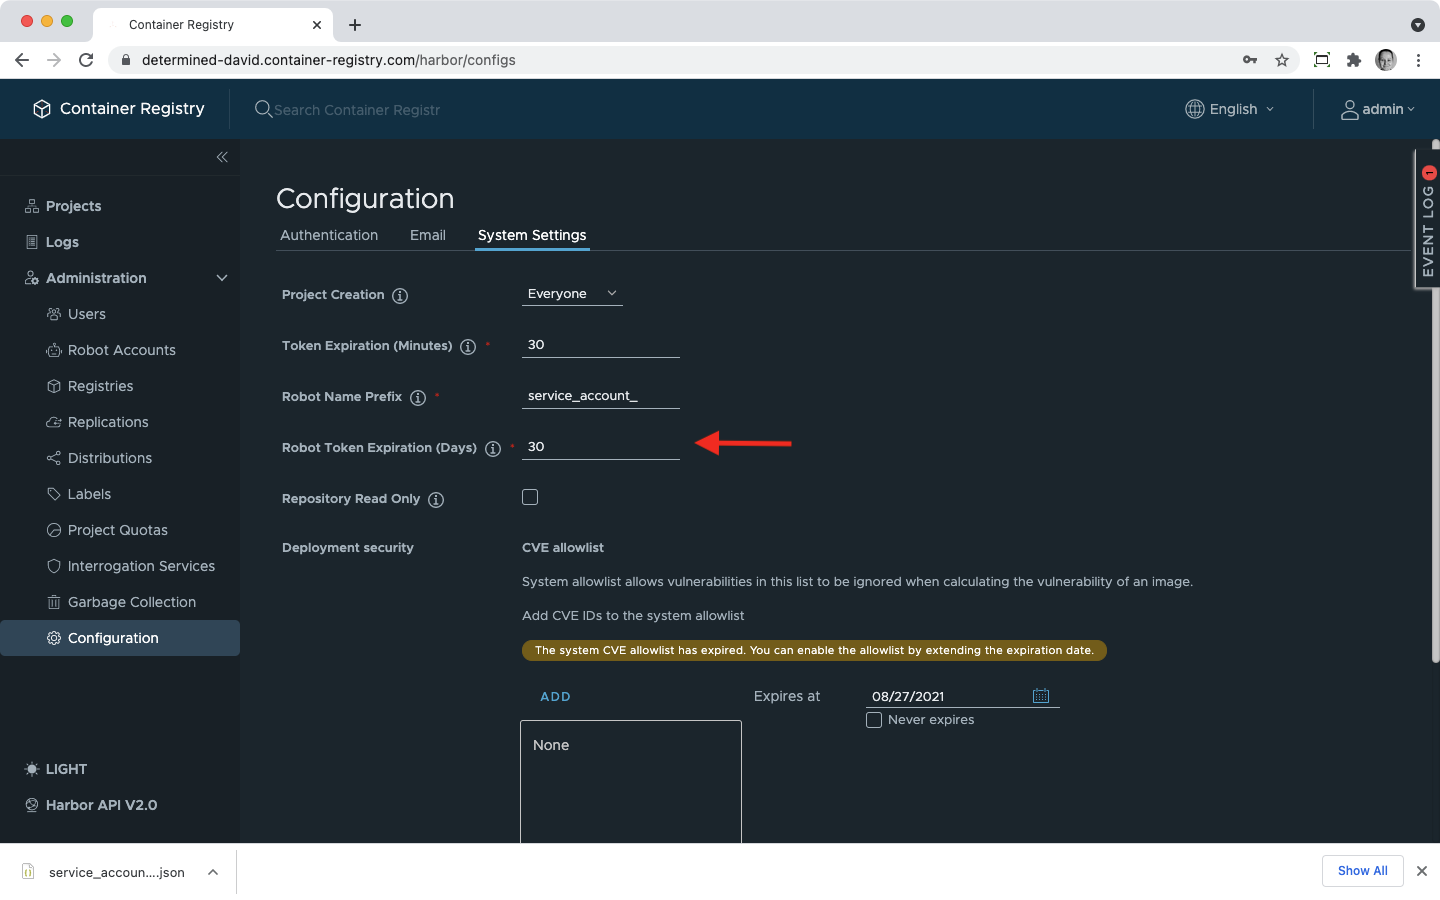
Robot Accounts Expiration
By default, when you create a new system or project robot account, the Expiration time field is filled with a value which is 30 (days). You can set a different default value which will be also in days counted from the creation of a robot account.
In the same System Settings tab, you can specify the default expiration period for the tokens of all newly created robot accounts. However, you still can set the expiration period manually while creating a robot.