Project Quotas
Individual accounts have 1 GB of storage included. Dedicated accounts have 100 GB. You can set the upper limit for storage usage for every project.
Overview of the Storage Usage
In the Project Quotas tab of the navigation pane, you can check how much storage is used and by which projects.
Default disk space per project shows how much storage every newly created project will be assigned.
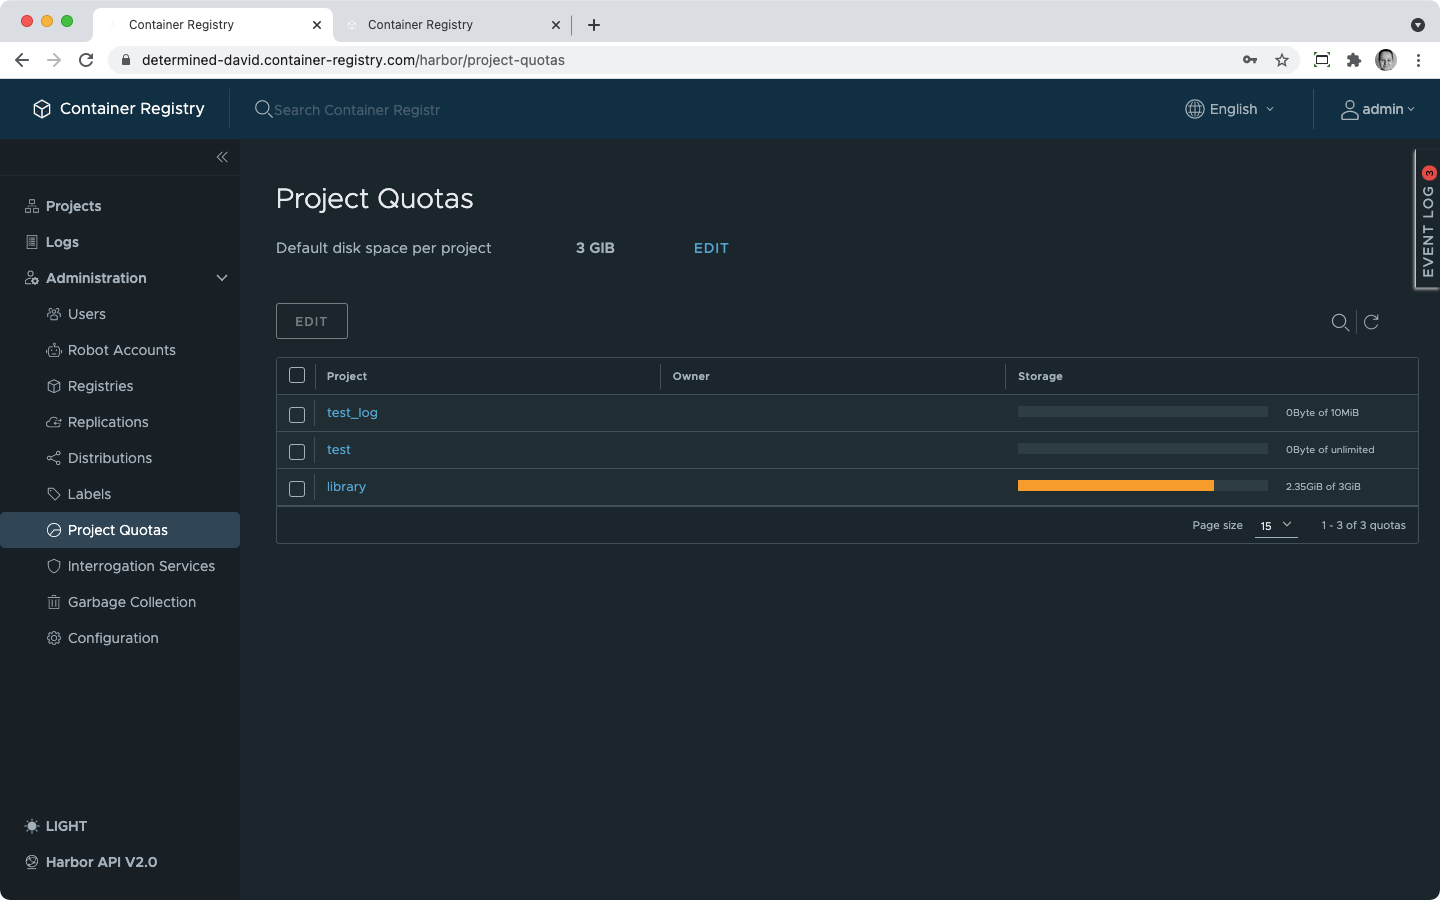 The bar in the Storage column of the overview shows the percentage of storage use. If it is green, you are below the first half of the storage reserved for this project. The yellow color shows that you are above the first half. The red color shows that the project is close to exhausting its available storage.
Default disk space per project is not the total storage use per instance, nor it is the sum of all other project quotas.
Changing Project Quotas
If you are a system administrator of your Container Registry instance, you will be able to set project quotas during the creation of new projects. For the projects created by other users of your instance, you can adjust quotas afterward or specify a default storage quota.
Set Default Storage Quota Per Project
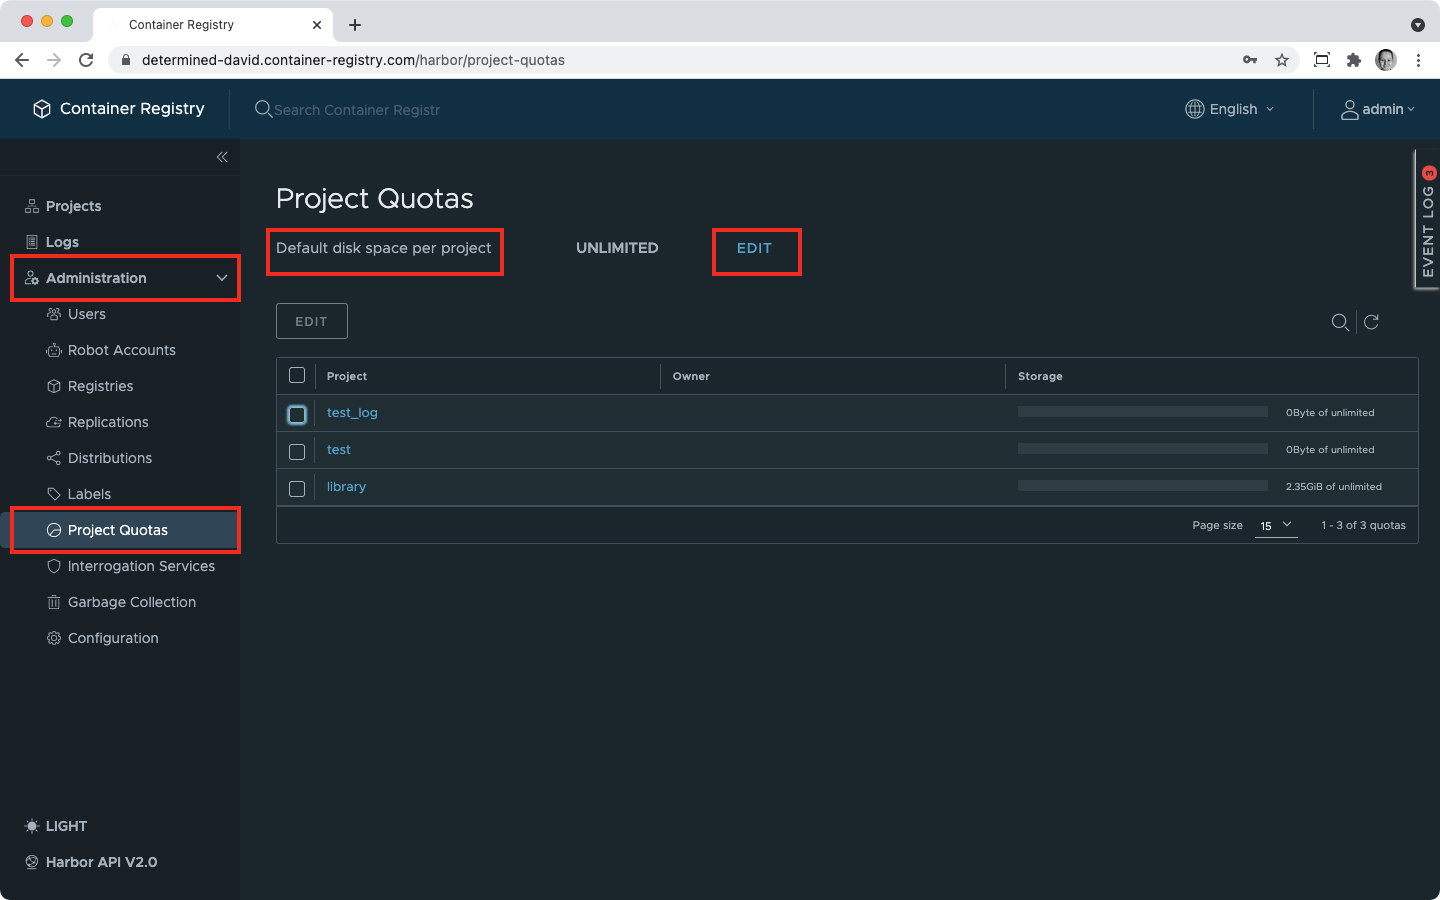
- In the navigation pane, expand Administration;
- Find Default disk space per project und click Edit next to it:
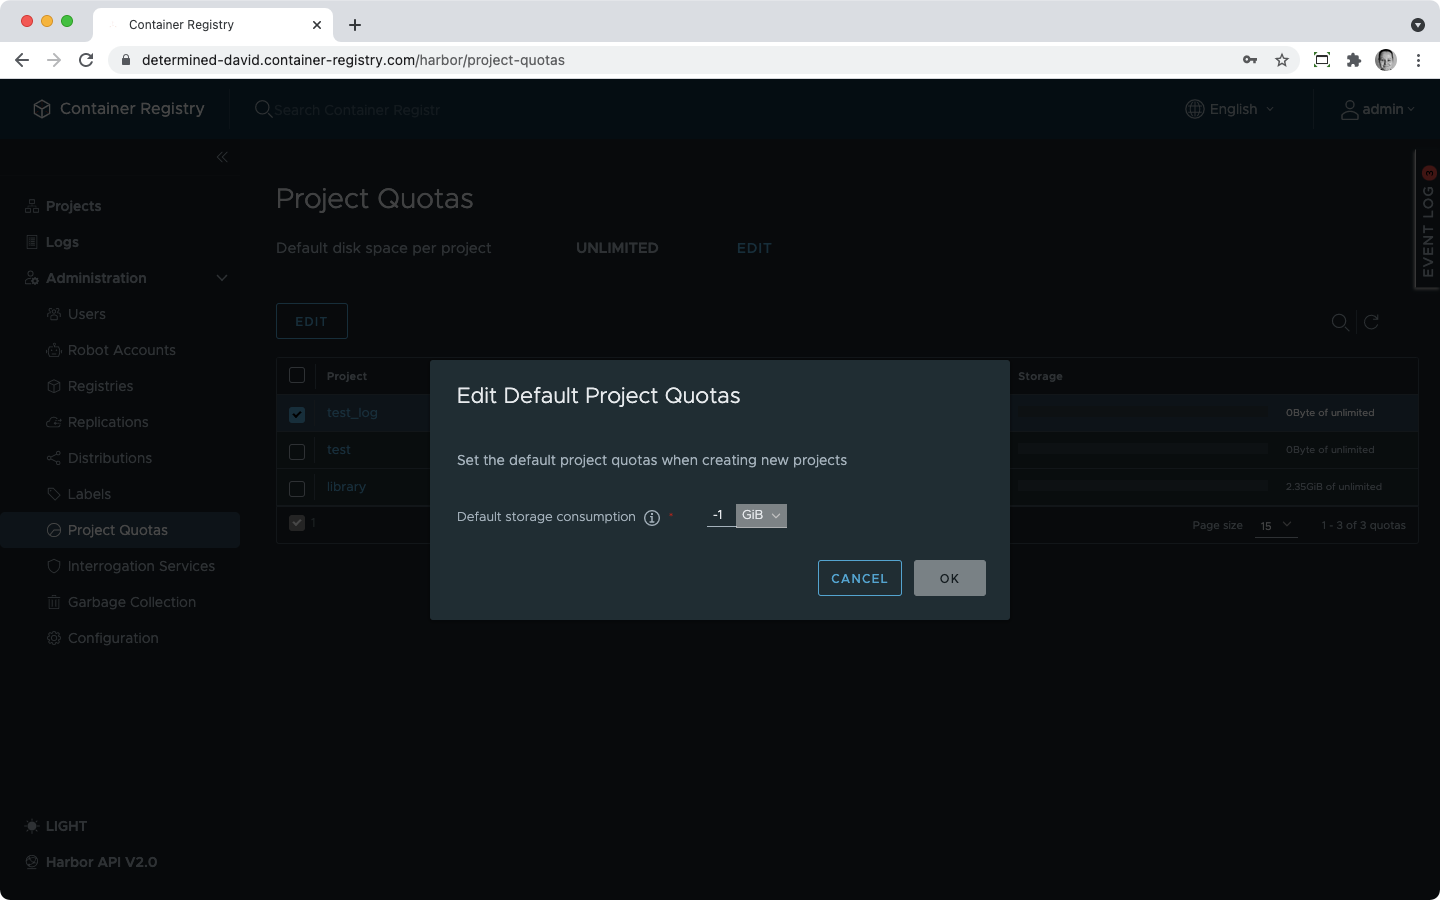
- Choose the volume measure from the dropdown;
- Type in the amount of storage you need;
- Set it at -1 for unlimited storage.
Change Quotas for Existing Projects
- In the navigation pane, expand Administration;
- Click Project Quotas;
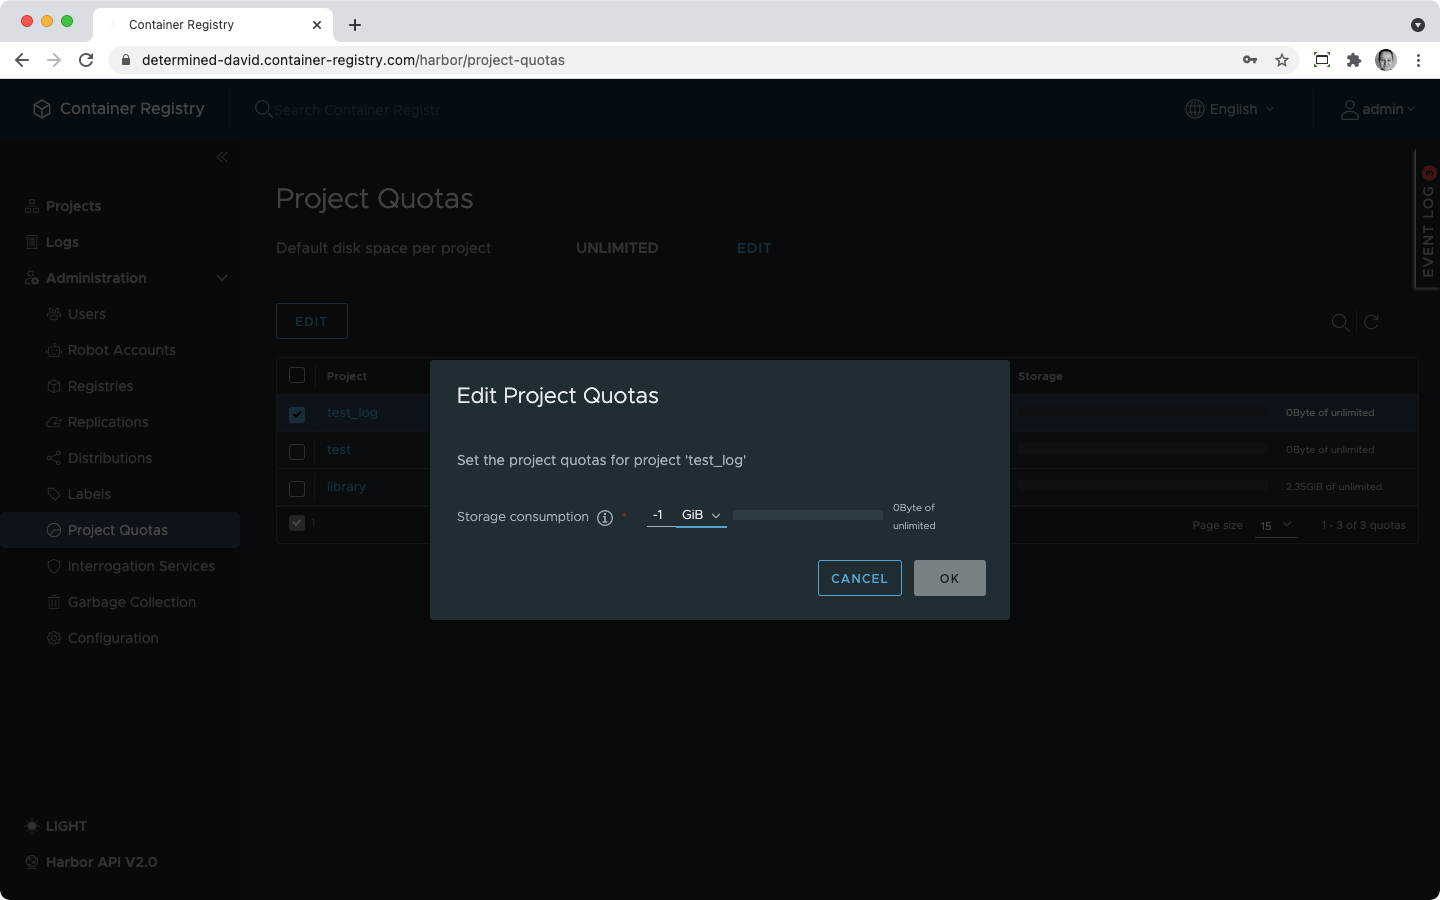
- In the project list, select a checkbox next to the project you want to change the quota for;
- Click Edit;
- Select the volume measure from the dropdown;
- Enter the amount of storage you need;
- Set it at -1 for unlimited storage.
When you change the default project quota and there are some existing projects in the instance, that won’t change their storage quotas.
General Information About the Storage Size
A few notes on when you should expect changes in your storage usage: what makes your storage quotas exhausted quickly and what makes some storage space vacant again.
Helm Charts do not influence the storage usage that you see in the project quotas overview.
Shared Blobs and Project Quotas
The hierarchy of the image layers was explained in detail here. From this perspective, one can say that some image layers are included in more than one image. But the underlying Harbor technology does not multiply identical layers but rather maps different images to store one unique layer only once and to spare some storage space.
Consequently, shared blobs – identical layers – add to the exhaustion of the project storage only once. However, shared blobs stretched across different projects add to the exhaustion of every project.
What Happens With the Storage on Image Push
On image push, blob files are transmitted first. The manifest is pushed only upon their successful arrival in the registry. Therefore, you may exceed your project quota but you won’t be notified about it immediately after you’ve started the push. The storage may be exhausted in the process but Container Registry can reject the push only when its manifest arrives and gets rejected due to the quota exceeded by the blobs.
Rejection or acceptance happens on “First come, first served” principle, in the order image manifests arrive. Keep this in mind when pushing a few images in parallel. They may race with each other and the first to be pushed is not necessarily the one to be stored successfully. Images with blobs already existing in the registry will squeeze through faster than those with completely new layers.
What Happens With the Storage on Retagging Images
Retagging images increases storage exhaustion if you copy an image from one project to another. It does not change project quota exhaustion if you tag the image but leave it in the same project.
What Happens With the Storage on Deleting Images
Image blobs are not deleted when the image is deleted. Therefore, deleting images won’t free any storage space. To remove the blobs completely and to reduce the storage exhaustion in the project, run Garbage Collection as described here.