Configure Replication Rules
Replication rules specify which artifacts will be moved between registries and how they should be moved. Each replication rule includes:
- a filter to catch particular artifacts;
- a scheduler;
- a flattening rule.
Create or Configure a Replication Rule
Prerequisite
You need at least one endpoint – a registry to push or pull images from – to create a new replication rule.
Steps
- In the navigation, select Administration and then Replications;
- Click + New Replication Rule;
- If you want to edit an existing one, select it for editing as explained below;
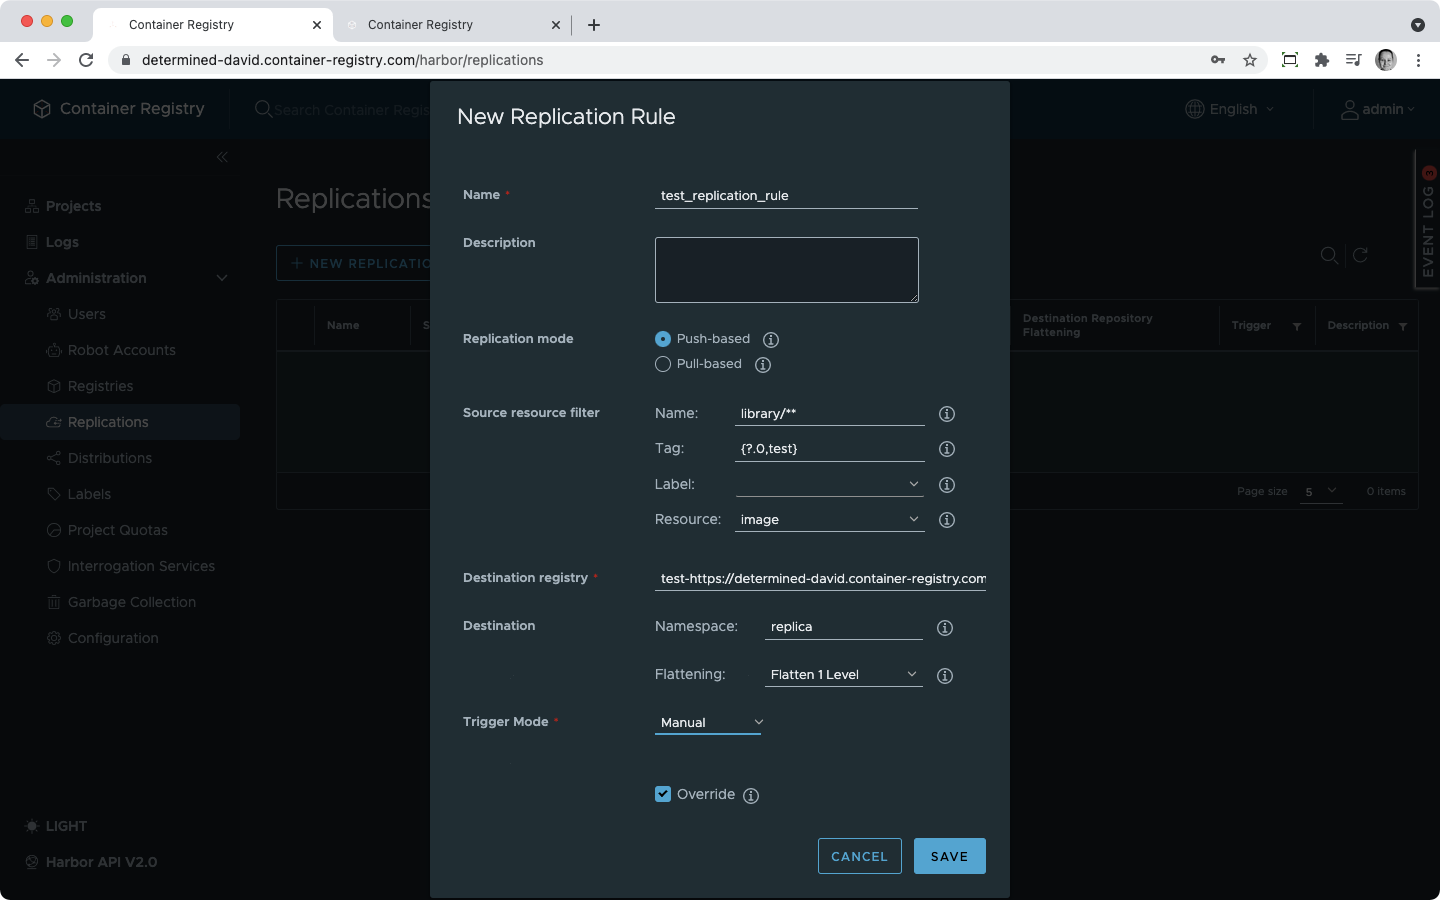
- Fill in the form:
- Name should not have any white spaces;
- Description is optional;
- Replication mode:
- Push-based means that you will push images from your current Container Registry instance into a remote one;
- Pull-based means that you will pull images to your current Container registry instance from a remote one;
- Resource filter: in the push replication mode, your current instance is the resource, whereas, in the pull mode, the resource is the remote registry; the resource filter selects which artifacts should be included in the replication:
- Name is the repository name; however, you can include all repositories by specifying in this field only the name of the project or using patterns;
- Tag is the artifact tag;
- Label;
- In the Resource dropdown, you can choose between the artifact type: chart, image, or any artifact.
- Destination/Source registry: you need to specify the remote registry by selecting an existing endpoint from the dropdown;
- In the Destination Namespace you can enter a custom name for the namespace where the artifacts should be pushed; if you leave it empty, the namespace existing in the source will be created in the destination and the artifacts will be stored there;
- In you specify a destination namespace or tag, you will need to select a Flattening rule for them (read more about flattening below);
- Trigger will specify when a replication should run:
- manually: when you start it pro-actively;
- scheduled: the replication runs repeatedly after the same time interval; this interval must be specified using the CRON format;
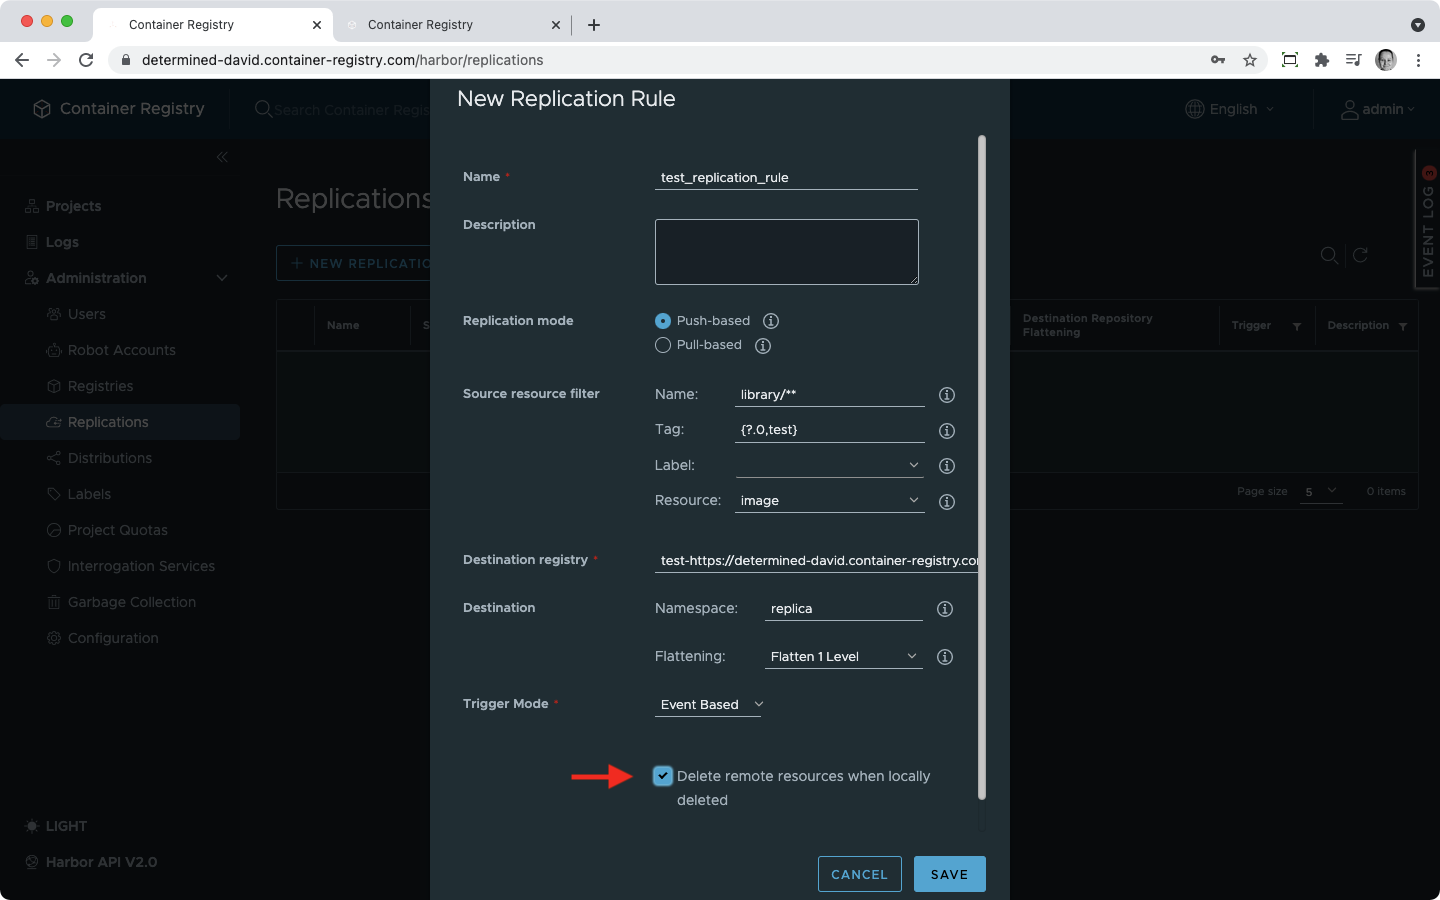
- event-based runs when an event happens;
- for manual and scheduled triggers, specify if you want the artifacts with the same name to be overridden in the destination;
- for event-based trigger, specify if you want to synchronize delete operations.
The resource filter is an AND filter. The more conditions you add, the narrow is the selection.
Which Events Trigger a Replication or Not
The following events will trigger a replication that is set to be event-based:
- a new artifact has been pushed into the resource registry;
- an artifact was re-tagged in the resource registry;
- optionally: an artifact has been deleted from the resource registry; to activate this one, you need to tick the checkbox near Delete remote resources when locally deleted.
Changes in the artifact labels do not count as events and never trigger a replication.
Flattening
Docker images have multiple layers that reflect all changes you’ve done to the original image. Layers are organized into hierarchies. When a layer in the hierarchy is changed, Docker will propagate the changes to all the layers below this one.
The hierarchy may have more than one brunch. Consequently, you need to make sure that you keep track of where certain layers come from, which changes were applied to them, and how to find the “original” layer. You can also choose not to track this information if you do not need it.
An image hierarchy can be visualized in your command line tool using the tool known as dockviz and looks like this:
$ dockviz images -t -l
└─511136ea3c5a Virtual Size: 0.0 B
  ├─f10ebce2c0e1 Virtual Size: 103.7 MB
  │ └─74fe38d11401 Virtual Size: 209.6 MB Tags: ubuntu:12.04, ubuntu:precise
  ├─ef519c9ee91a Virtual Size: 100.9 MB
  │ └─a7cf8ae4e998 Virtual Size: 171.3 MB Tags: ubuntu:12.10, ubuntu:quantal
  │   ├─5c0d04fba9df Virtual Size: 513.7 MB Tags: nate/mongodb:latest
  │   └─f832a63e87a4 Virtual Size: 243.6 MB Tags: redis:latest
  └─02dae1c13f51 Virtual Size: 98.3 MB
    └─316b678ddf48 Virtual Size: 169.4 MB Tags: ubuntu:13.04, ubuntu:raring
In your repository, this hierarchy is represented through slashes in the artifact name. The highest level appears in the image name on the left, before the very first slash. By selecting a flattening rule, you keep some or all or none of the hierarchy levels. It is pretty much like removing parts of the image name. When you drop – flatten – one or a few levels, one or a few slashes and characters between them will be removed from the artifact name.
Chartmuseum always needs two levels left on the chart name.
- Flatten All Levels will remove the complete hierarchy leaving only the tag of the last layer;
- No Flatteing will keep the hierarchy as it appears in the resource registry;
Other options always remove a number of levels (parts of the image name starting from the left):
- Flattening 1 level;
- Flattening 2 levels;
- Flattening 3 levels.
Pattern Matching Rules for the Name and Tag Resource Filter
You can use double-starred patterns as explained here to include only certain repositories in the project or certain tags. The pattern will be matched with the names of repositories or artifacts.
In addition to that, you can use two more pattern matching methods.
- Contrary to double-starred patterns that take any match independently of the number of the characters that can be added to the pattern to build a match, with the question mark, you can specify that only one character can be added. For instance,
test?will be matched withtest1andtest2but not withtest12. - To enter more than one pattern as a match, create a list of them using curly brackets and separating single patterns with simple commas. You can use ? and asterisk in the patterns inside the list.
General Information About Replication Tasks
Failed Tasks
Replication tasks are running replications. Failed replication tasks undergo a few execution attempts automatically.
Reasons for Replication Task Failure
Most of the time, two reasons for the replication task failure are possible:
- network issues;
- insufficient user rights in the destination registry.
Managing Replication Rules
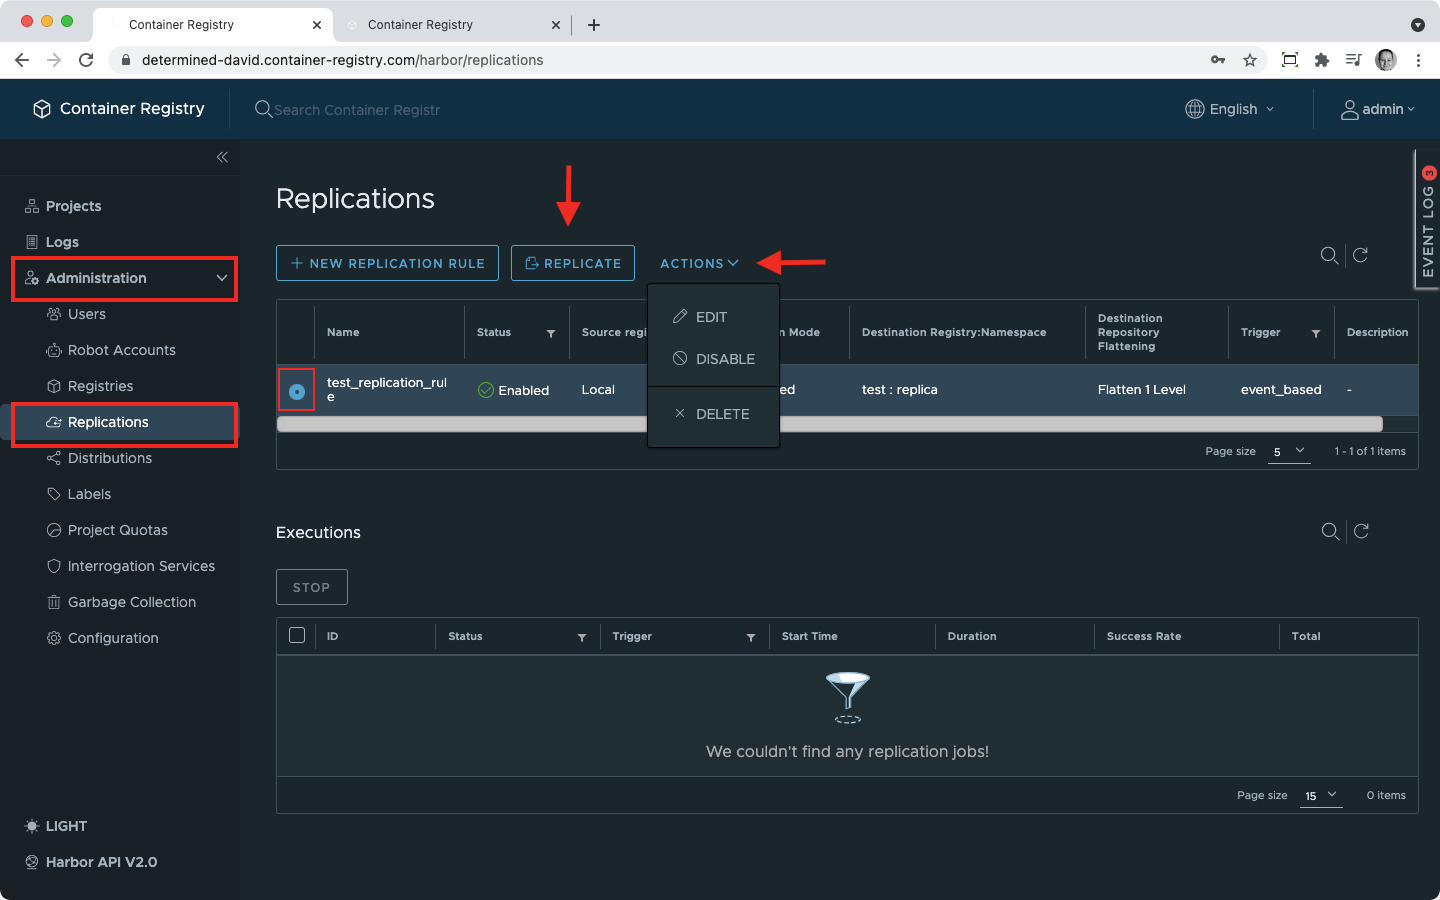
To manage replication rules, select one of them by clicking on the circle next to a rule and then perform one of the following actions using buttons in the replication rules overview.
Run a Replication Manually
The Replicate button will run the selected replication. This is possible for replications with any type of trigger but is the only way to run the replication with the manual trigger type.
Disable or Enable a Replication Rule
Replication rules can be disabled and enabled again if you only want to pause them for a while.
Edit or Delete a Replication Rule
You can delete or edit any replication rule using the Actions button.
If a replication that you want to edit or delete is running at the moment, you will need to wait until all replication tasks are finished successfully. You can check their status as explained below.
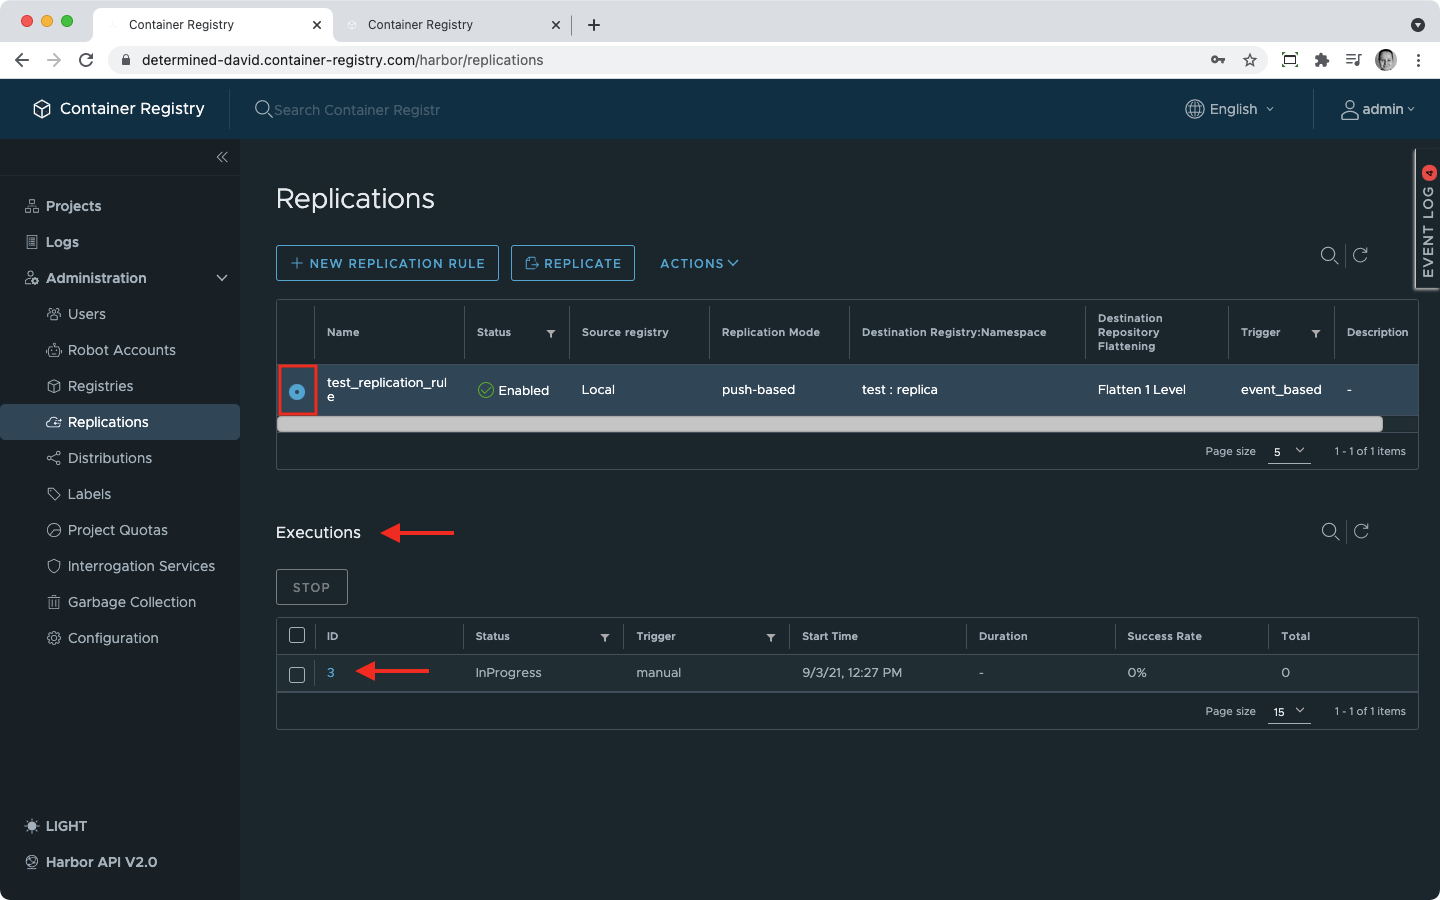
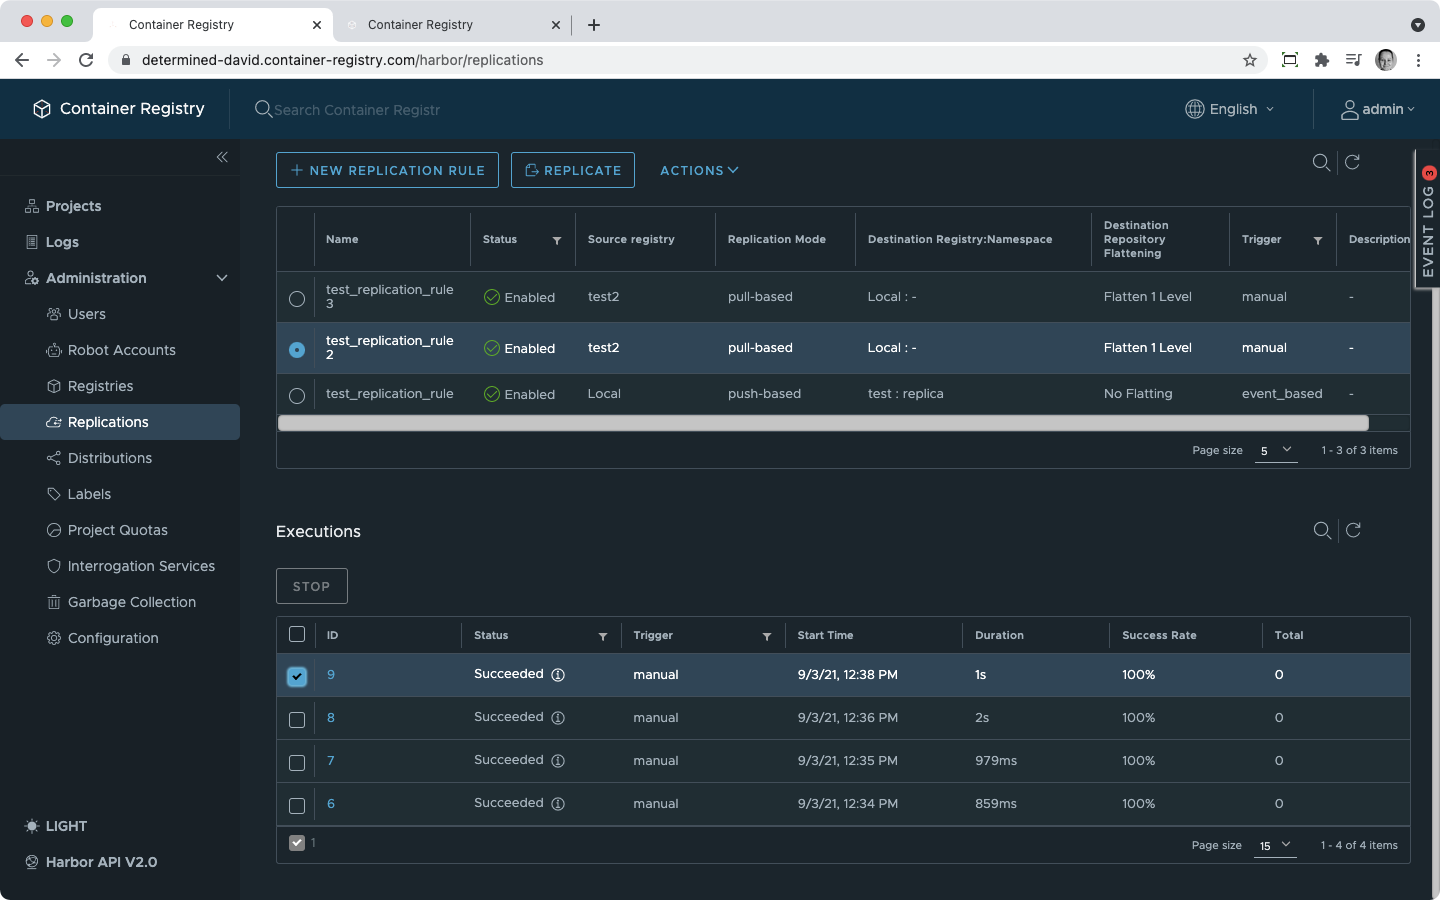
Check the Status of Replication Tasks
To check the status of all past and present replication tasks, select a replication rule and the list of its executions will appear below. Click on the execution ID and you will be redirected to the overview of the replication tasks for this execution.

Replication Logs
For each replication task, you can access its logs by clicking on the log icon next to the task in the replication task overview.
Stop a Running Replication
To stop a running replication, select a replication rule to display the list of executions. Select the one that is still in progress by using the checkbox and press Stop.
 The same button is also available in the replication task overview.