

In this tutorial, we will develop an automated workflow to build a containerized Flask application.
This workflow will build a new container image every time a new commit is pushed to our GitHub repository. We will be using a simple Flask application for this tutorial. But you can use this workflow to build a Flask application of any complexity.
We will run the workflow with GitHub Actions and use 8gears Container Registry as our image repository.
8gears Container Registry is a Harbor-based container registry as a service. You can use 8gears Container Registry as a replacement for Docker Hub in your DevOps toolbox.
For this tutorial, you will need:
- A development workstation running Ubuntu OS 18.04 or later
- A GitHub account
Also, you need to be familiar with Flask and Python.
These are the steps that we will be following in this tutorial.
- Create a Flask web application
- Create a GitHub repository
- Containerize the Flask application
- Set up 8gears Container Registry
- Automate the build workflow with GitHub Actions
- Run the GitHub Actions Workflow
Create a Flask web application
Let’s start by creating a new web application with Flask.
In the development workstation, create a new project directory and set up the Python virtual environment.
sudo apt install python3-venv
mkdir my-flask-app
cd my-flask-app/
python3 -m venv .venv
. .venv/bin/activate
 pip install Flask
Create a simple Flask app by copy-pasting the below code to app.py inside the project directory.
from flask import Flask

app = Flask(__name__)

@app.route("/")
def hello_world():
   return "<p>This is a containerized Flask app</p>"

if __name__ == "__main__":
   app.run()
This Flask app has just one page. You can substitute this with any Flask app you have previously created.
Run the application.
$ flask run
 * Debug mode: off
WARNING: This is a development server. Do not use it in a production deployment. Use a production WSGI server instead.
 * Running on <http://127.0.0.1:5000>
Press CTRL+C to quit
127.0.0.1 - - [27/Nov/2023 04:32:30] "GET / HTTP/1.1" 200 -
Flask runs our application with a development server which listens on port 5000. Open a new terminal in the development workstation and test the application with curl.
$ curl <http://127.0.0.1:5000>
<p>This is a containerized Flask app</p>
Now, we have a working Flask application. But the Flask development server is not suitable for running Flask in production. So every time we use flask run, we get this warning.
WARNING: This is a development server. Do not use it in a production deployment. Use a production WSGI server instead.
To fix this warning and prepare our application for the production environment we need a production-ready WSGI server like Gunicorn.
Install Gunicorn in the development workstation.
pip install gunicorn
In the working directory, add wsgi.py with this content.
from app import app

if __name__ == "__main__":
   app.run()
Run the Flask app with Gunicorn.
$ gunicorn wsgi:app
[2023-11-27 04:38:39 +0530] [2119] [INFO] Starting gunicorn 21.2.0
[2023-11-27 04:38:39 +0530] [2119] [INFO] Listening at: <http://127.0.0.1:8000> (2119)
[2023-11-27 04:38:39 +0530] [2119] [INFO] Using worker: sync
[2023-11-27 04:38:39 +0530] [2120] [INFO] Booting worker with pid: 2120
Test with curl.
$ curl <http://127.0.0.1:8000>
<p>This is a containerized Flask app</p>
Now, our Flask app is ready to be deployed into production.
Create a GitHub repository
We are using GitHub Actions to automate the build workflow for our Flask app. GitHub Actions is a CI/CD platform that automates software development workflows for GitHub repositories.
To use GitHub Actions, we must create a GitHub repository for our Flask app.
Create a .gitignore file in the working directory and add these two paths, which should not be committed to version control.
.venv/*
__*
Initialize local Git repository.
git init
git add .
git commit -m "version 1"
Go to GitHub and create a repository named my-flask-app.
In the local repository, change the branch name to main and push the code to the newly created repository. Make sure to replace your-github-username with your actual username in GitHub.
git branch -M main
git remote add origin git@github.com:<your-github-username>/my-flask-app.git
git push -u origin main
Before using git push, you must set up authentication with GitHub via Personal Access Tokens or SSH keys.
Containerize the Flask application
To build container images, we will use Docker Buildx. So, let’s install docker and docker-buildx in the development machine.
sudo apt install docker docker-buildx
Add user ubuntu to the docker group so we can run the docker command without sudo.
sudo groupadd docker
sudo usermod -aG docker $USER
Create a Python requirements.txt file in the working directory.
flask == 3.0.0
gunicorn
The Python package manager pip uses the requirements.txt file to install the
package dependencies. In the working directory, create Dockerfile with this
content.
FROM python:3.13.0a1-alpine #1

# Copy the requirements and install
COPY requirements.txt ./ #2
RUN pip install --no-cache-dir -r requirements.txt

# Set destination for COPY
WORKDIR /app #3

# copy the application to the working directory.
COPY . . #4

EXPOSE 8000 #5

# Run
CMD [ "gunicorn", "--bind=0.0.0.0:8000", "wsgi:app" ] #6
Use the Docker image python:3.13.0a1-alpine as the base.
Install the Python package dependencies in the Docker image.
Set the working directory for subsequent instructions in the Docker image.
Copy our Flask app to the working directory in the Docker image.
Expose port 8000 to allow connections from outside the container, since the Flask app inside the container will be listening on this port.
Run the Flask app with Gunicorn. Set the bind to 0.0.0.0:8000 so that Gunicorn will listen on all available network interfaces of the container. If you did not set this, Gunicorn will listen only on the localhost interface and will not accept requests coming from external networks.
Build the container image locally.
docker build . -t my-flask-app:1.0.0
Run the container with -p flag to publish port 8000.
$ docker run -p 8000:8000 my-flask-app:1.0.0
[2023-11-26 23:18:16 +0000] [1] [INFO] Starting gunicorn 21.2.0
[2023-11-26 23:18:16 +0000] [1] [INFO] Listening at: <http://0.0.0.0:8000> (1)
[2023-11-26 23:18:16 +0000] [1] [INFO] Using worker: sync
[2023-11-26 23:18:16 +0000] [6] [INFO] Booting worker with pid: 6
Test with curl.
$ curl <http://127.0.0.1:8000>
<p>This is a containerized Flask app</p>
Now, we have a production-ready containerized Flask app.
Set up 8gears Container Registry
8gears Container Registry offers several plans including a free plan c8n.io to help you get started. Go to container-registry.com and create a new c8n account or activate your Account from the GitHub Marketplace.
Once we are logged in to c8n.io, we get the portal for
managing our artifacts, including container images.
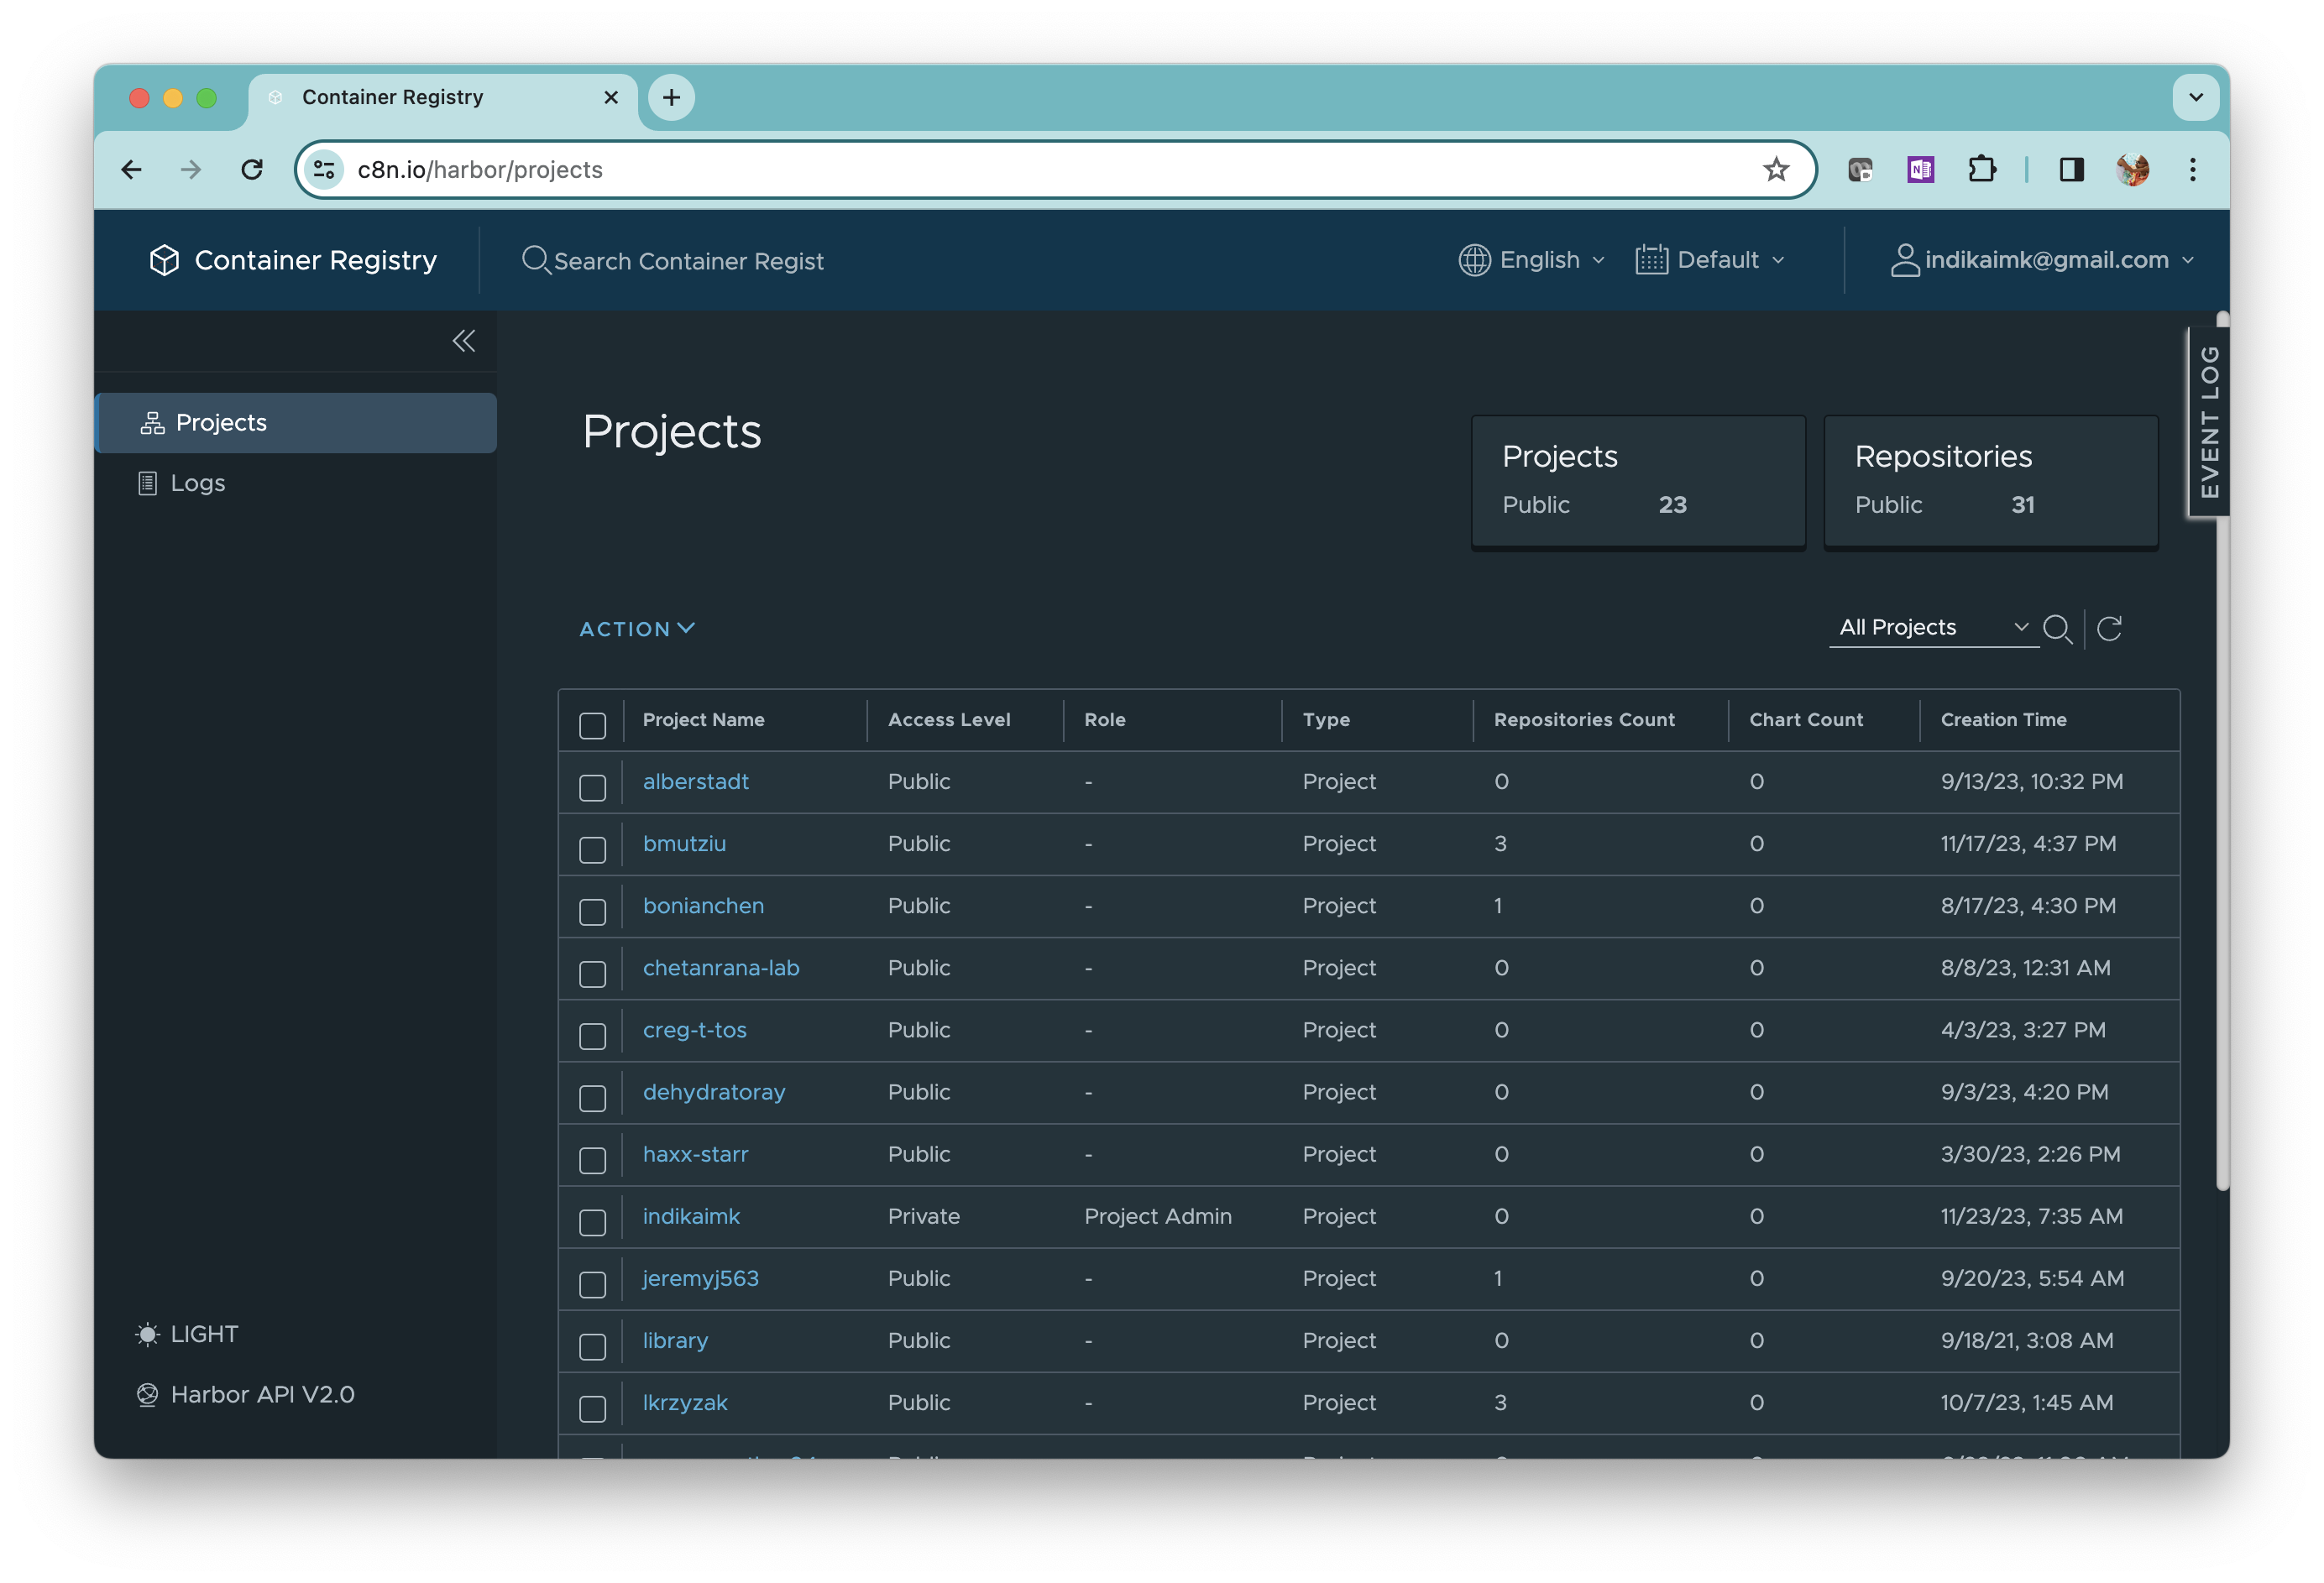
Click on the project named with your username. This is also marked
as Project Admin.
It takes us to the project details page. There are no repositories here yet.
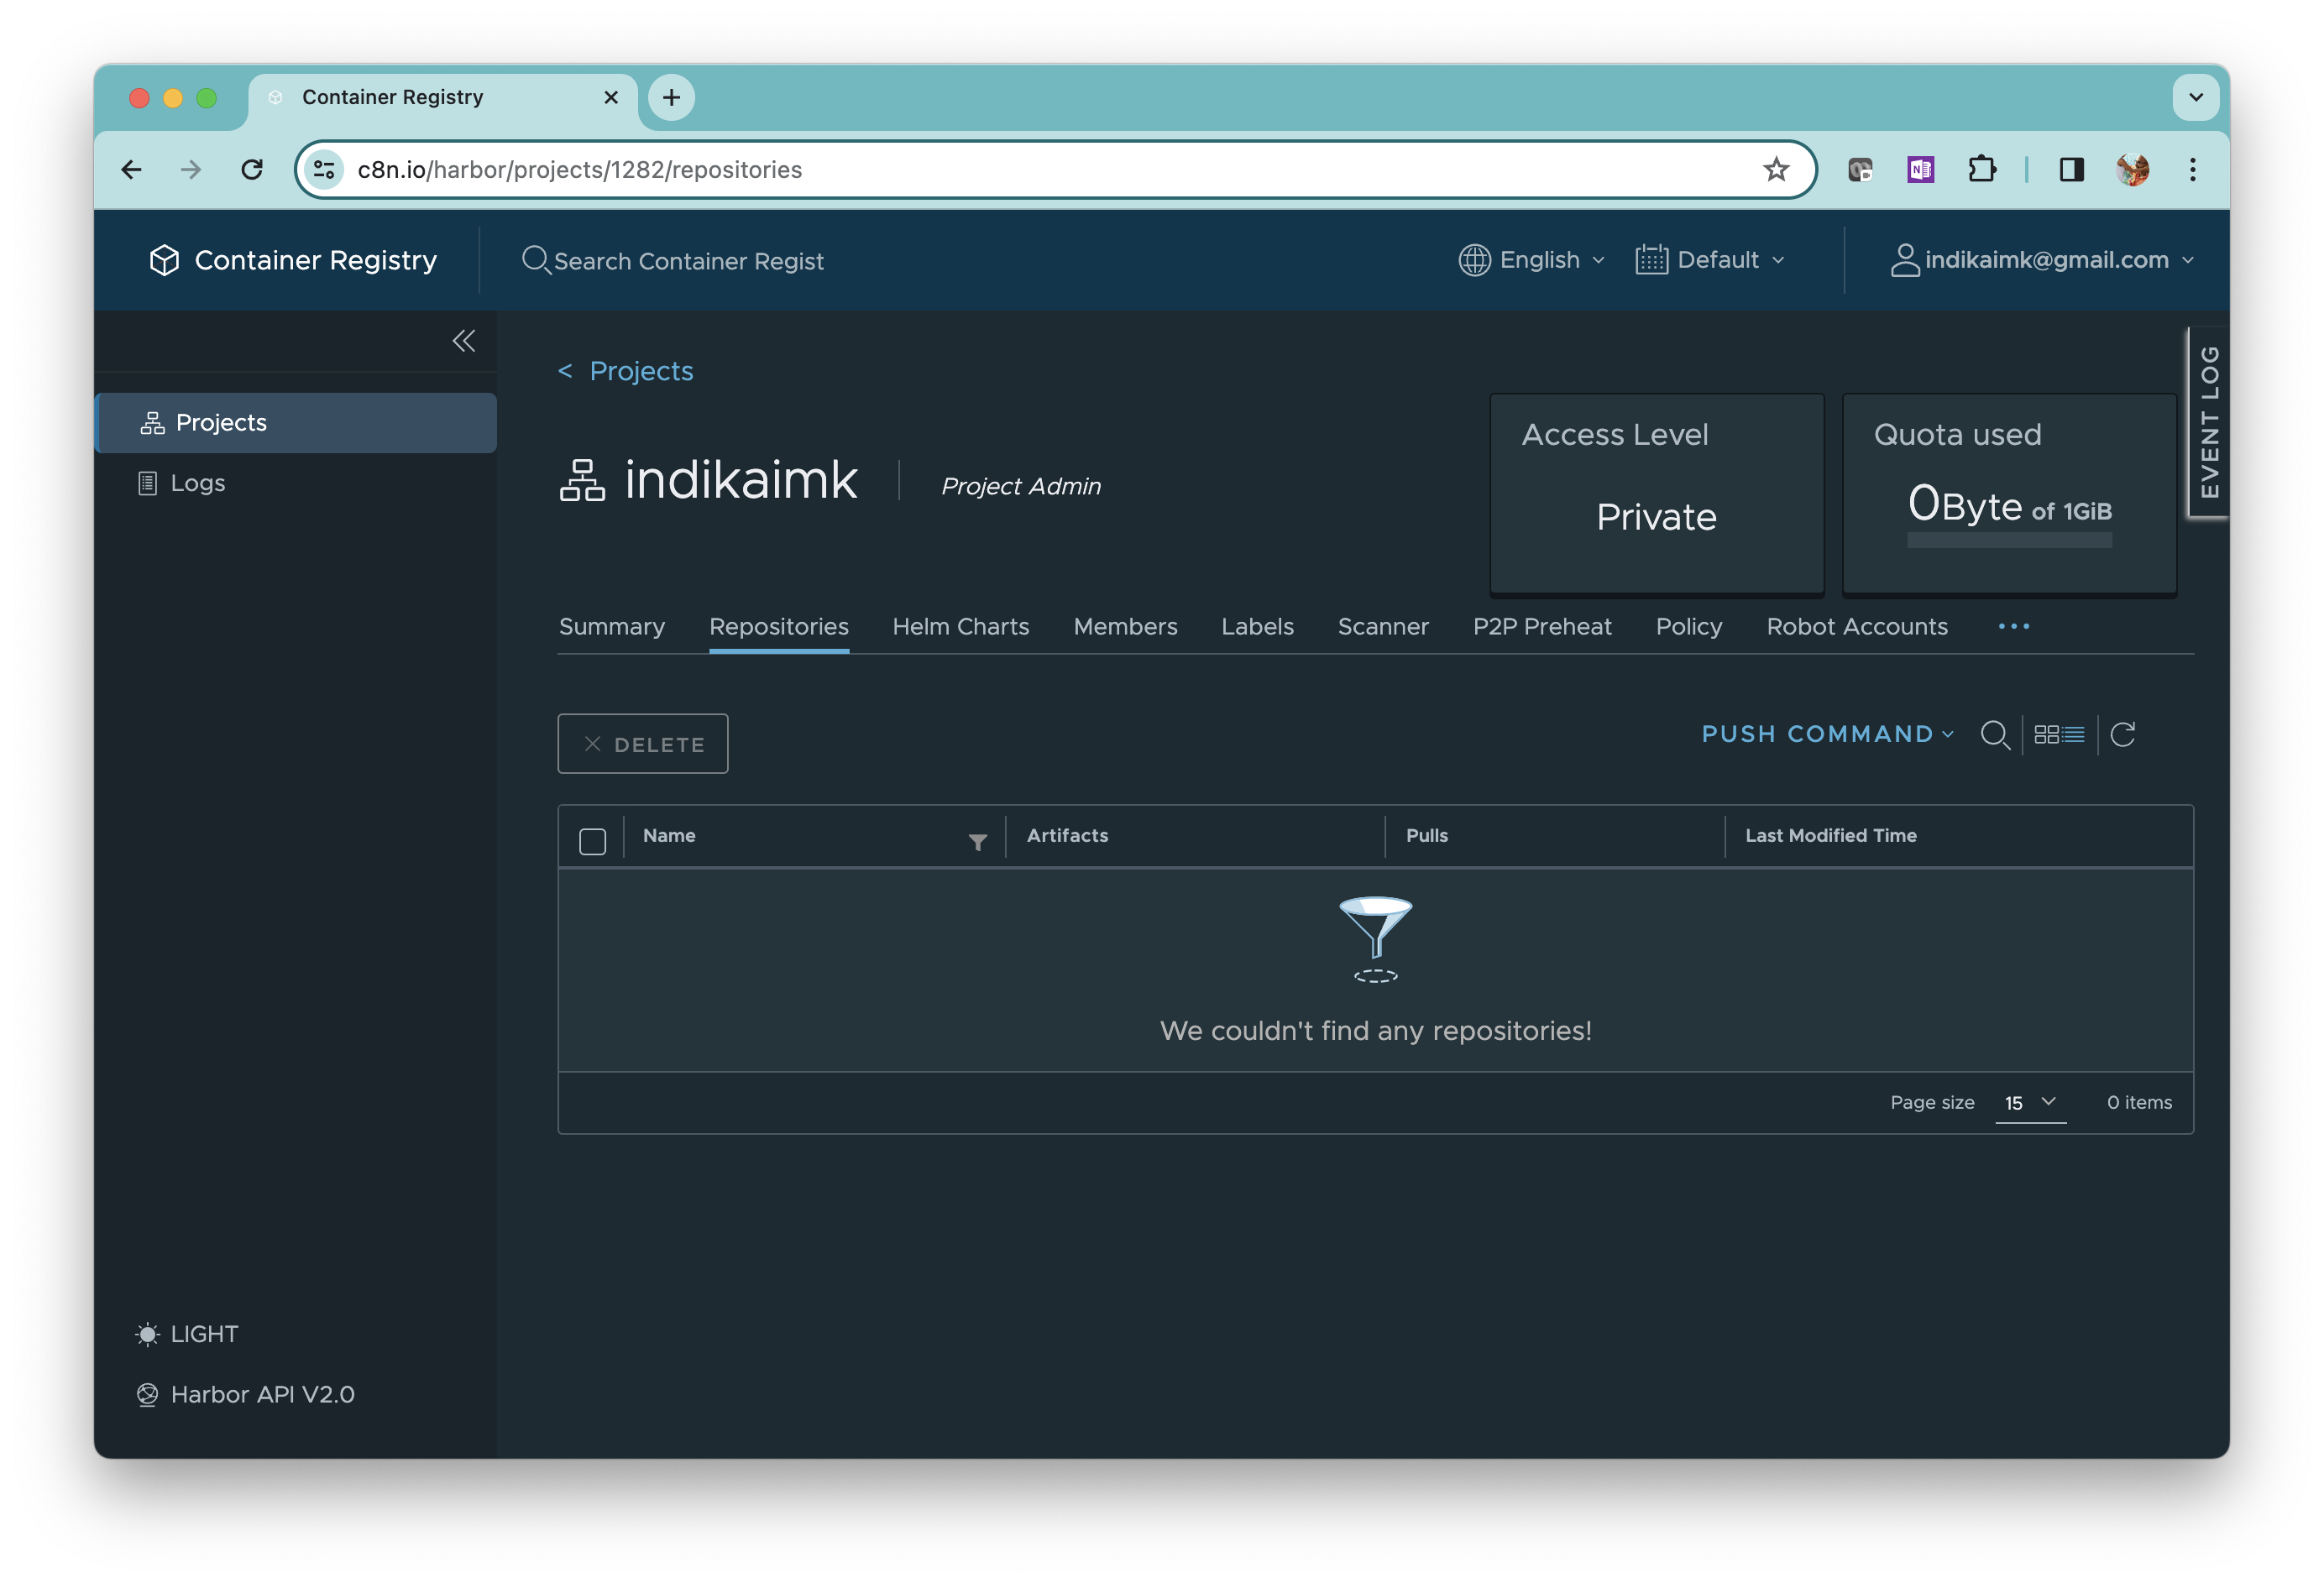
To push the images to this registry from GitHub Actions, we need a Robot Account.
You can provision multiple Robot Accounts and grant minimum required privileges for each account. So, using a Robot Account is more secure than using the user or admin account to automate workflows.
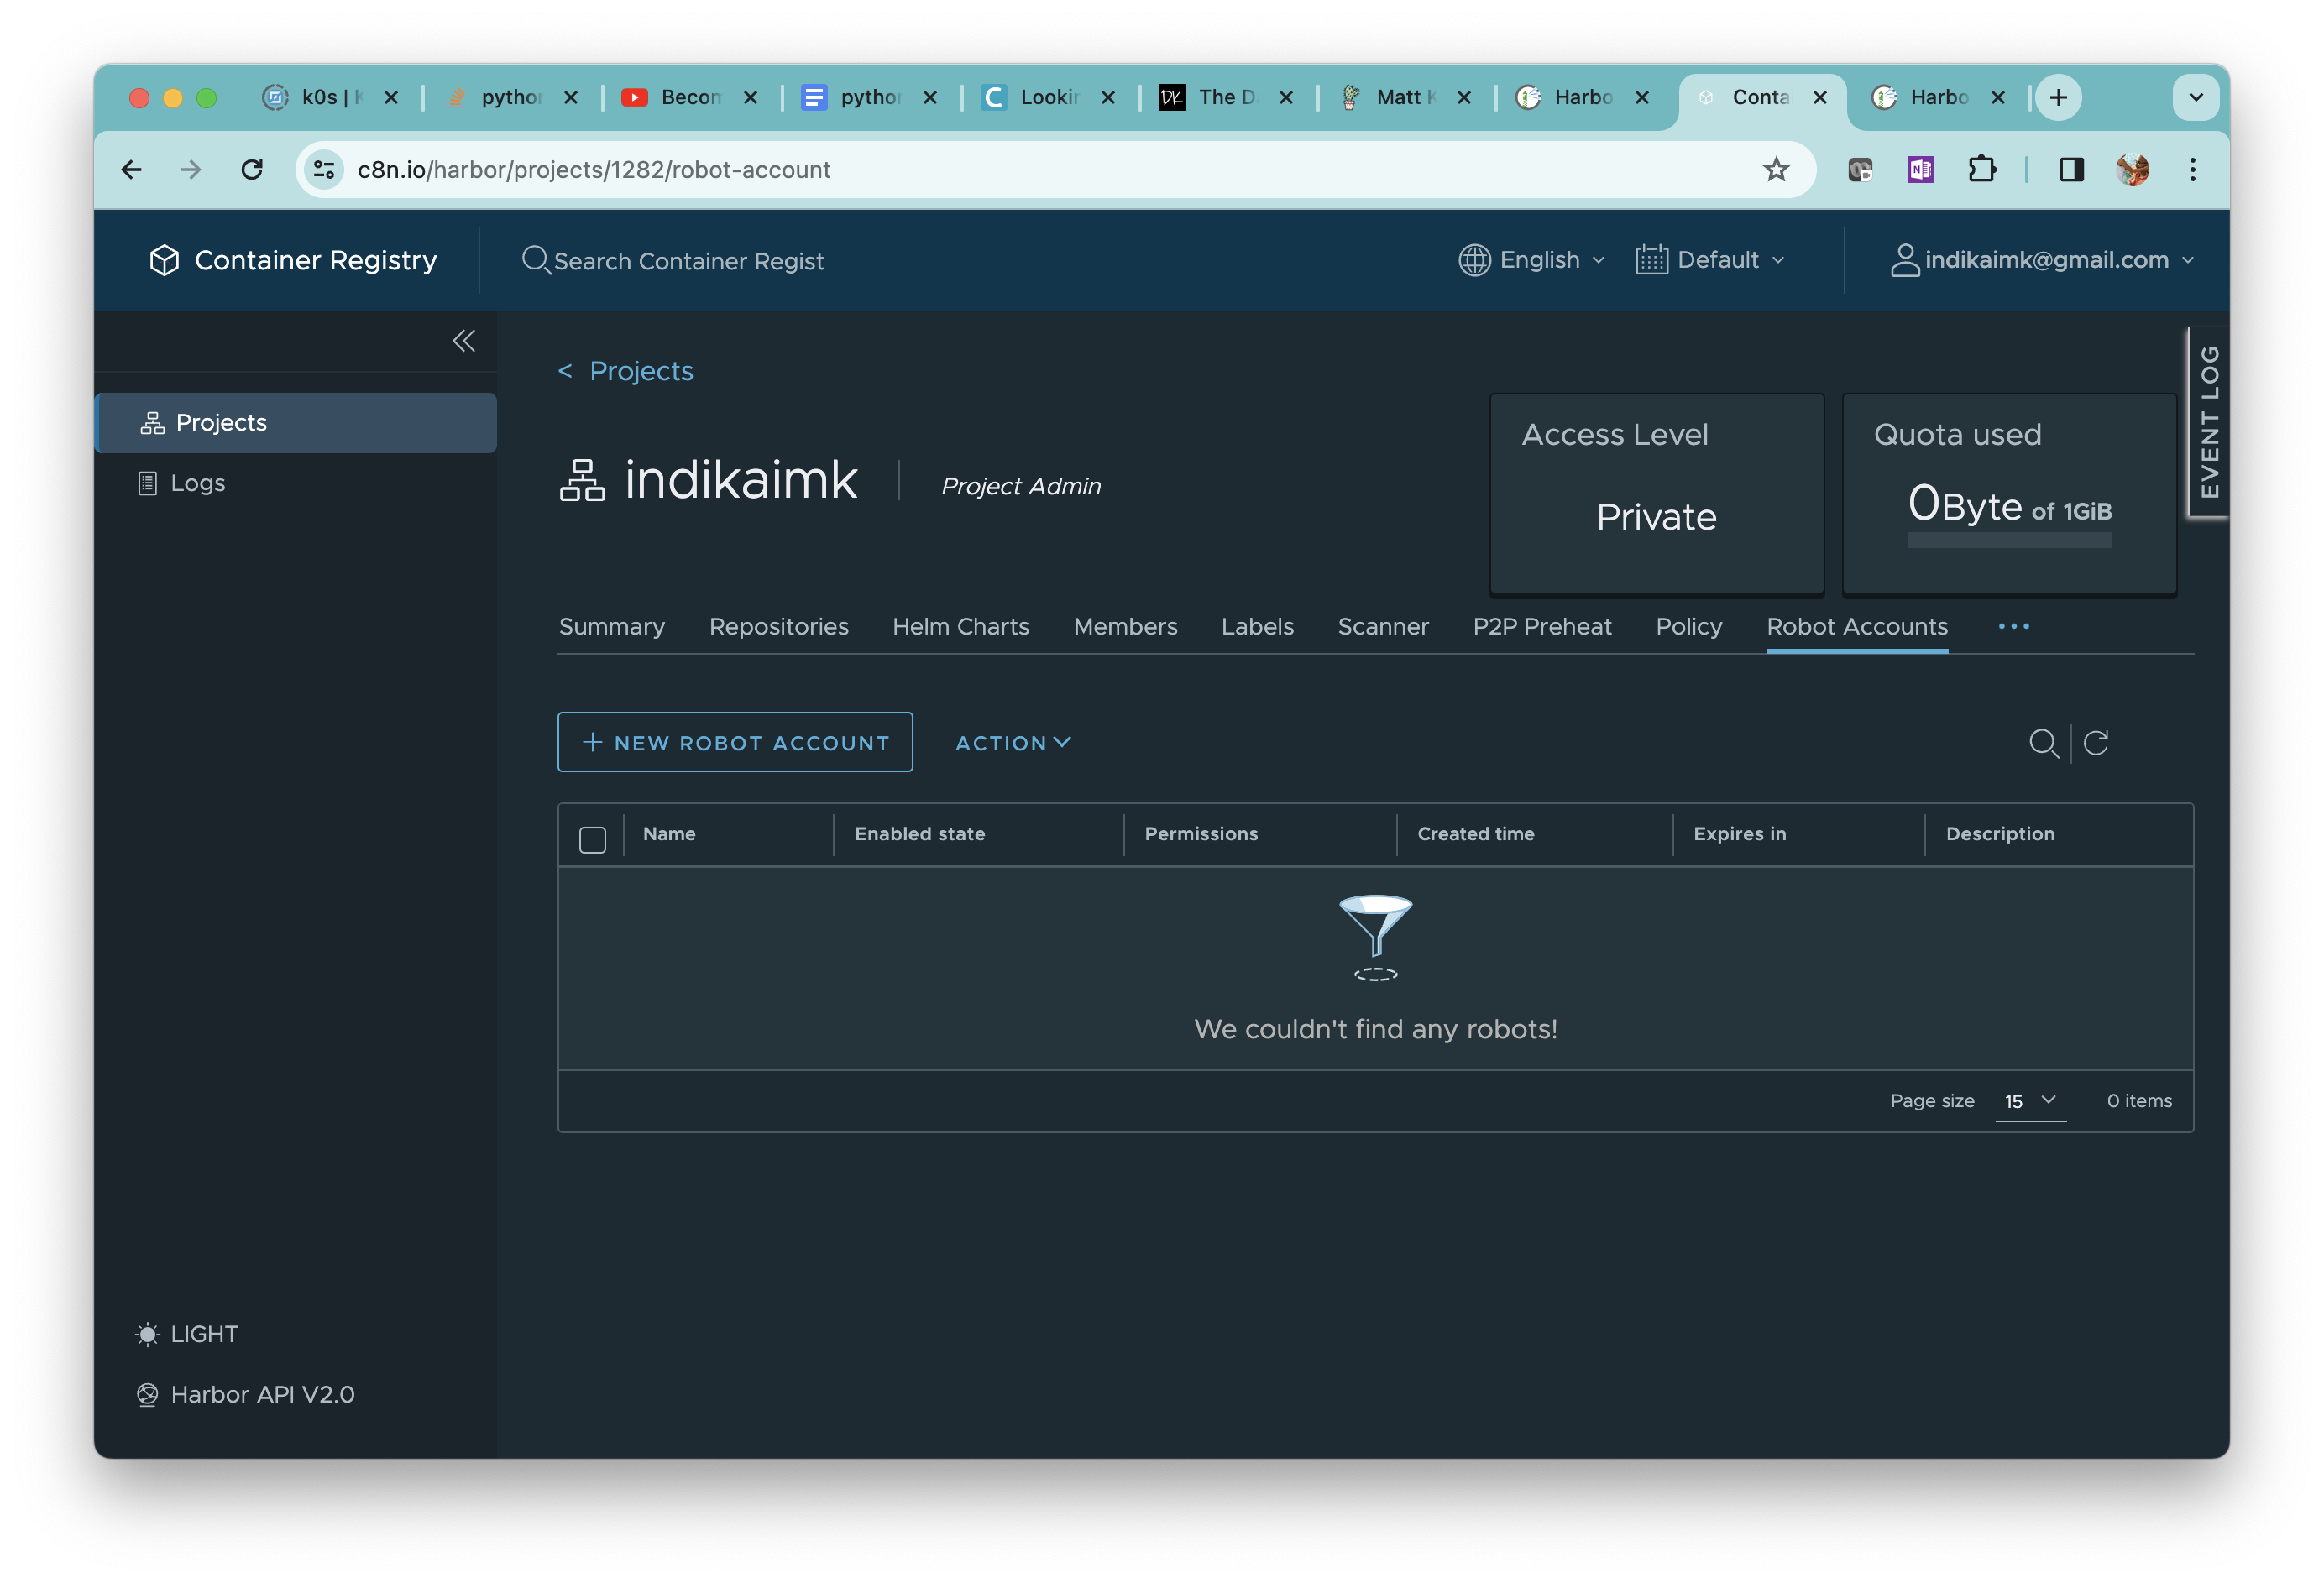
On your project page in the portal, click on Robot Accounts and click on the New Robot Account button.
Type in your username and select Expiration time as Never. Leave the Permission field as it is and click on the Add button.
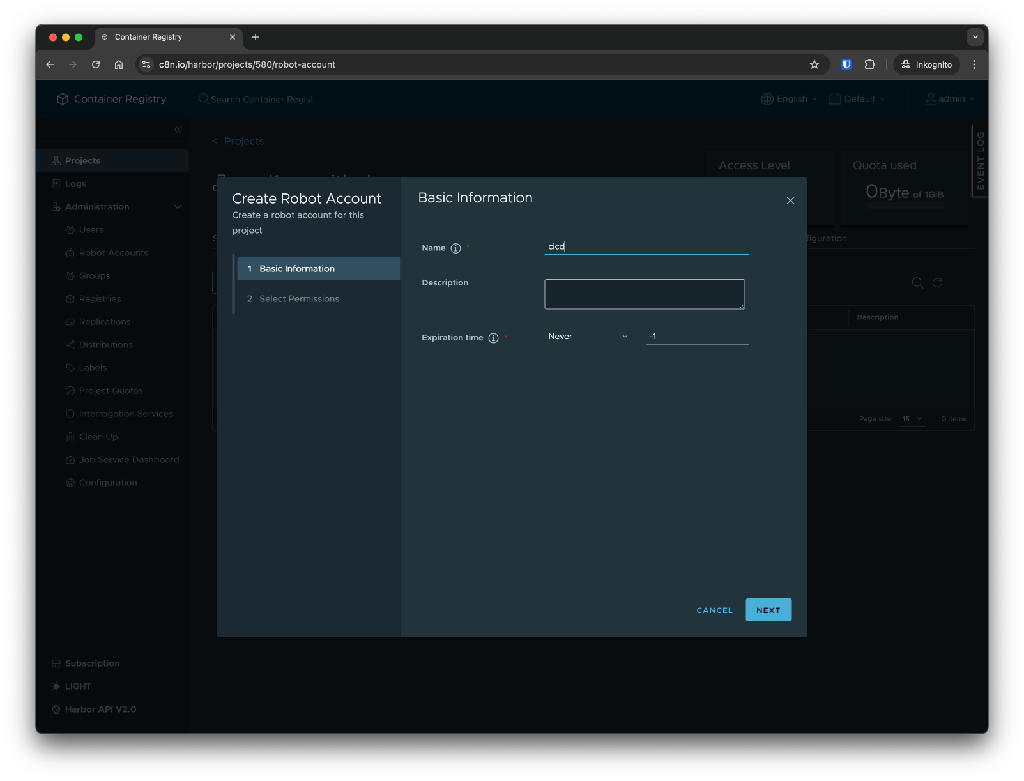
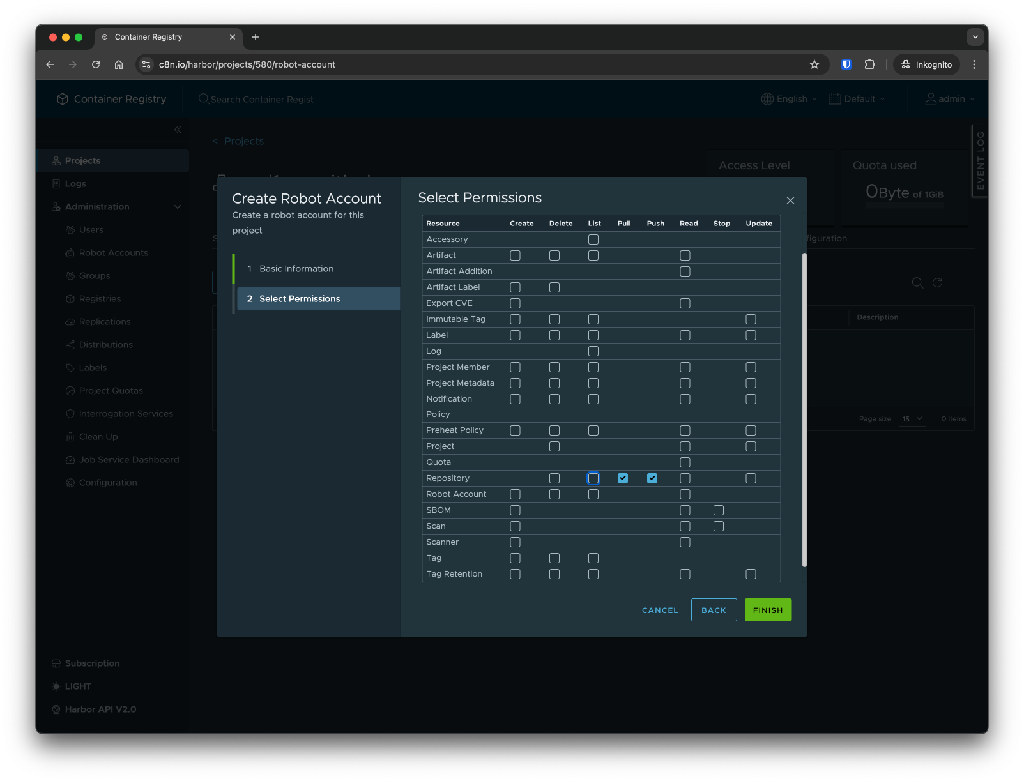
Your username will be in the format robot$<project_name>+username. You must use this username to log in from the Robot Account.
On the next screen, click on Export to File to save the Secret to a file. We require this Secret to log in to the Container Registry portal from the Docker CLI. Remember to safeguard your Robot Account Secrets, as anyone who gets access to a Secret gains access to your repositories.
We shall verify the Robot Account by pushing an image from the developer workstation.
By default, the Docker CLI pushes images to Docker Hub. To push images to a different registry,
we need to tag the image with the path of the registry as <hostname>/<project>/<image>:<tag> format.
So, let’s re-tag the image in the development workstation.
docker image tag my-flask-app:1.0.0 c8n.io/<project-name>/my-flask-app
Make sure to replace
List the images to confirm.
$ docker image ls
REPOSITORY                      TAG       IMAGE ID       CREATED        SIZE
c8n.io/indikaimk/my-flask-app   1.0.0     32436ea99088   17 hours ago   88.2MB
my-flask-app                    1.0.0     32436ea99088   17 hours ago   88.2MB
Login to the Container Registry from the Docker CLI using the Robot Account we just created. Make sure to replace <project-name> with your project name.
$ docker login -u robot_<project-name>+developer c8n.io
Password:
WARNING! Your password will be stored unencrypted in /home/ubuntu/.docker/config.json.
Configure a credential helper to remove this warning. See
<https://docs.docker.com/engine/reference/commandline/login/#credentials-store>
Login Succeeded
Push the image to the Container Registry.
docker push c8n.io/<project-name>/my-flask-app:1.0.0
Go to the Container Registry portal and check the Repositories in your project.
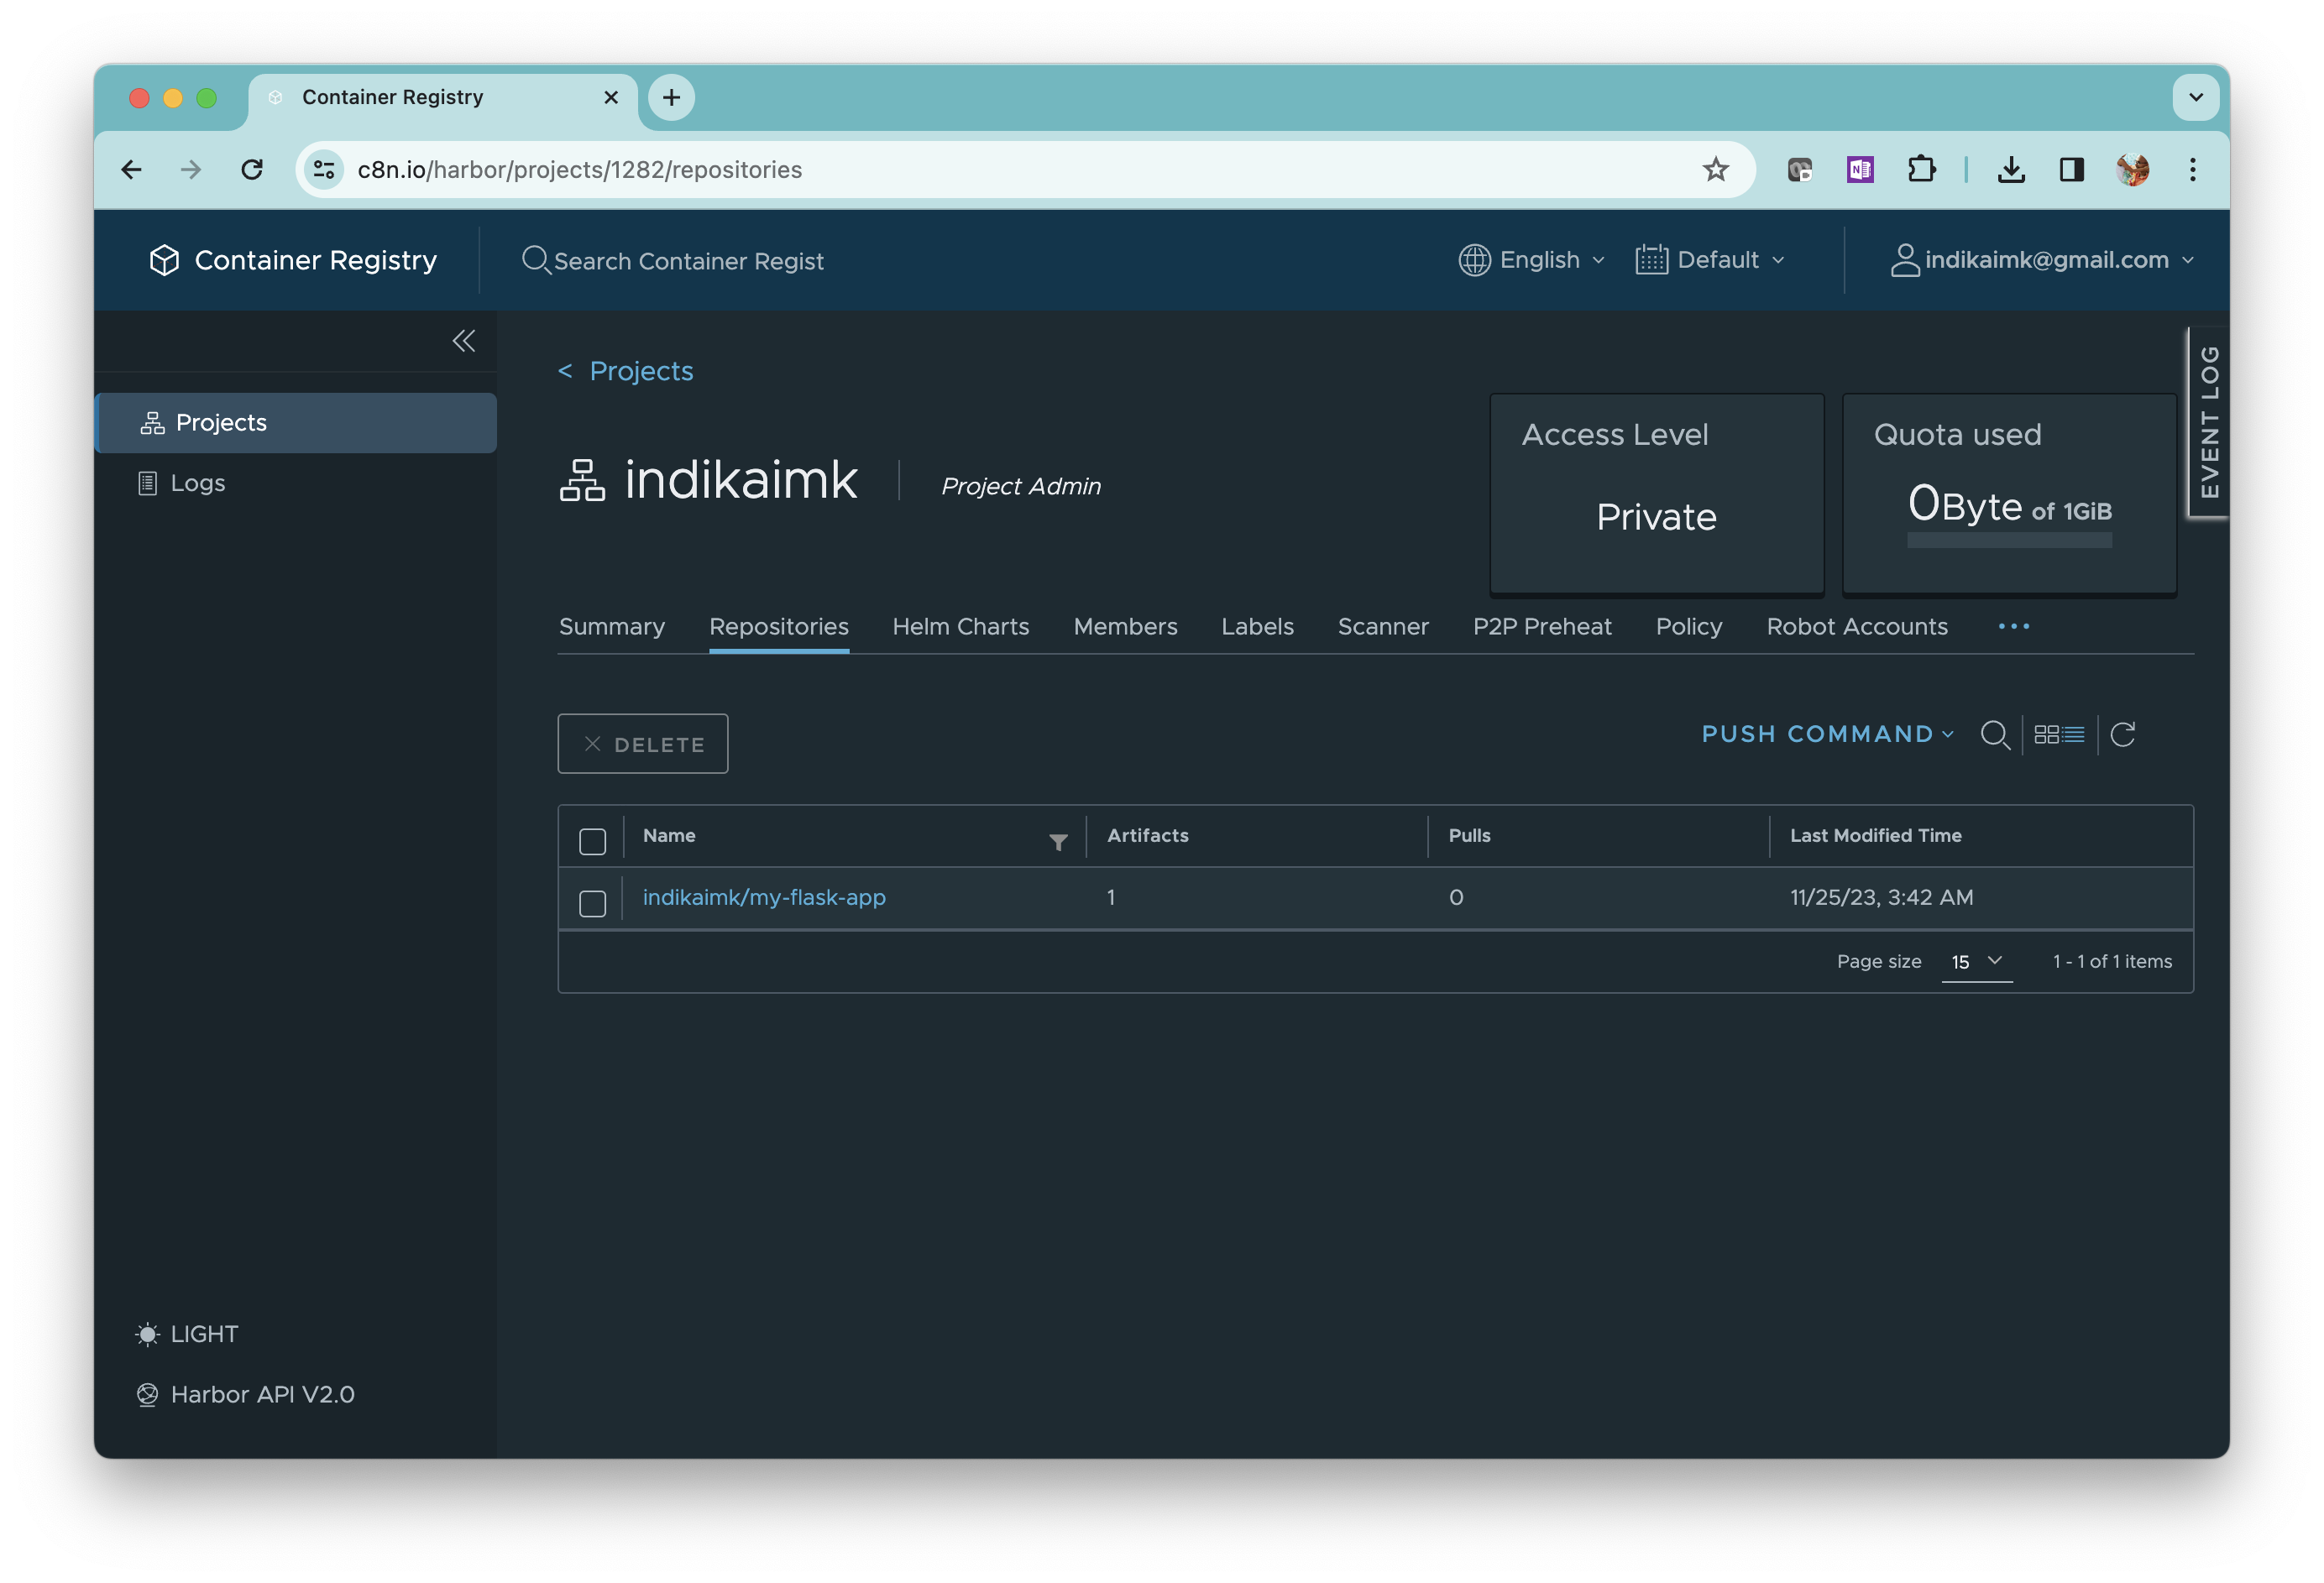
Click on the repository name and check the image that we just uploaded.

We have successfully pushed our image to the Container Registry using the Robot Account.
Automate the build workflow with GitHub Actions
GitHub Actions is a fully-fledged CI/CD workflow management system. Workflows in GitHub Actions are defined in YAML and stored in .github/workflows in the repository.
Here’s the structure of a GitHub Actions workflow.
name: # A name for this workflow (optional)
on: # Event which triggers the workflow
jobs: # Steps of the workflow
Create build.yml in .github/workflows inside the working directory and add the following content.
name: 'Build and push to container-registry.com'  #1

on: #2
  push:
    branches:
      - main

jobs:
  build_and_push: #3
    name: build image and push
    runs-on: ubuntu-latest #4
      steps:
      - name: Set up QEMU #5
          uses: docker/setup-qemu-action@v3

      - name: Set up Docker Buidlx #4
          uses: docker/setup-buildx-action@v3

      - name: Login to container-registry #5
          uses: docker/login-action@v3
          with:
            registry: c8n.io
            username: ${{ secrets.C8N_USERNAME }}
            password: ${{ secrets.C8N_SECRET }}

      - name: Build and push container image #6
          uses: docker/build-push-action@v5
          with:
            push: true
            tags: c8n.io/indikaimk/my-flask-app:1.0.1
Name of the workflow.
on defines the event that triggers this workflow. GitHub Actions triggers this workflow every time we push to the main branch.
Steps to build and push the container image.
Workflows in GitHub Actions run on virtual machines created on-demand. We choose the latest Ubuntu OS for the virtual machine.
Set up QEMU, which is a prerequisite for running multi-platform builds with Docker Buildx.
Set up Docker Buildx, which is a Docker CLI plugin for extended build capabilities.
Login to 8gears Container Registry with the Robot Account. Since we keep build.yml inside the repository, it’s recommended not to use plain text credentials here. So, we use GitHub Actions Secrets. We will create the secrets in the next section.
Build and push the container image. Note the use of the tag c8n.io/<project-name>/my-flask-app:1.0.1 to select our project in the Container Registry. Make sure to replace <project-name> with your project name.
Create GitHub Secrets
Now, we will create the GitHub Actions Secrets that we referred to in the workflow file.
Log in to GitHub and go to Settings in the my-flask-app repository.
In the right-hand side menu, inside the Security section, click on Secrets and variables and click on Actions.
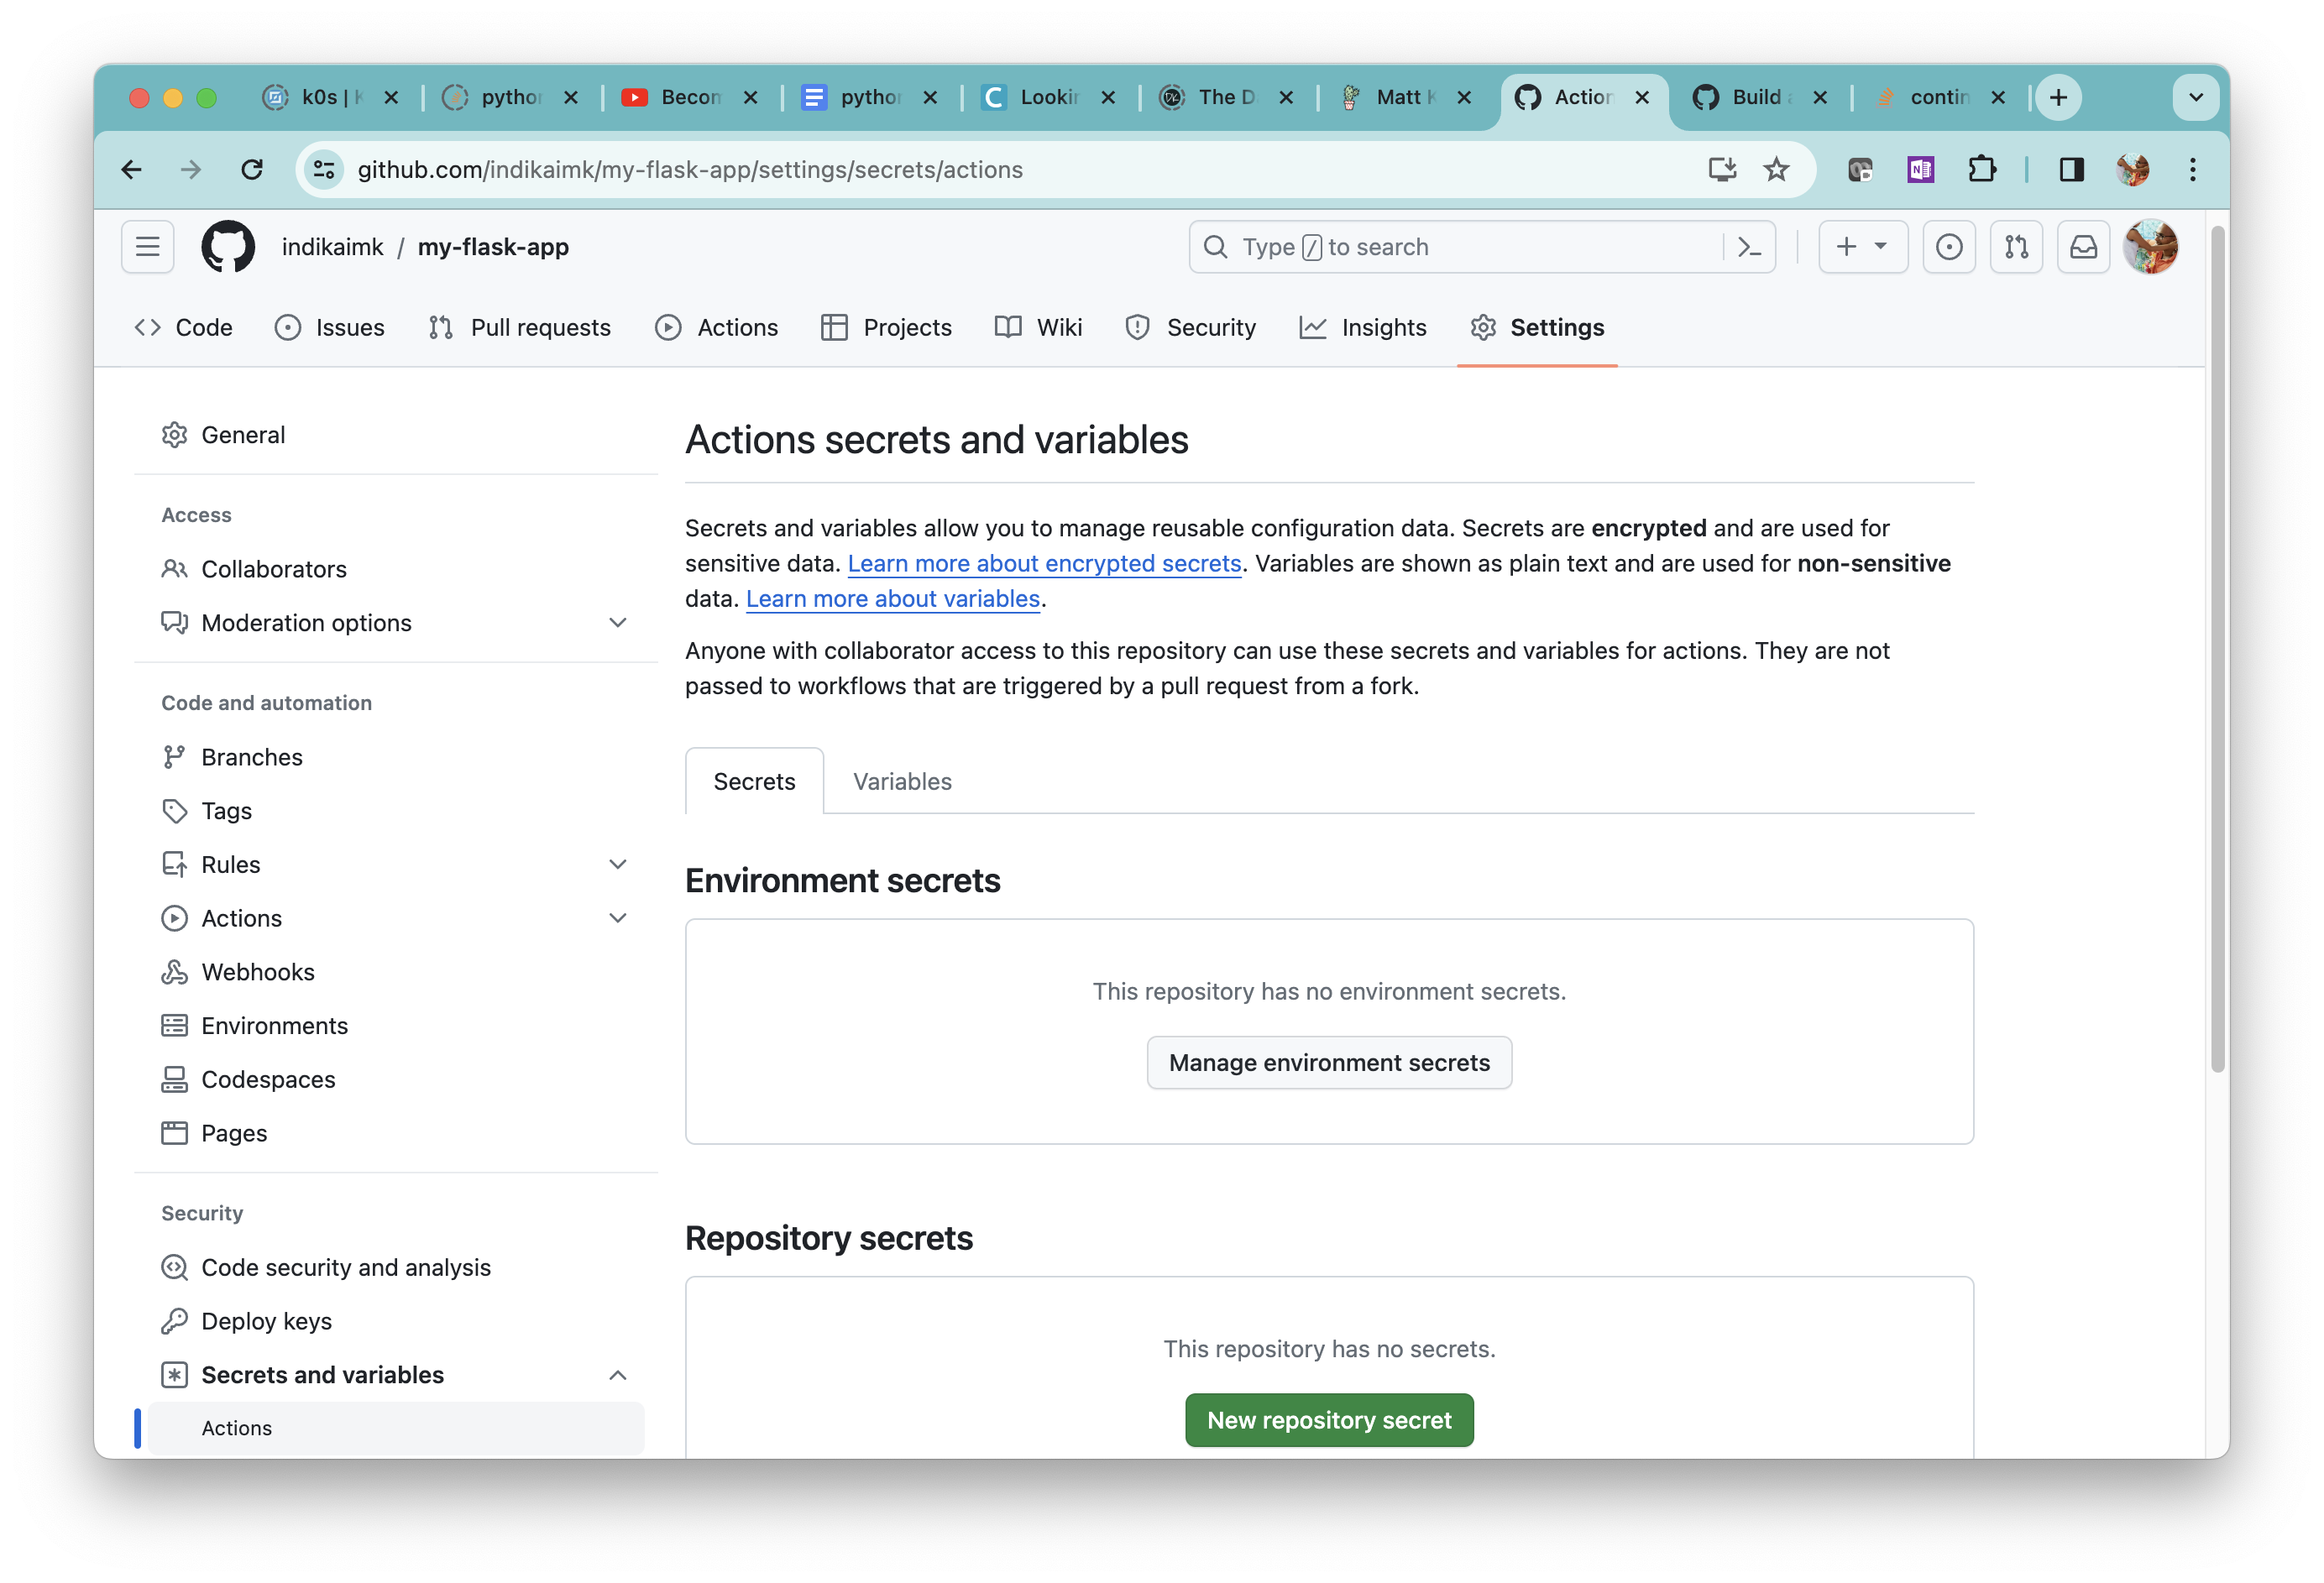
In the Repository Secrets section, click the New repository secret button.
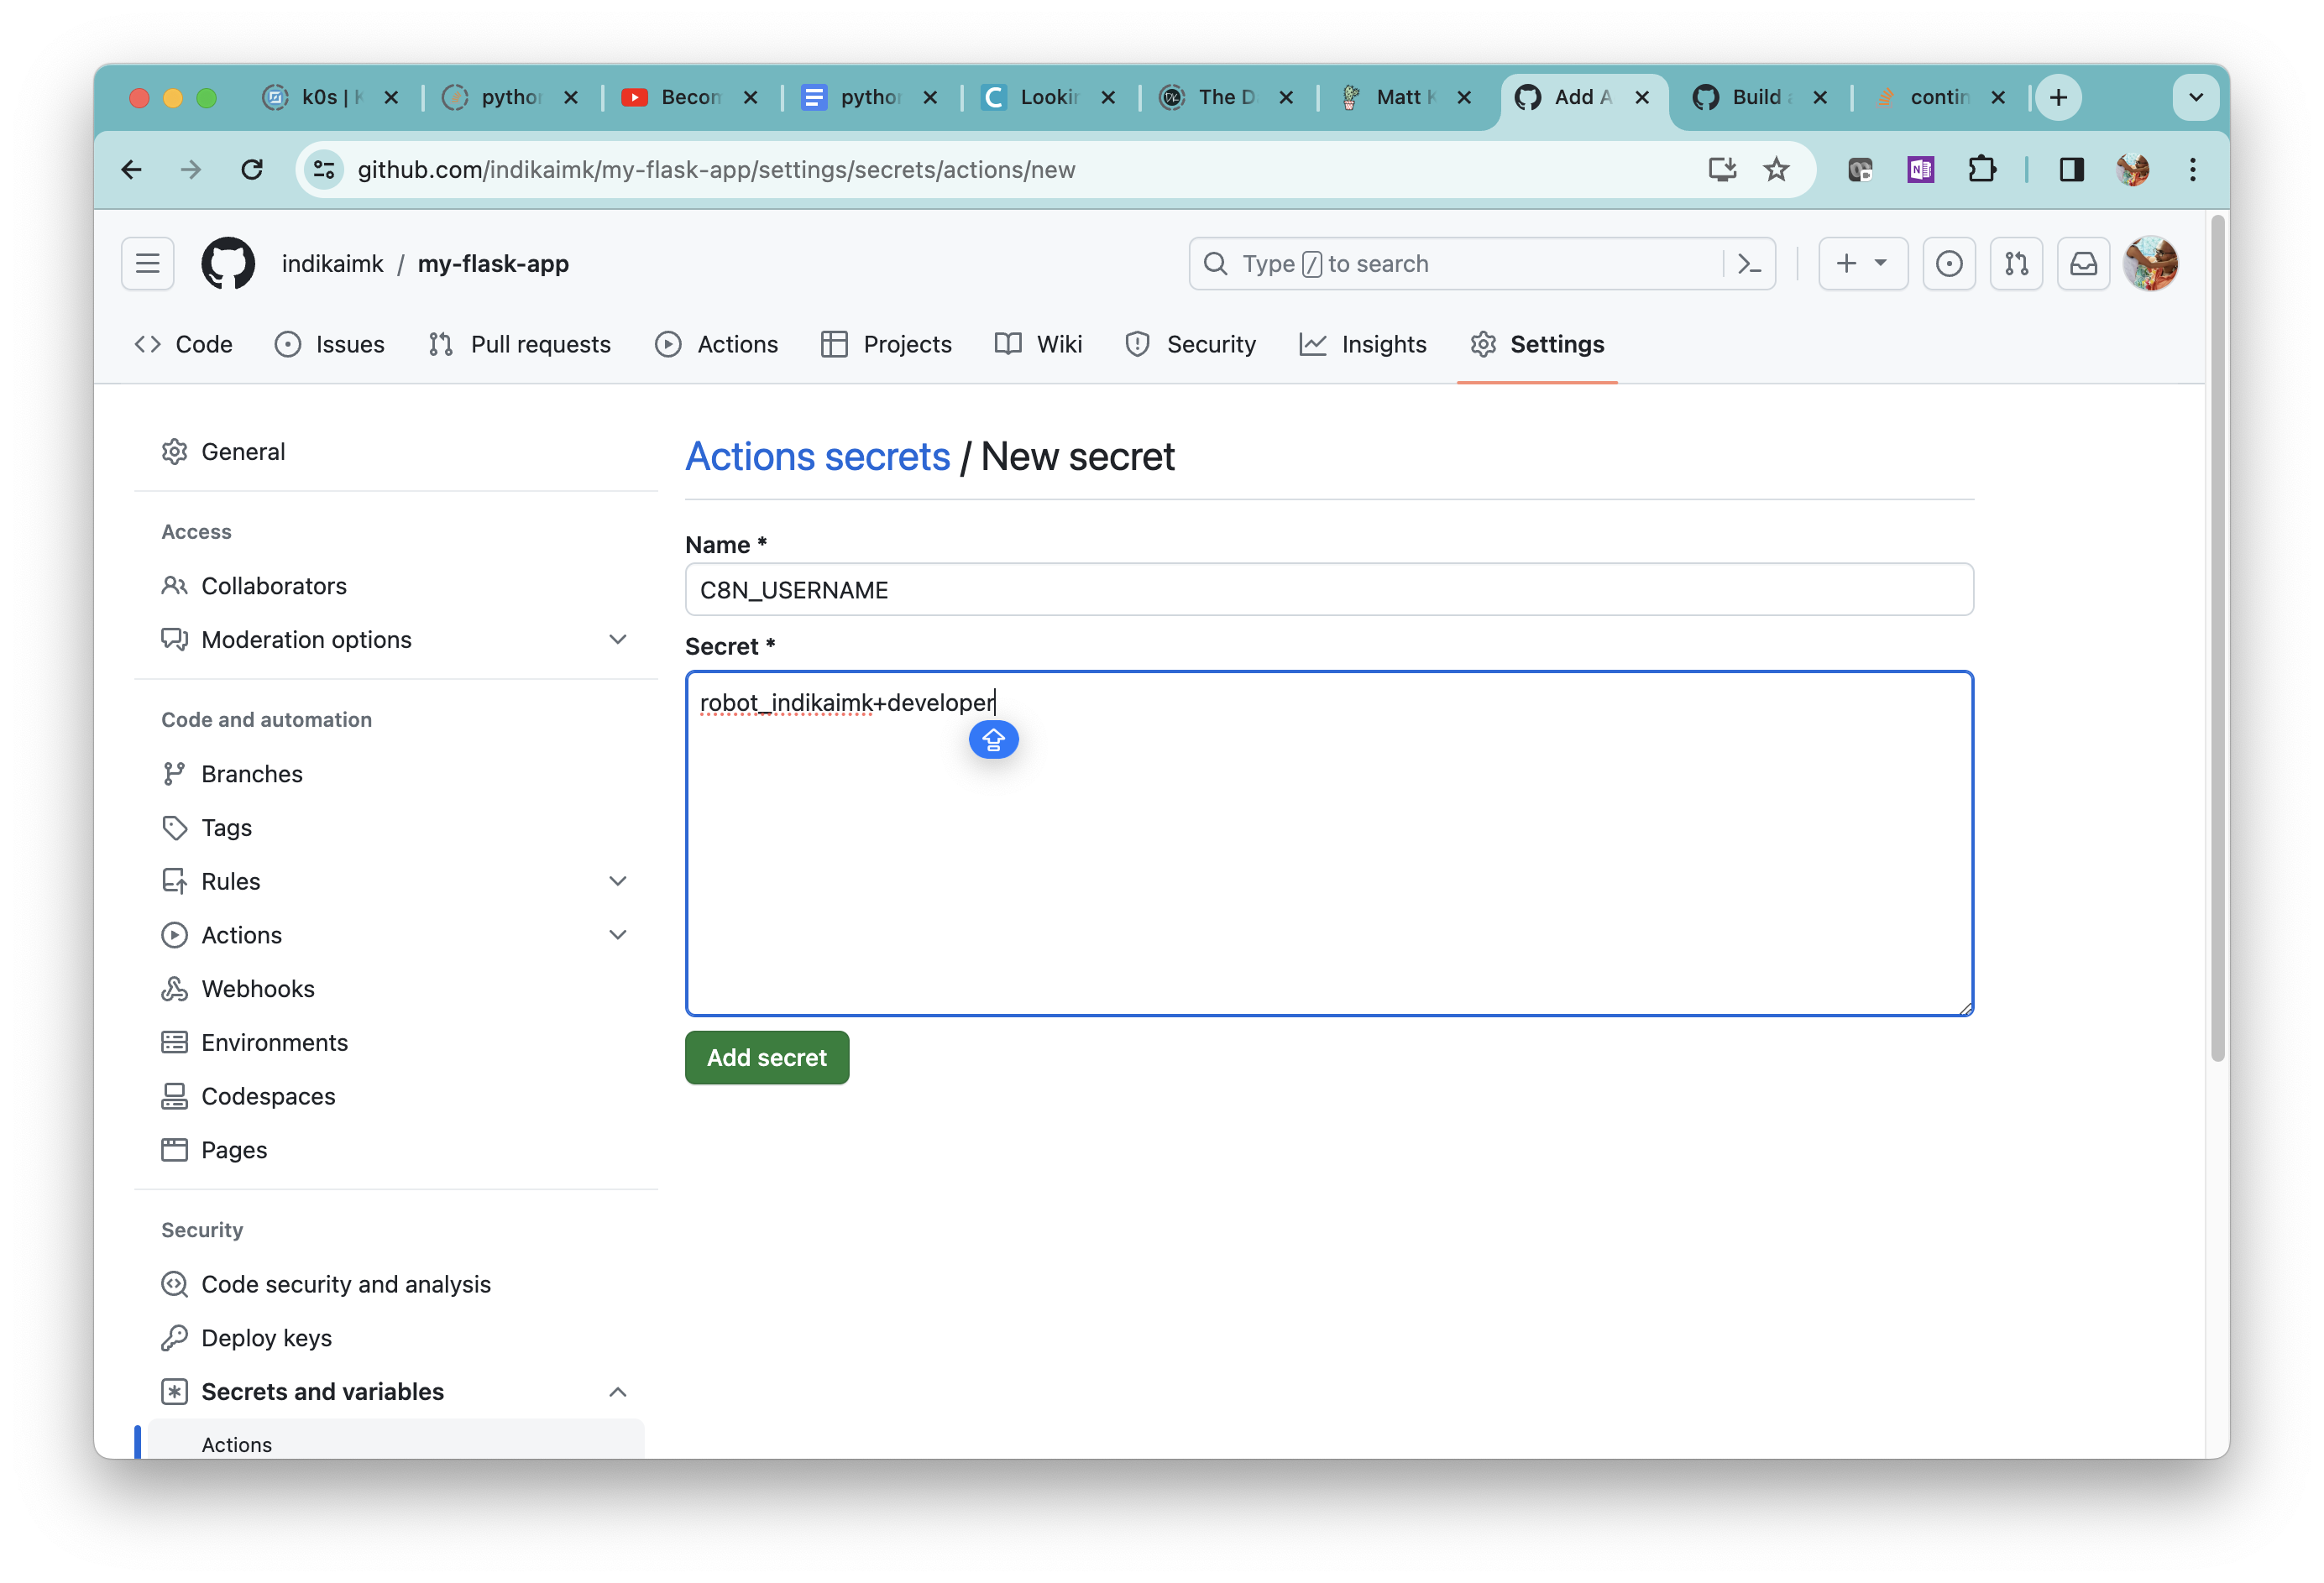
Type in the name as C8N_USERNAME and the secret as robot$<project-name>+developer, which is the username of the Robot Account. Make sure to replace <project-name> with your actual project name.
Similarly, create the secret C8N_SECRET with the Secret of the Robot Account.
Run the GitHub Actions Workflow
To run the workflow, push an update to the main branch in the GitHub repo.
git add .
git commit -m "updated workflow"
git push origin main
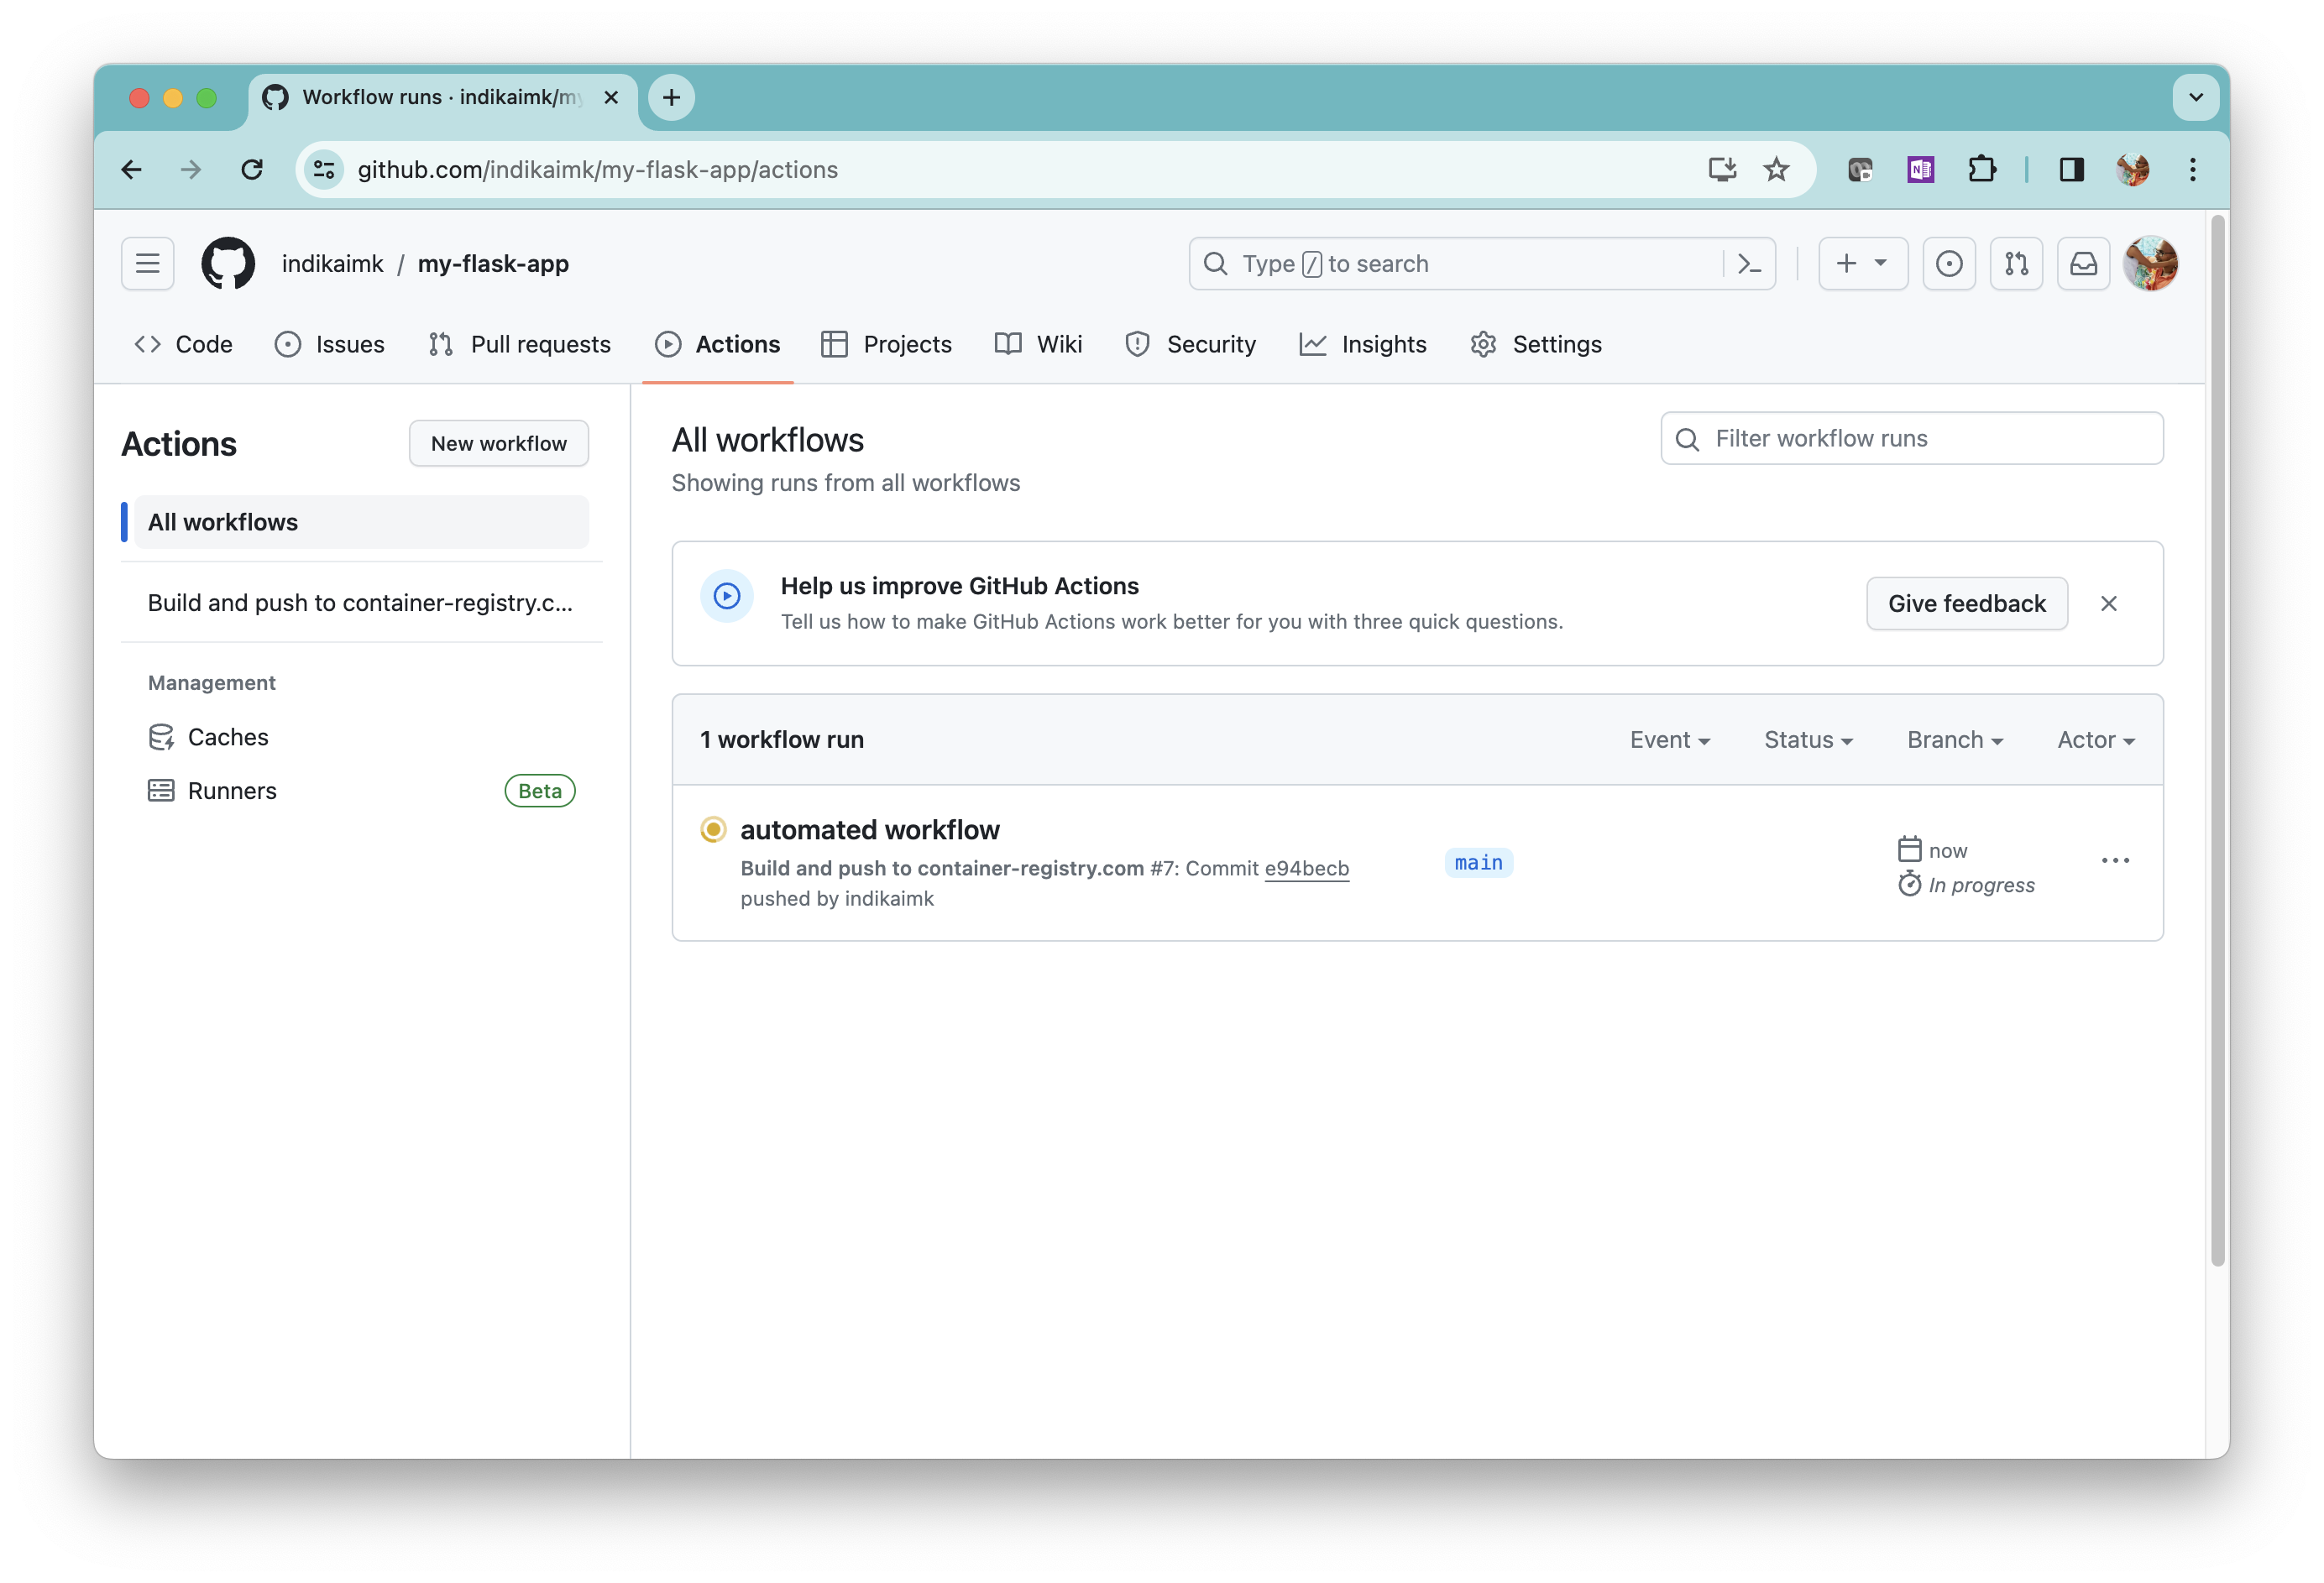
Go to the GitHub repo page and click on Actions. The workflow is still running - indicated by the amber color icon. It will take a few minutes to complete.
Once the workflow is completed, the icon will turn green.
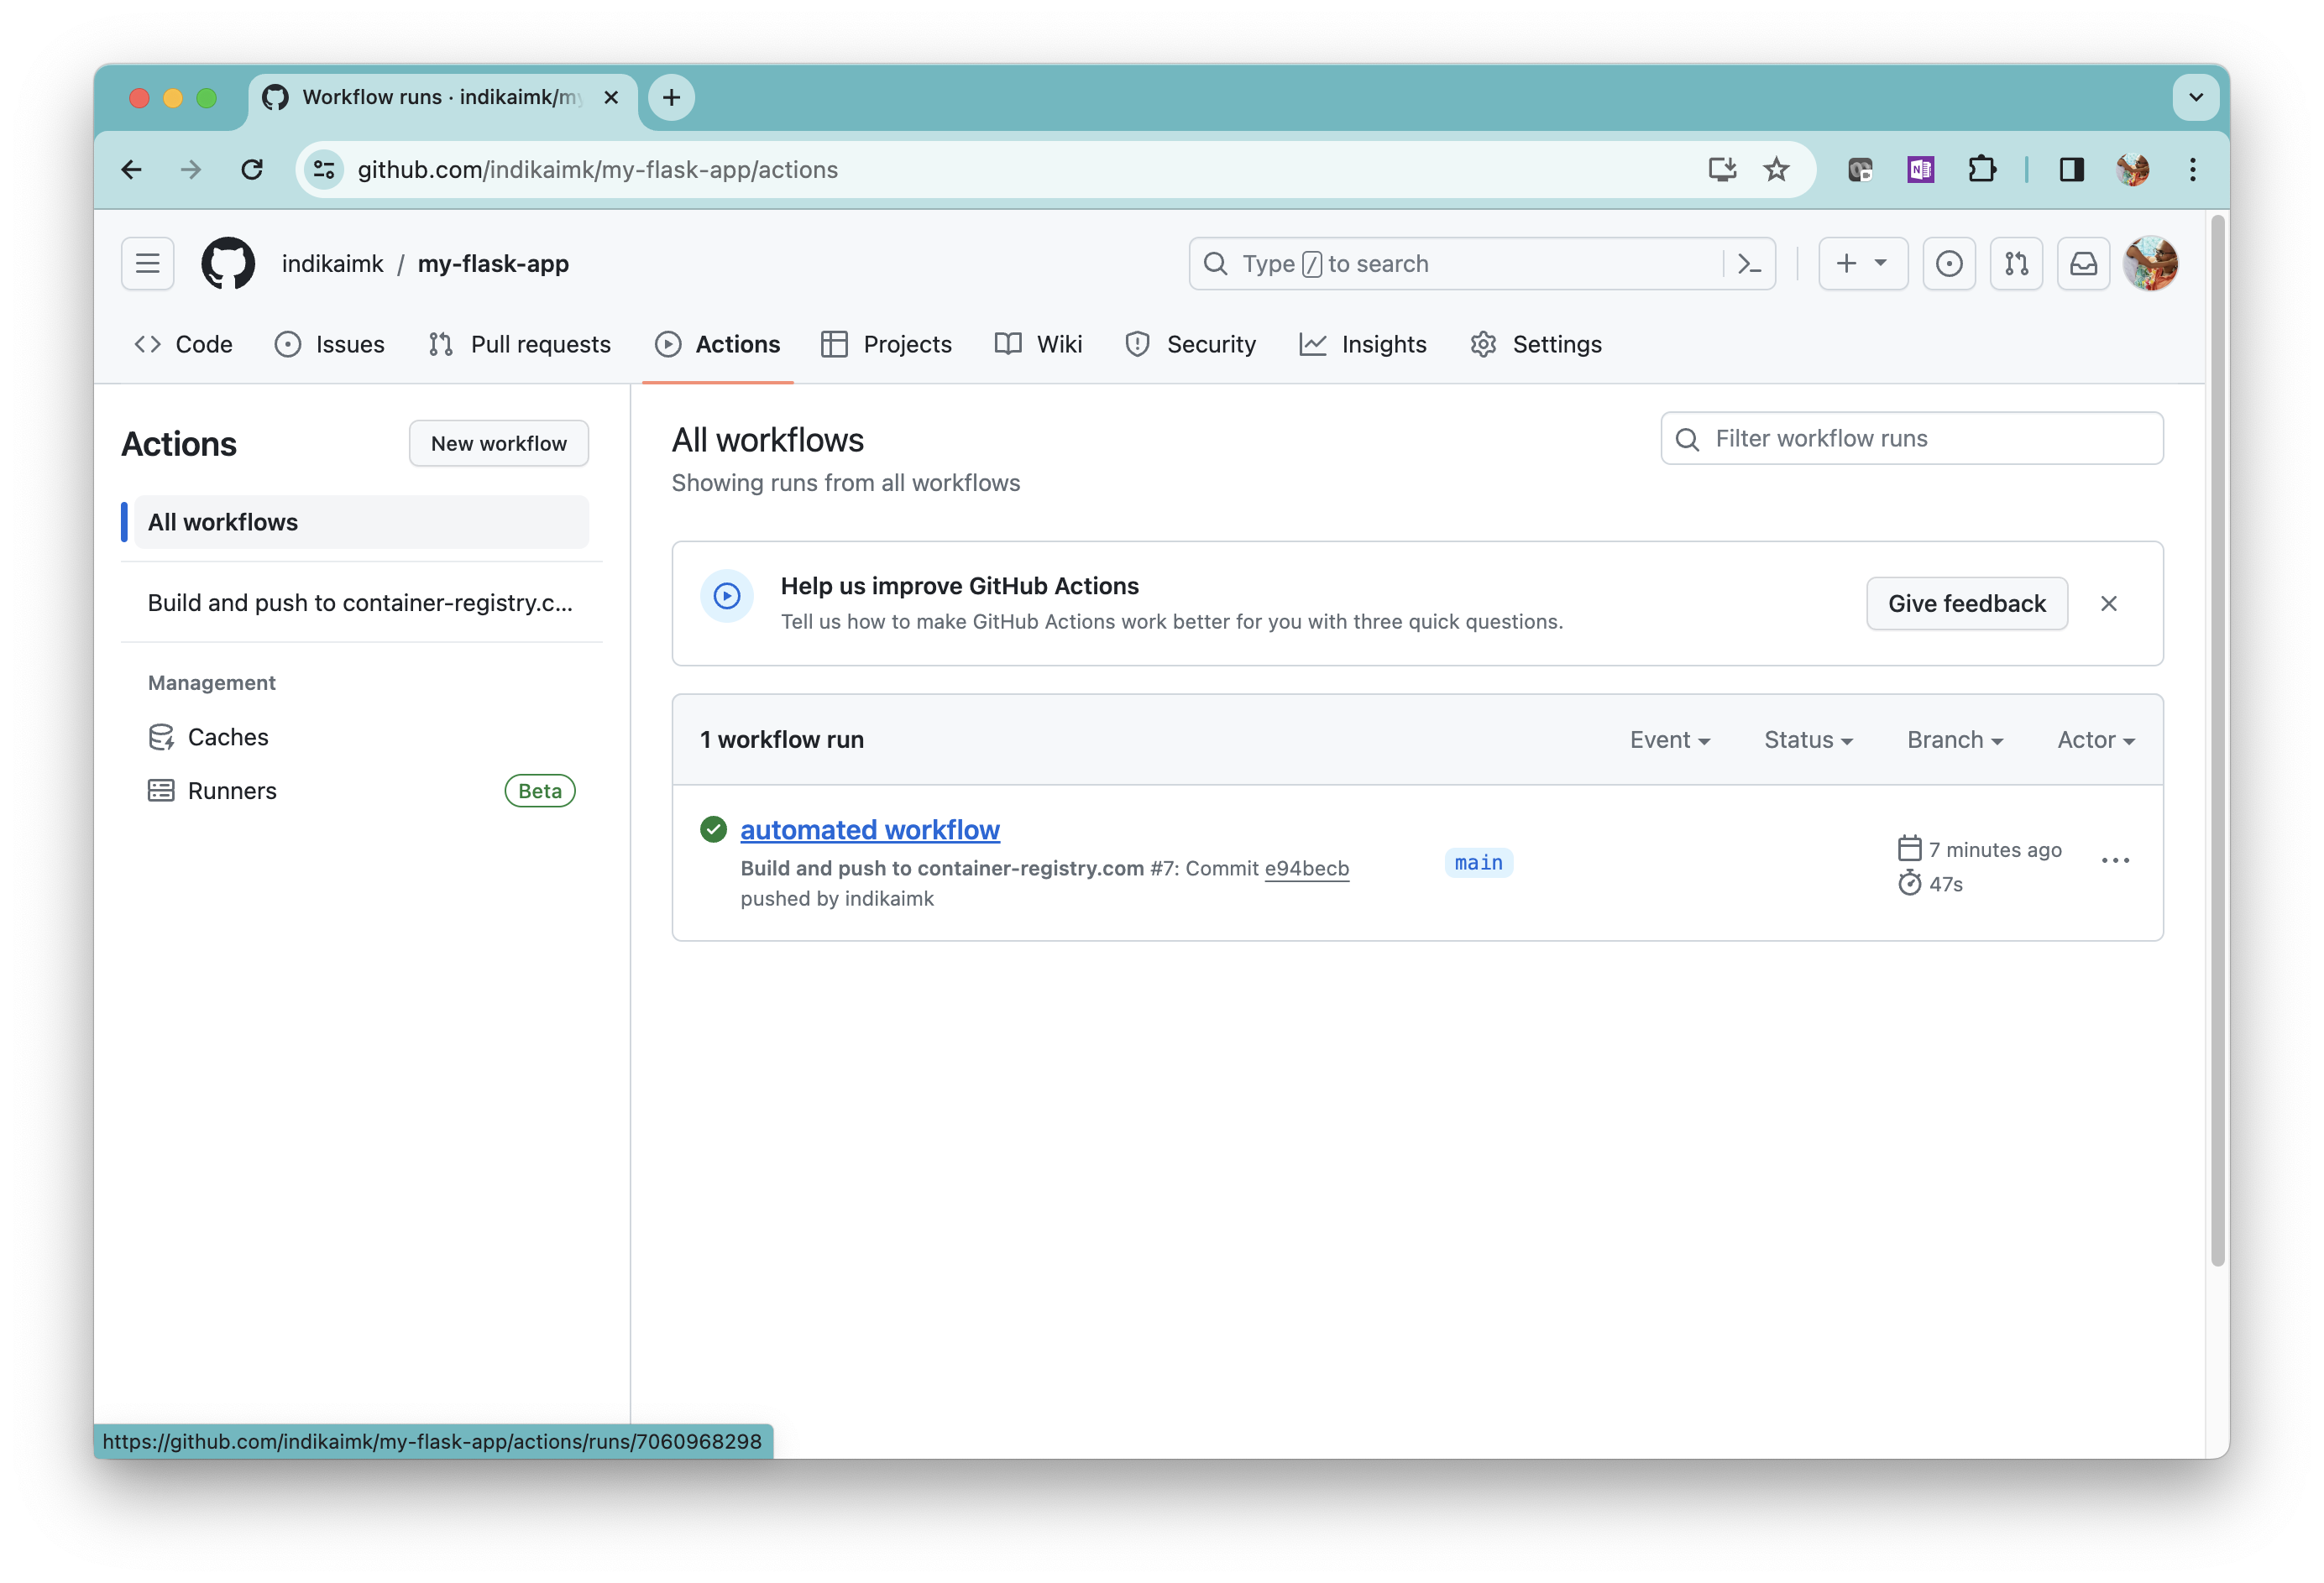
To check the workflow logs, click on the workflow. Had the workflow failed, you can identify the reason for failure by analyzing these logs.
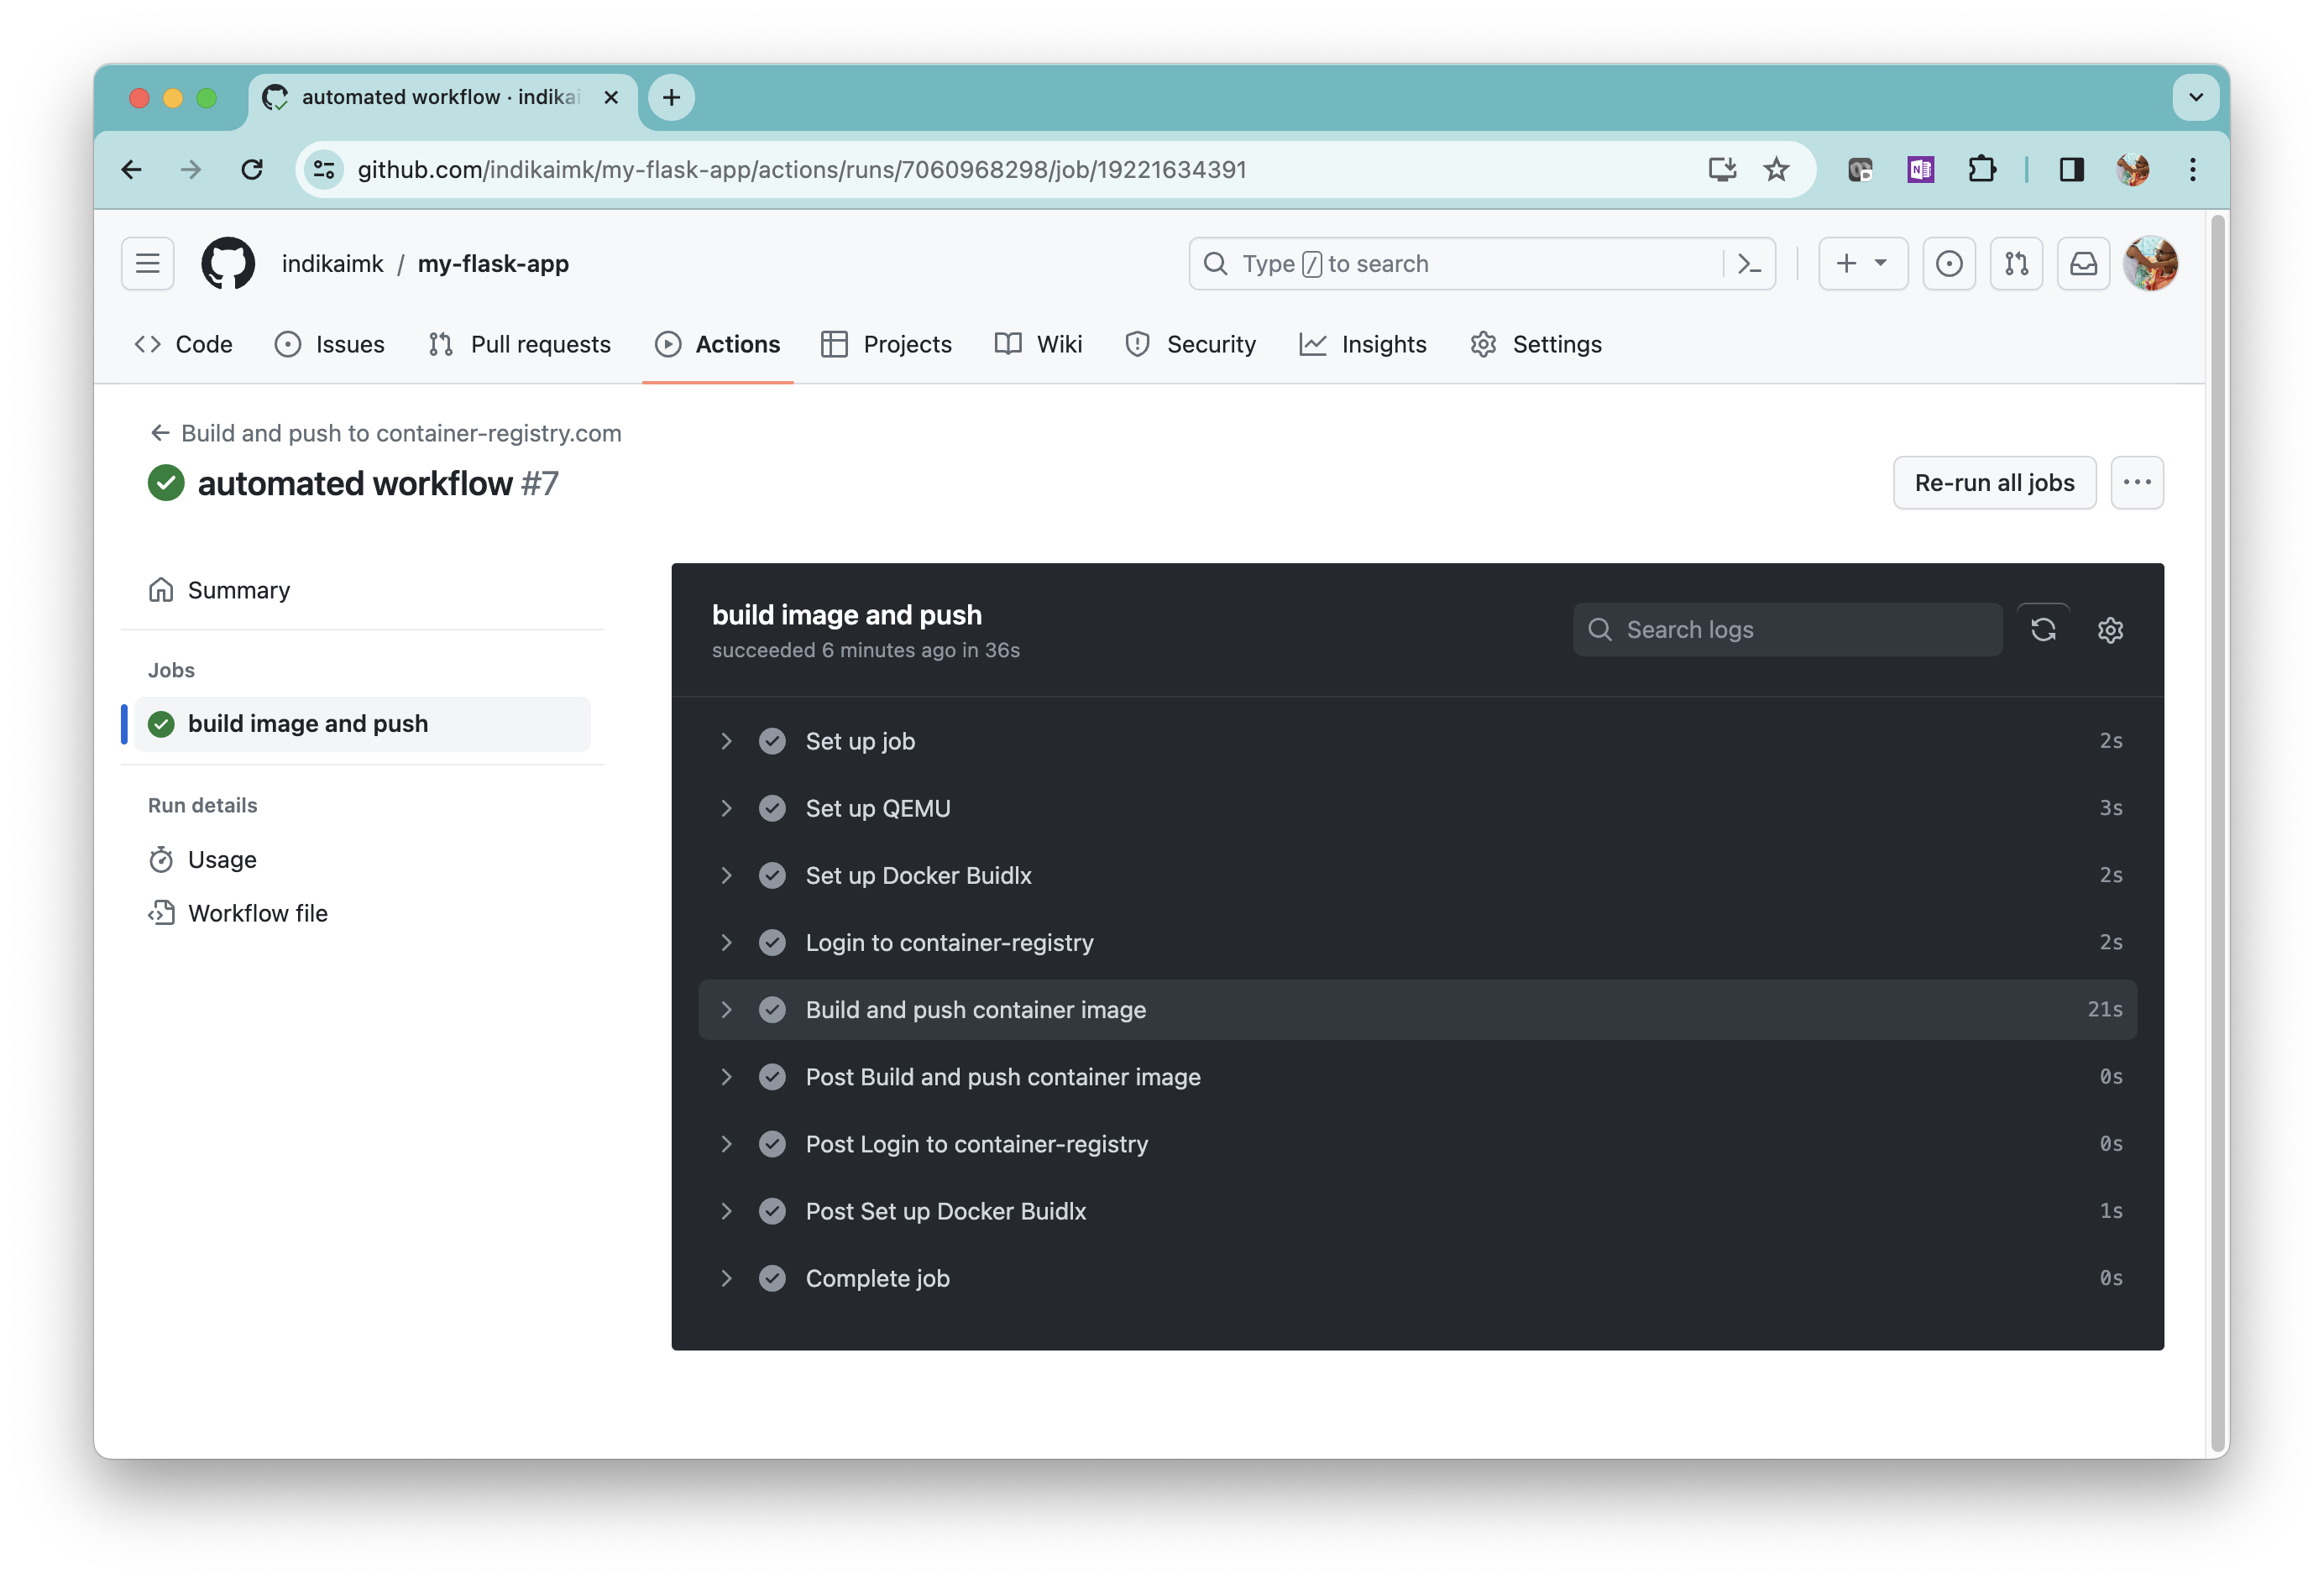
When the workflow is successfully completed, the new version of the image will be available in the container registry.
Go to the 8gears Container Registry portal and check the repository.
Click on the repository name and confirm that the new version 1.0.1 is available in the registry.

Wrapping up
Flask is a popular web application framework written in Python. We demonstrated in this tutorial end-to-end how you can automate your Flask development workflows with 8gears Container Registry and GitHub Actions.
Give it a try in your next project.
8gears Container Registry is a Harbor-based container registry as a service. You can start free and go up to any scale with our flexible plans.
Discover our offer