Manage Project Users
The user that created a project and the super admin of the instance can add users to projects to enable them to perform different actions.
It is possible to pull images from a public repository without being a project member. But a membership grants users other rights depending on the role they are assigned.
Project Member Permissions
Each member holds one role, and the role decides what they may do. For the full matrix, see Project Member Permissions.
Adding Project Members
By default, any new project has no users except the project admin that created it. Super admins can access projects that they are not members of.
To enable your collaborators to work on the project, you need to add them. There are two methods for doing this. An important prerequisite is that they must be users of the same instance. If they are not, refer to this article to add users to the instance.
Regardless of the method you want to use for adding project members:
- Go to the Projects section in the navigation pane;
- Open the project in detailed view;
- Go to the Members tab.
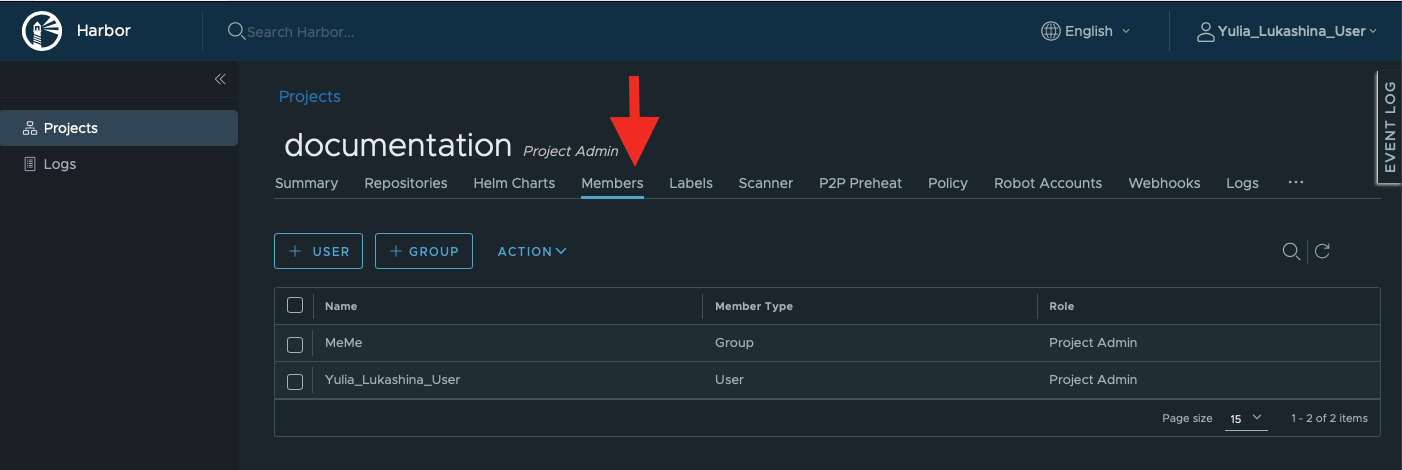
Adding Users One by One
If you want to add single users, use + User button. Start typing in the name and a dropdown with a few suggestions will appear.
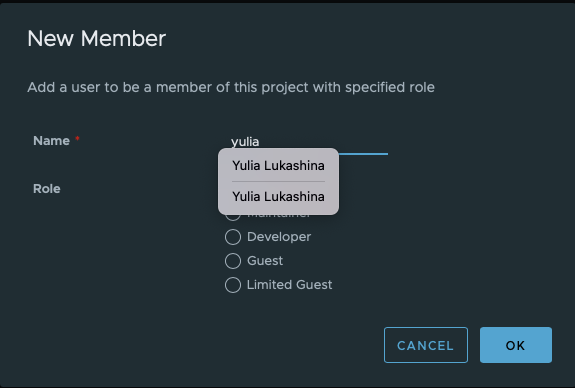
By default, every new user is granted the project admin role, thus, acquiring the same rights as the project creator has. Remember to change this, if you want to restrict the permissions level.
Adding LDAP/AD User Groups
Prerequisites
This method is available for instances using LDAP/AD authentication. Read about configuring this method of authentication here.
Another important Prerequisite is that you must enable the memberof feature on the LDAP/AD server. It is explained in the same guide mentioned above, as well as in this external technical note.
Eventually, you need to create user groups on your LADP/AD server since, with this authentication method, the super admins cannot manage users inside the Container Registry interface.
Steps
- Click + Group button;
- Select a user group:
- If you use the group option for the first time, and do not have any user groups in your Container Registry yet, select Add a group from LDAP to project member.
- Enter the LDAP Group DN;
- Optionally: give your group a catchy name.
- If you already used some LDAP/AD groups, select Add an existing user group to project members and start typing the name of the group.
- If you use the group option for the first time, and do not have any user groups in your Container Registry yet, select Add a group from LDAP to project member.
- Assign a role to the new project group.
The corresponding permissions will be granted to all users in this group.
Adding OIDC User Groups
Prerequisites
- This method is available for instances using OIDC as authentication method. Read about configuring this method of authentication here.
- User groups must be created in the OIDC provider workspace.
Steps
- Click + Group button;
- Type in the correct name of the group as it exists in the OIDC provider;
- Assign a project role to this group.
The corresponding permissions will be granted to all users in this group.
Deleting Users
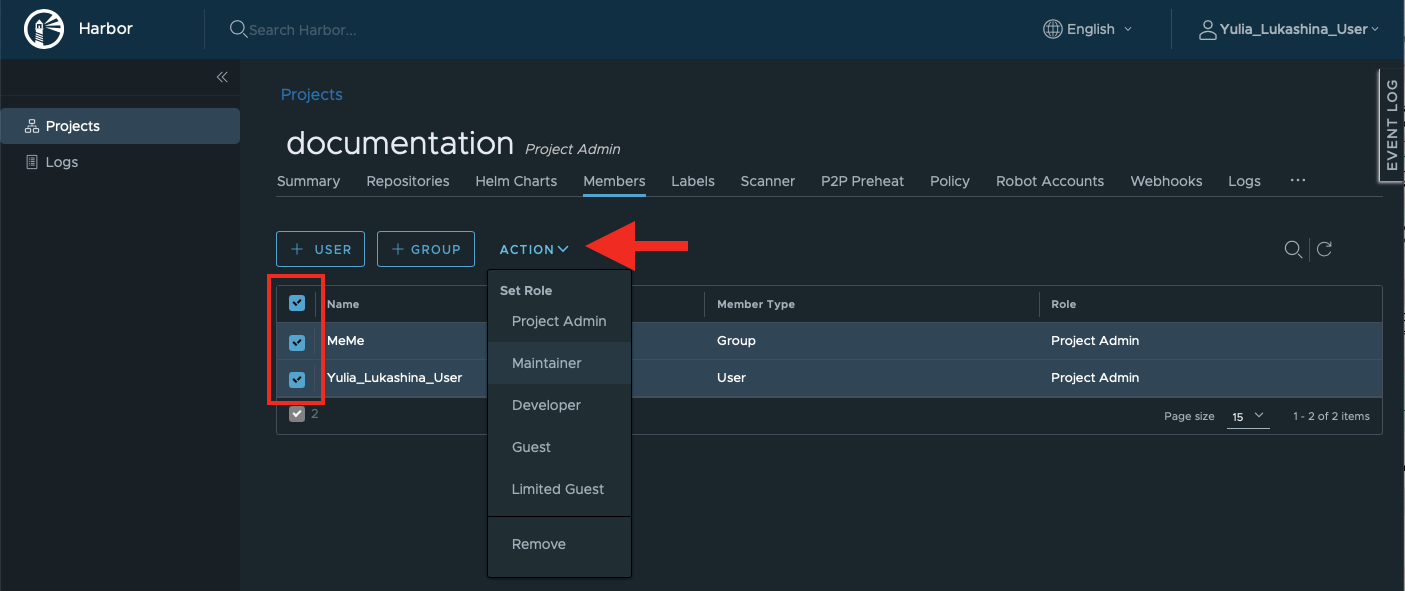
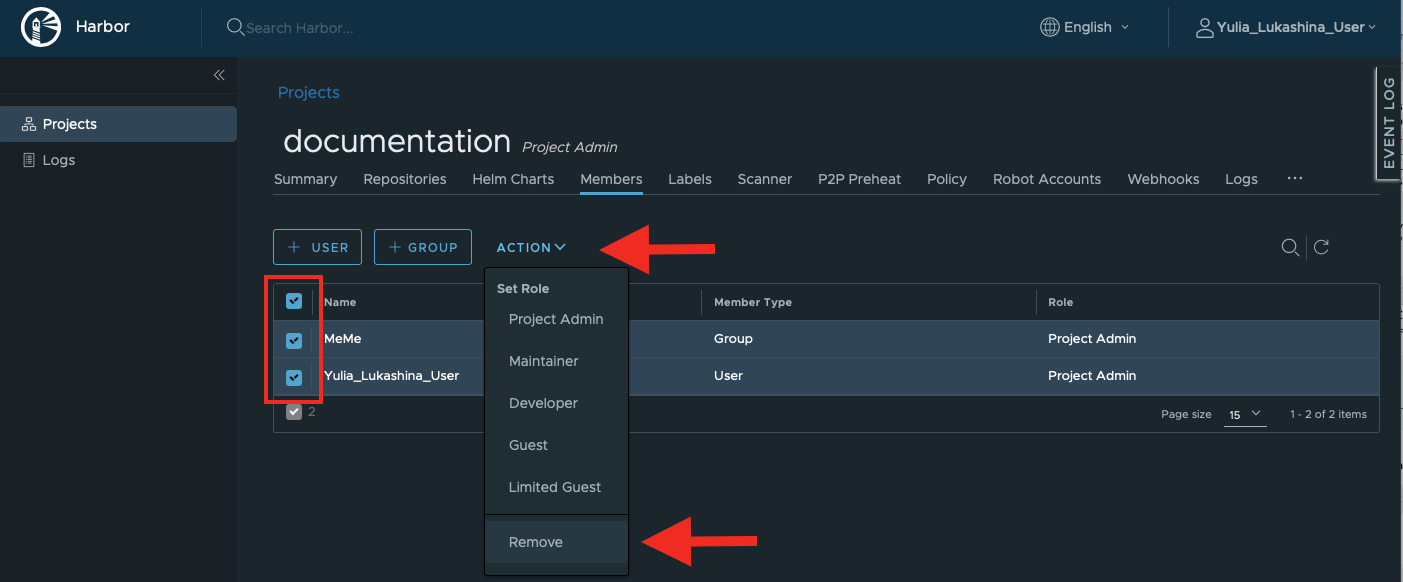
To delete one or a few users, click on the tickbox next to the user entry, then go to Actions and select Remove.
Changing Project Role
To change the project role for one or a few users, check the tickboxes next to their names, click Actions, and select a new role.