Enable Webhooks
A project produces events worth acting on: finished scans, quota warnings, new pushes. Add a webhook, and Container Registry sends them to Slack or to any endpoint you choose.
Prerequisites
Webhooks must be enabled on the instance level by your system administrator (super admin). The instructions are available here.
You must be a project administrator to add webhooks to the project.
Get Your Webhook URL
You need an endpoint URL that is able to receive HTTP/HTTPS POST requests.
HTTP or HTTPS
Configure a webhook listener on a server that will receive messages and perform further actions if their content requires so.
Slack
You can configure Slack, a popular team messenger, to receive notifications from your project. For this, you need:
- a Slack account;
- a Slack workspace;
- a target channel inside this workspace;
- an app with enabled incoming webhooks.
For the last step, there are two methods to implement it:
- Add the existing legacy Incoming Webhooks app from the Slack marketplace:
- Go to https://slack.com/apps/A0F7XDUAZ-incoming-webhooks?tab=more_info;
- Click Install;
- On the following page, select your channel and click Add Incoming WebHooks Integration.
- Alternatively, create a new Slack channel:
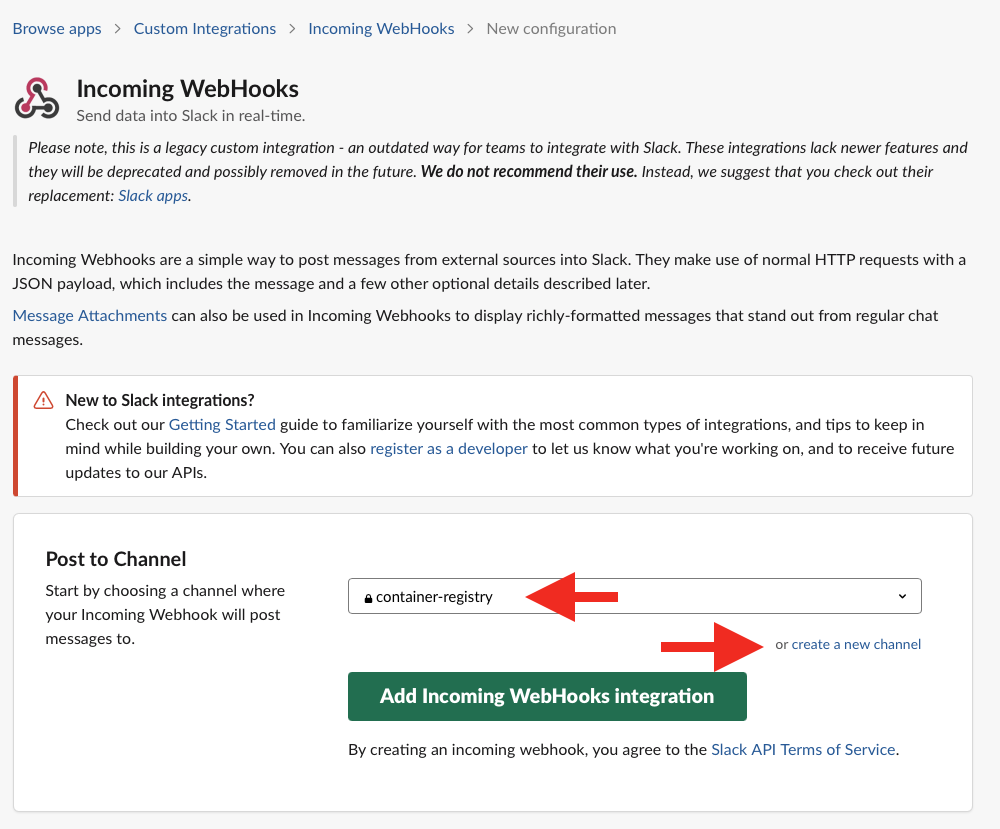
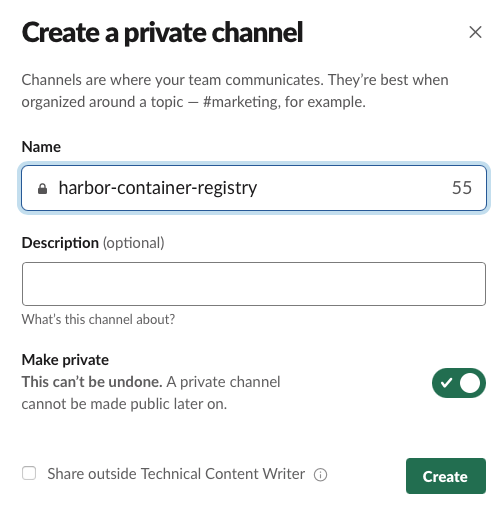
- You’ll be redirected to the Setup Instructions page where you can copy your webhook URL:
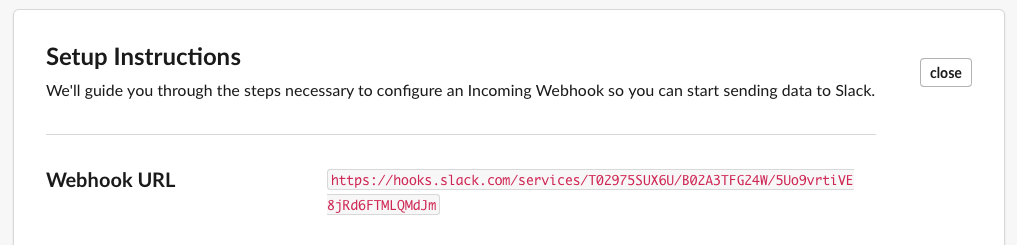
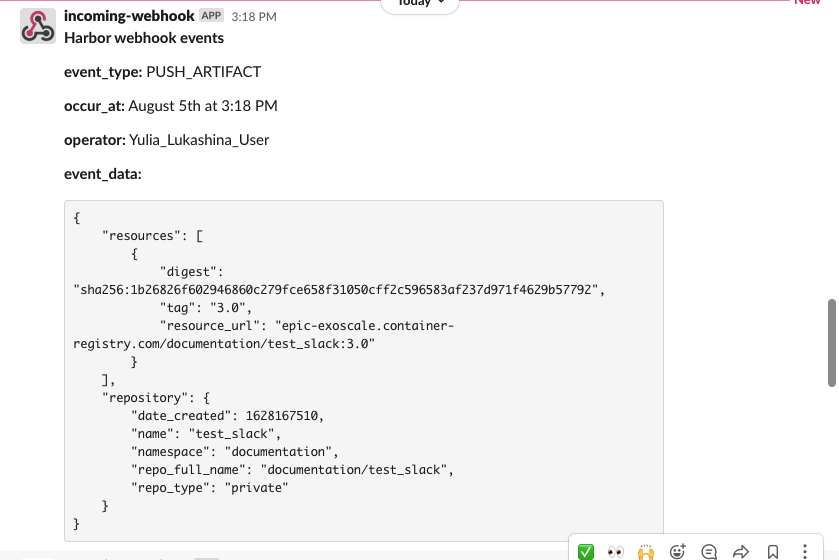
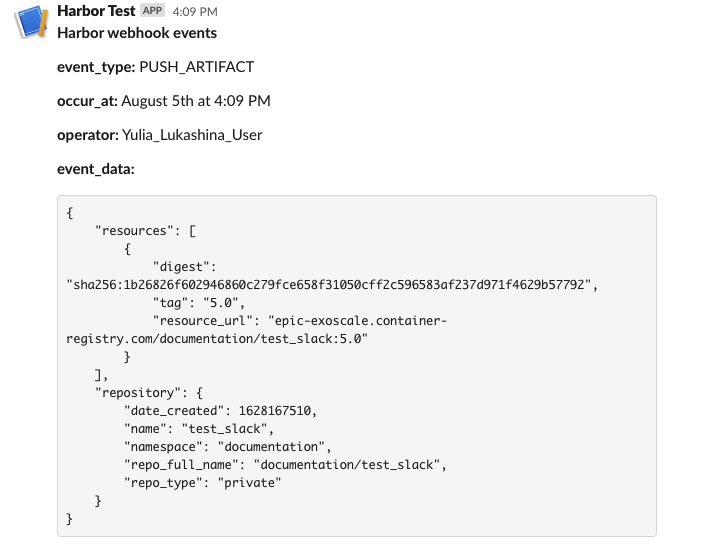
After you add your webhook in the Container Registry GUI, you will start receiving Slack notifications that look like this:
- Create your own Slack app and enable webhooks for it.
- Go to https://api.slack.com and click Create an app or
- Go directly to https://api.slack.com/apps?new_app=1;
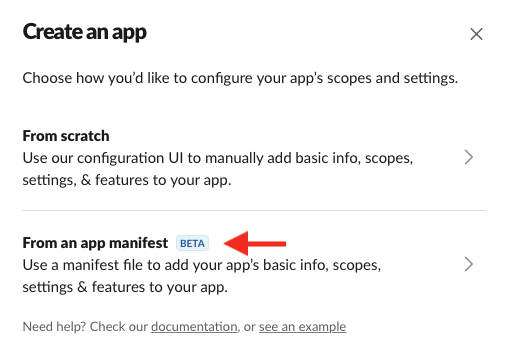
- Select From an app manifest if you only need it for the webhooks;
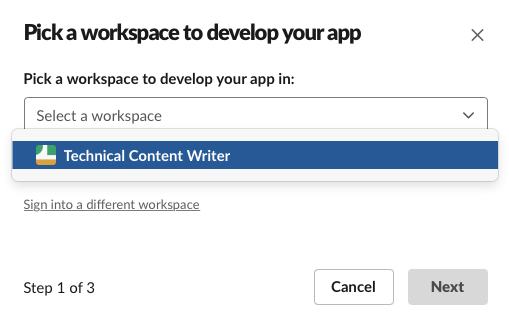
- Select your workspace;
- Inside the YAML or JSON file, change the name of your app;
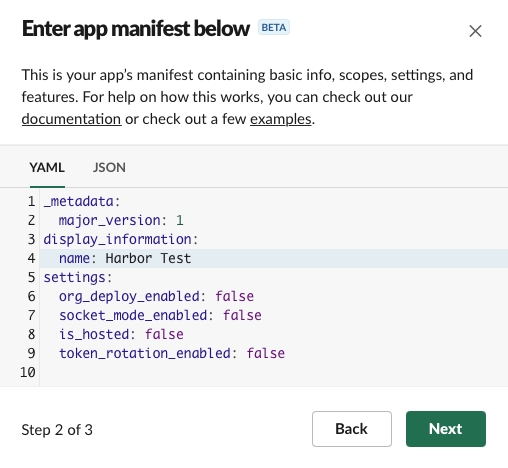
- Hit Next and then Create;
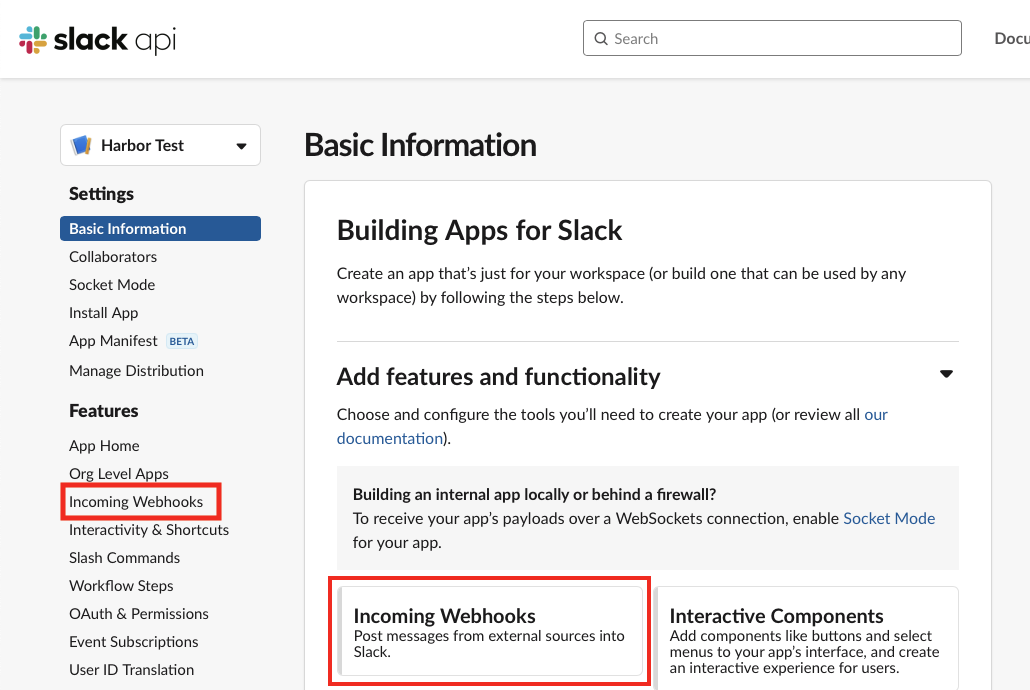
- You’ll land in the basic information view of your new Slack app;
- Click Incoming Webhooks;
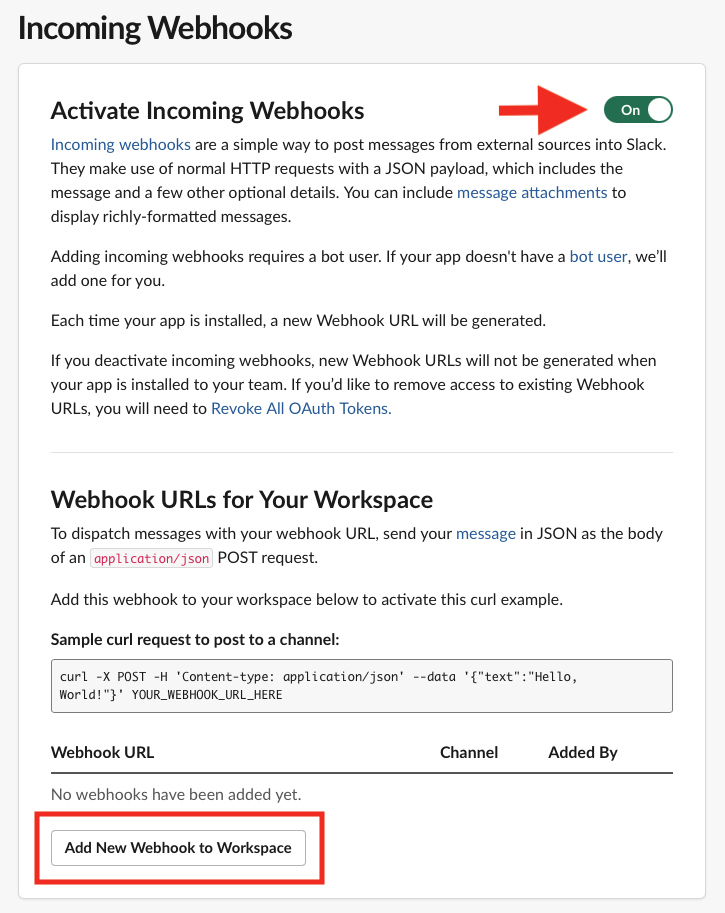
- Activate incoming webhooks for this app with the slider and then click Add New WebHook to Workspace;
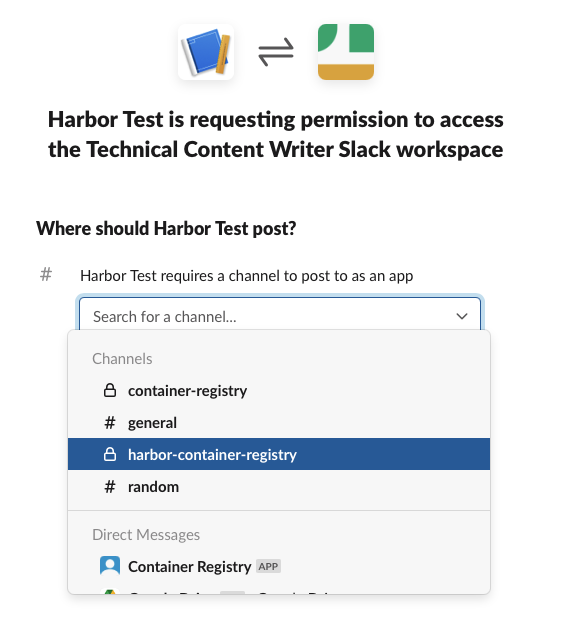
- Select the target channel to post notifications and click Allow;
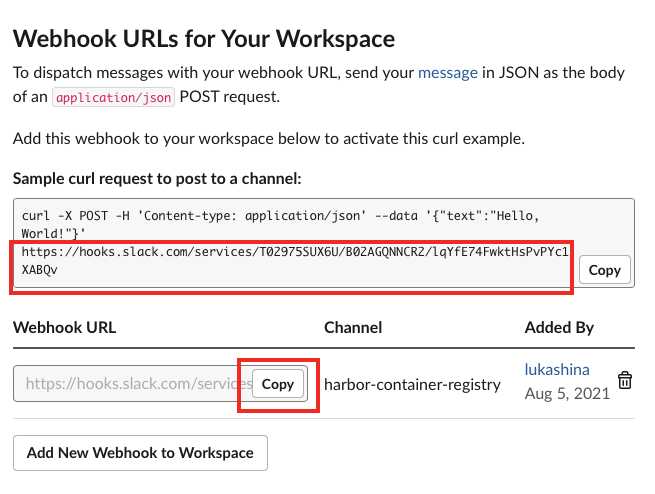
- Your Slack webhook URL was now generated and can be copied:
Your new app will be visible among your Slack apps:
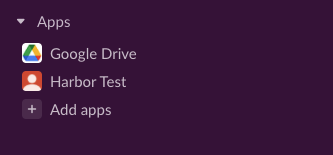
After you add your webhook in the Container Registry GUI, you will start receiving Slack notifications that look like this:
Webhook Triggers
A webhook fires on artifact, Helm chart, scan, quota and replication events. For every event, its event type and the contents of the notification, see Webhook Event Types.
Creating a New Webhook in the Container Registry GUI
- Go to the Webhooks tab in your project;
- Click + NEW WEBHOOK:
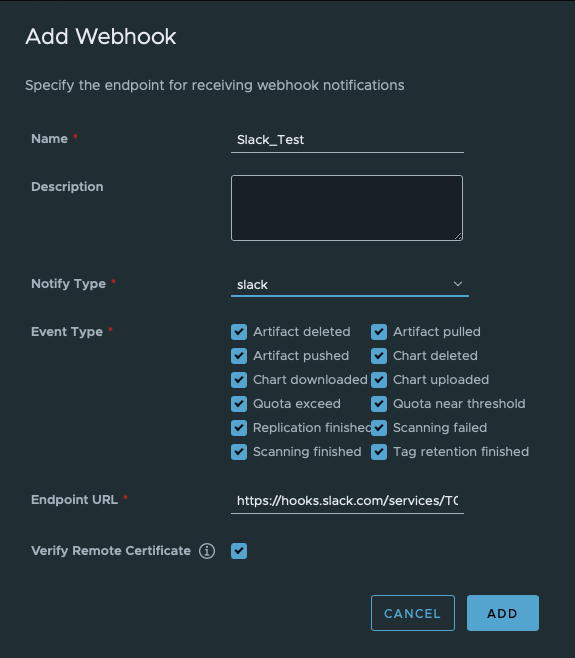
Select slack if you copied your endpoint/webhook URL from a Slack application, or select http if you use another application to receive push notifications;
Paste the endpoint URL;
- For HTTP endpoint URLs, you can provide the Authorization Header that specifies your authorization type and contains your credentials, if required, for instance:
Authorization: Bearer {{token}}Select an option to verify remote certificates;
- For HTTP endpoint, disable the feature;
- For HTTPS, enable it.
Webhooks Overview and Details
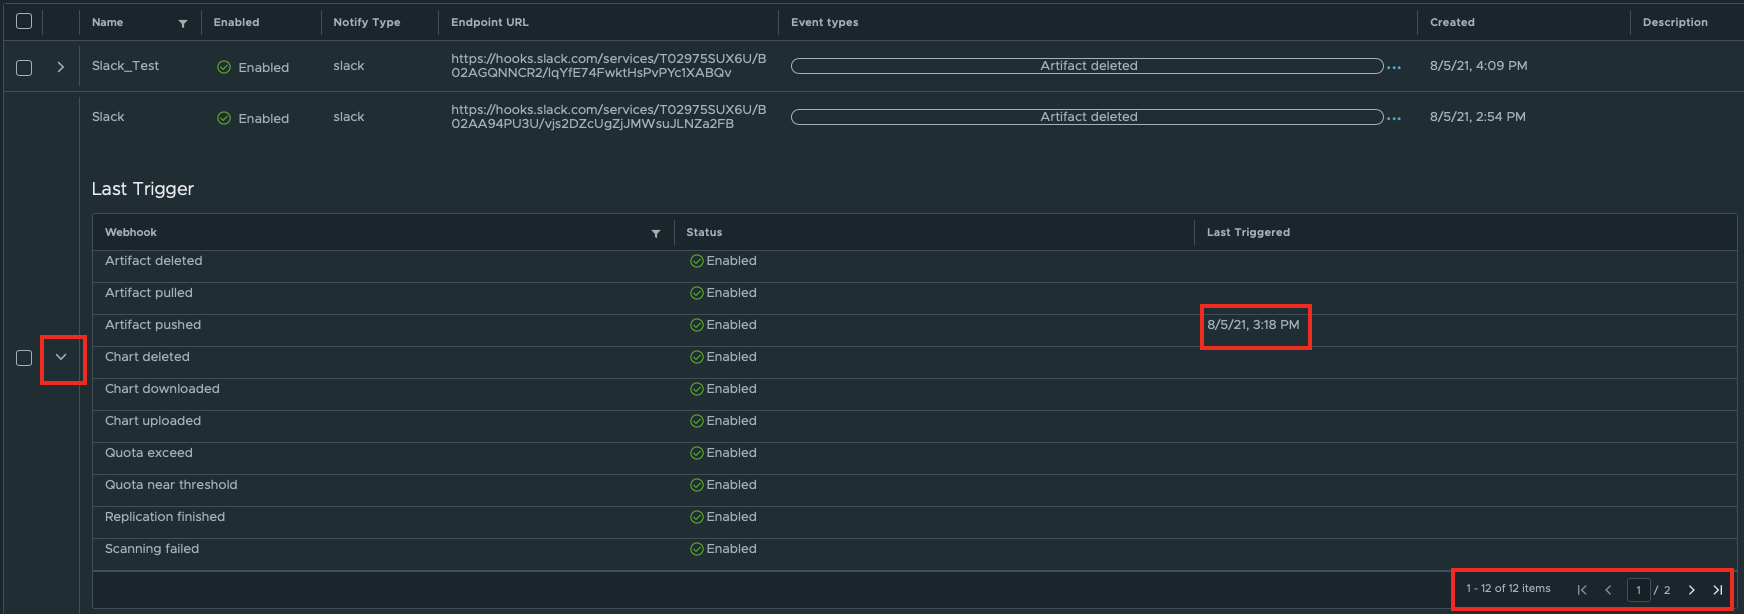
If you click on the arrow next to a webhook, you can open a detailed overview of the triggers and when they ran for the last time. You may need to flick through the triggers using the arrows in the bottom right corner.
Enabling/Disabling, Editing, and Deleting Webhooks
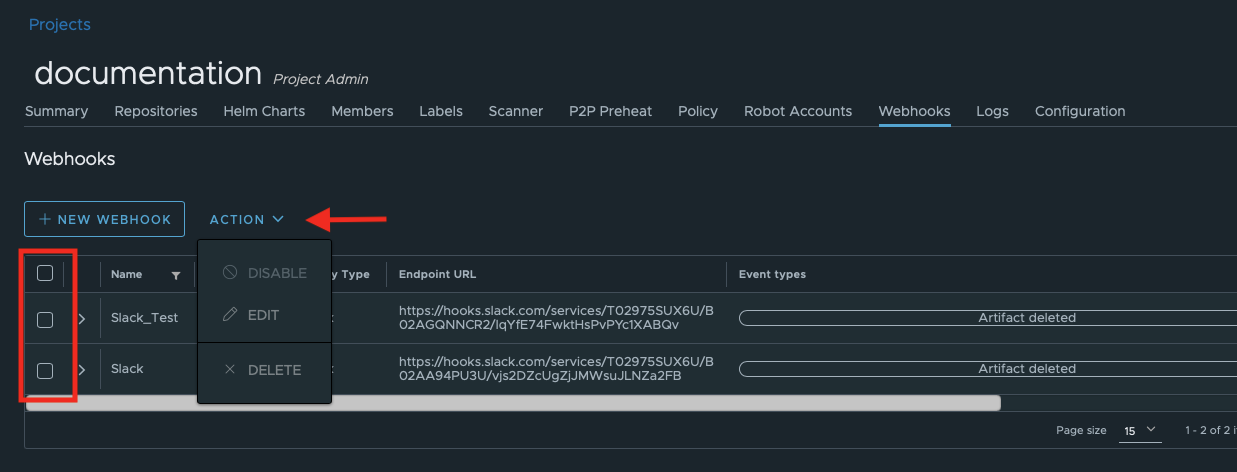
You can delete webhooks manually or in bulks if you tick the checkboxes and click Delete under the Action menu.
You can disable/re-enable and edit webhooks one by one if you tick the checkboxes and click Disable/Enable or Edit under the Action menu.